Ever wondered how to prepare your inground pool for winter? You’re not alone. Many pool owners face the challenge of protecting their investment from freezing temperatures. One effective way to do this is by blowing out the pool lines to prevent water from freezing and causing damage.
This article will guide you through the process step by step, making it easier than you think. You’ll learn the tools you’ll need and the best techniques to ensure your pool stays in top shape all winter long. By the end, you’ll feel confident tackling this essential maintenance task and keeping your pool ready for the next swim season.
Table of Contents
- 1 Key Takeaways
- 2 Understanding Pool Winterization
- 3 Tools Needed For Blowing Out Pool Lines
- 4 Step-By-Step Guide To Blow Inground Pool Lines Out
- 5 Common Mistakes To Avoid
- 6 Conclusion
- 7 Frequently Asked Questions
- 7.1 Why is it important to winterize an inground pool?
- 7.2 How do I lower the water level in my pool for winterization?
- 7.3 What equipment do I need to blow out pool lines?
- 7.4 What common mistakes should I avoid when winterizing my pool?
- 7.5 When should I winterize my inground pool?
- 7.6 How do I add winterizing chemicals to my pool?
- 7.7 How can I check if my pool lines are clear?
Key Takeaways
- Winterization Importance: Proper winterization, including blowing out pool lines, is essential to prevent freezing and damage to pipes during winter months.
- Essential Tools: Key tools include an air compressor, blow out plugs, winterizing chemicals, and a sturdy pool cover.
- Step-by-Step Process: Follow a systematic approach: prepare your pool, lower the water level, connect the compressor, blow out the lines, and seal them.
- Common Mistakes to Avoid: Don’t skip equipment checks, use insufficient air pressure, or neglect to lower the water level, as these can lead to freeze damage.
- Add Winterizing Chemicals: Always apply winterizing chemicals after blowing out the lines to inhibit algae growth and protect against corrosion.
- Inspect All Lines: Ensure thorough clearing of skimmer, main drain, and other lines to safeguard your pool against potential ice damage.
Understanding Pool Winterization
Winterizing your inground pool is crucial to prevent damage from freezing temperatures. Proper winterization involves several steps, including blowing out the pool lines. This process ensures all water is removed, reducing the risk of ice expansion that can crack pipes or equipment.
Importance of Blowing Out Pool Lines
Blowing out the pool lines prevents water from freezing inside them. When water freezes, it expands, creating pressure that can break pipes. By clearing the lines, you safeguard your investment.
Essential Tools for Pool Winterization
- Air Compressor: An air compressor effectively pushes air through the plumbing.
- Blow Out Plug: This plug fits into the skimmer and allows air pressure to clear the lines.
- Winterizing Chemicals: Using chemicals helps prevent algae growth during the off-season.
- Pool Cover: A sturdy cover protects your pool from debris and keeps it clean.
Steps to Blow Out Pool Lines
- Prepare Your Pool: Remove any accessories such as ladders or skimmers.
- Lower the Water Level: Drain the pool water to below the skimmer level.
- Connect the Compressor: Attach the air compressor to the blow out plug in the skimmer.
- Blow Out the Lines: Turn on the compressor and begin blowing air through the lines. Start with the skimmer, then move to the main drain, and finally, the returns.
- Seal the Lines: Once you see bubbles in the water or hear a steady stream of air, seal the lines with silicone or appropriate plugs.
- Check Equipment: Inspect your pump and heater for any damage before winterizing.
- Use a Pool Cover: Consider using a solid cover rather than a mesh one to prevent debris buildup.
- Monitor Weather Conditions: If temperatures drop suddenly, consider re-checking the lines to ensure all water is cleared.
Understanding these steps and their importance prepares you for a smooth winterization process. Following these guidelines keeps your inground pool in good condition, ready for enjoyment when warmer weather returns.
Tools Needed For Blowing Out Pool Lines
To blow out your inground pool lines effectively, you’ll need a few essential tools. Each tool plays a crucial role in ensuring the process runs smoothly.
Recommended Products

Blowout plug adapter fitting to easily winterize underground irrigation sprinkler systems, outdoor pipes, water lines, homes, cabins, faucets, spigots, garden hoses, sillcocks, and hose bibbs by blow out method.

【What in the box?】This air compressor accessories kit including 1 x air blow gun, 1 x 1/4" NPT standard quick plug, 2 x thread converter, 2 x air flow extension, 2 x ball inflate needle, 1 x rubber tip air nozzle, 1 x pagoda type air nozzle and 1 x teflon tape. Which is a great starter kit for your air inflation and cleaning jobs.
Air Compressor
An air compressor is the primary tool for blowing out pool lines. Choose a compressor with a minimum output of 20 CFM at 90 PSI to ensure it can handle the job. This power prevents water from remaining in pipes, eliminating the risk of freezing. Connect the compressor to the pool’s skimmer or main drain using a blow-out fitting. Ensure secure attachment to prevent air leaks.
Blow Out Fittings
Blow out fittings are specifically designed for this task. These fittings connect the air compressor to the pool system, allowing for efficient water removal. Common types include skimmer blow-out plugs and threaded fittings for main drains. Select a fitting that matches your pool’s plumbing configuration. Proper installation of the fitting creates an airtight seal, enhancing the effectiveness of the air flow.
Using these tools properly will help you winterize your inground pool and protect it from potential damage.
Step-By-Step Guide To Blow Inground Pool Lines Out
Following these steps ensures your inground pool lines are properly blown out, preventing damage from freezing.
Recommended Products

Brass Material: Brass, for your health and safety, certified to contain less than 0.25% lead. Hose Material: EPDM Rubber, EXTRMELY durable, more excellent corrosion resistance

【Size】The blowout Fitting is designed with a Schrader valve to 3/4 Garden Hose Thread size, allowing for easy compatibility with standard RV plumbing systems and air compressor quick connect hose.

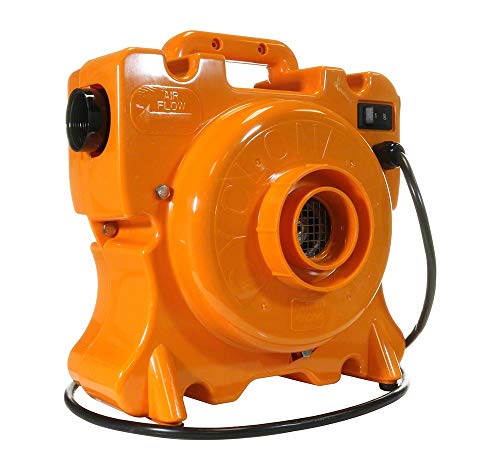
Powerful & Efficient Pool Winterization: The 3.0 HP pool air blower delivers a strong airflow to quickly blow water out of pool lines
Preparing Your Pool
- Lower the water level. Aim for about six inches below the skimmer to make the process easier.
- Remove any accessories, such as pool ladders or slides. This clears the area for efficient access.
- Gather essential tools, including an air compressor, blow out fittings, and safety goggles. Having everything ready saves time.
- Check your equipment for damage. Ensure hoses and fittings are secure and free from leaks, which can disrupt the process.
Blowing Out The Lines
- Connect the air compressor to the blow out fitting. Securely attach the fitting to the skimmer or return line using the proper connector.
- Turn on the air compressor slowly. A consistent airflow prevents sudden pressure spikes that can damage pipes.
- Watch for water to discharge through the return lines. Once the water stops flowing, you’ve successfully emptied the lines.
- Move to the main drain next. Use the same method, ensuring all remaining water is cleared from the lines.
- Repeat the process for any additional lines or features, such as spa jets or waterfalls, as necessary.
- Close the valves for the skimmer and return lines. This seals off the system, keeping debris out and blocking potential leaks.
- Add winterizing chemicals into the skimmer. This protects the plumbing and ensures proper circulation of the chemicals throughout the system.
- Securely cover the pool with a winter pool cover. This prevents dirt and debris from entering the pool during the off-season.
By following these steps, you protect your inground pool lines from freezing and ensure smooth operation when the swimming season arrives again.
Common Mistakes To Avoid
- Skipping Equipment Checks
Always check your air compressor and blow out fittings before starting. Equipment failures can lead to incomplete line clearing and potential damage. - Using Insufficient Air Pressure
Ensure your air compressor operates at the correct pressure. Low pressure leads to inadequate removal of water, risking freeze damage in the lines. - Neglecting to Lower the Water Level
Always lower the pool water level before blowing out the lines. Not doing so can cause water to trap in the lines, freezing and expanding in cold weather. - Failing to Monitor Water Discharge
Keep an eye on the discharge while blowing out the lines. If water continues to flow, you need to adjust your setup, as this indicates that water remains in the lines. - Not Adding Winterizing Chemicals
Always add winterizing chemicals after blowing out the lines. Chemicals help prevent algae growth and corrosion, ensuring your pool remains in good condition through winter. - Overlooking Skimmer and Main Drain Lines
Spend time on skimmer and main drain lines. Both require thorough clearing to prevent ice damage, so don’t neglect these critical areas. - Ignoring Manufacturer Instructions
Always refer to your pool manufacturer’s guidelines for winterization. Following specific recommendations ensures you avoid mistakes related to your particular pool model.
Recommended Products
Features a 3 horsepower, 120 volt motor and includes a versatile hose adapter

Convenient: In The Swim's Pool Winterizing and Closing Chemical Kit streamlines pool closing with all necessary chemicals included, saving time and chemical usage.
Conclusion
Taking the time to properly blow out your inground pool lines can save you from costly repairs down the road. By following the right steps and avoiding common mistakes you’ll ensure your pool stays safe during those chilly months.
Remember to check your equipment and monitor the process closely. With a little effort now you’ll be ready to enjoy your pool again come spring. Keeping your pool in top shape is worth it and you’ll be glad you took the necessary precautions. Happy winterizing!
Frequently Asked Questions
Why is it important to winterize an inground pool?
Winterizing an inground pool is crucial to prevent damage from freezing temperatures. Proper preparation helps maintain the pool’s integrity, protects equipment, and ensures a smoother reopening in the spring.
How do I lower the water level in my pool for winterization?
To lower the water level, use a submersible pump or your pool’s drain. Aim to reduce the water to below the skimmer and return jets to prevent freezing damage.
What equipment do I need to blow out pool lines?
You will need an air compressor, adapters to fit your pool’s plumbing, and possibly a wet/dry vacuum. Ensure you use sufficient air pressure to clear all water from the lines.
What common mistakes should I avoid when winterizing my pool?
Avoid these mistakes: skipping equipment checks, using too low air pressure, neglecting to lower the water level, and forgetting to add winterizing chemicals. Always follow manufacturer instructions.
When should I winterize my inground pool?
Winterization should typically take place before the first frost, usually late fall. Monitor local weather forecasts to determine the right time for your region.
How do I add winterizing chemicals to my pool?
First, balance your pool’s water chemistry, then add the winterizing chemicals according to the product instructions. Ensure to distribute them evenly throughout the pool.
How can I check if my pool lines are clear?
After blowing out the lines, check for any water pooling at the exit points. You can also use a wet/dry vacuum to confirm that no water remains in the lines.