Have you ever looked at your pool tiles and noticed the grout looking a bit worse for wear? It’s a common issue that can make your beautiful pool feel less inviting. Whether you’re dealing with cracks, discoloration, or a complete absence of grout, it’s time to tackle this project and bring your pool back to life.
Table of Contents
- 1 Key Takeaways
- 2 Understanding Pool Tile Grouting
- 3 Preparing for Grouting
- 4 The Grouting Process
- 5 Finishing Touches
- 6 Conclusion
- 7 Frequently Asked Questions
- 7.1 Why is it important to address deteriorating grout in pool tiles?
- 7.2 What materials are suitable for pool tile grouting?
- 7.3 What steps are involved in the grouting process?
- 7.4 How can I protect my grout from moisture and staining?
- 7.5 What maintenance tips can help keep pool tile grout in top shape?
Key Takeaways
- Understanding Grouting Importance: Proper grouting protects pool tiles from leaks and damage, enhancing both functionality and aesthetic appeal.
- Selecting Grout Material: Choose from various grouting materials like cement-based, epoxy, or polymer-modified grout based on tile type and joint width for optimal results.
- Preparation is Key: Thoroughly prepare the surface by cleaning, inspecting for damage, and ensuring the area is dry before beginning the grouting process.
- Applying Grout Methodically: Use a grout float for even application, filling gaps firmly, and clean excess grout promptly with a damp sponge to achieve a professional finish.
- Finishing and Sealing: Seal the grout after curing to protect against moisture and staining, and maintain your grout with regular cleaning and resealing every 1-2 years.
- Routine Maintenance: Regularly inspect grout lines and perform simple cleaning practices to prolong the life and beauty of your pool tile grout.
Understanding Pool Tile Grouting
Grouting pool tiles is a crucial step in maintaining a beautiful and functional pool. Proper grouting ensures that tiles stay in place and prevents water damage.
Recommended Products

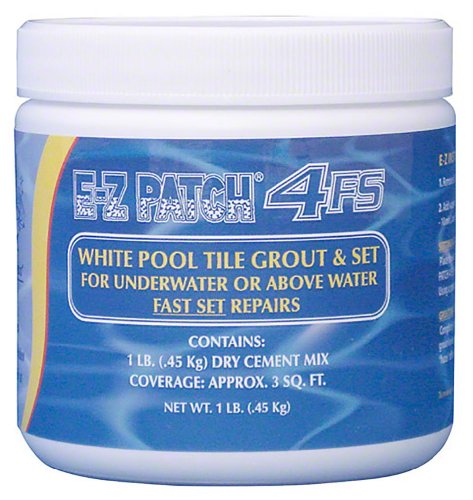
💧 Pool Patch White Pool Tile Grout Repair Kit - Fast Setting Formula for Quick Fixes - Covers approximately 5 s. F. At 1/4 in. Thickness - Easy to Mix and Use - Plus Liquid Cement Bonder - Made in the USA - 1. 5lb Tub.
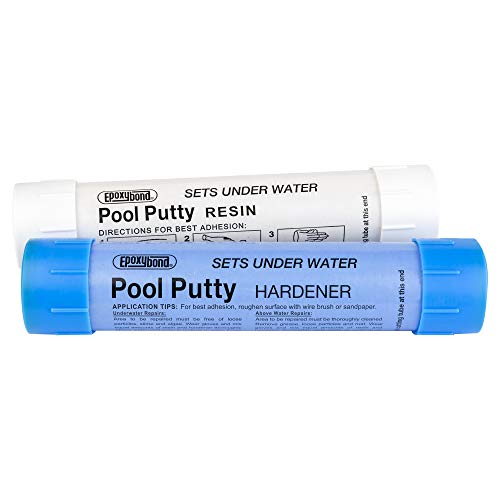
SAFE AND LASTING HAND-MOLDABLE PUTTY APPLY TO FIX LEAKS UNDERWATER: So easy and safe to use. Simply mix 1-to-1, mold putty in your hands, and apply to the area where leak or crack.
Importance of Proper Grouting
Proper grouting protects the pool from leaks and damage. It keeps water from seeping behind tiles, which can lead to costly repairs. A well-grouted pool looks polished and inviting. Regular maintenance increases the longevity of your tile and enhances the overall aesthetic appeal of your pool.
Common Grouting Materials
Several materials work well for pool tile grouting.
- Cement-based Grout: Ideal for most pool tiles, cement-based grout provides strong adhesion and water resistance. Ensure it’s specifically formulated for wet environments.
- Epoxy Grout: Known for its durability and stain resistance, epoxy grout withstands harsh chemicals. It’s a great option for high-traffic pools, though it may be more difficult to apply.
- Polymer-modified Grout: This type combines the benefits of cement and epoxy. It offers flexibility and reduced shrinkage, making it suitable for areas with temperature fluctuations.
- Sanded vs. Unsanded Grout: Choose sanded grout for wider joints (greater than 1/8 inch) as it reduces cracking. Unsanded grout works well for thinner joints, providing a smooth finish.
Select the right material based on your pool’s specific needs and tile type.
Preparing for Grouting
To achieve a successful grouting process, proper preparation sets the foundation for a durable and visually appealing finish. Follow these steps to ensure readiness before grouting your pool tiles.
Recommended Products


12" x 4" grout float with beveled rounded front edges for compacting the joint and squared back corners for edge and corner coverage. Designed for consistent grout packing on floor tile surfaces

One hand-held and one pool pole attachment scrubbing scouring brush sponge pad.
Tools and Supplies Needed
Gather the following tools and supplies for grouting:
- Grout Float: Essential for applying the grout evenly across tile surfaces.
- Grout Bag: Helps with precision when filling narrow joints.
- Mixing Bucket: For combining grout components according to manufacturer instructions.
- Sponge: Useful for wiping excess grout off tiles during cleanup.
- Trowel: A flexible tool for spreading grout into spaces effectively.
- Tile Saw: To cut tiles as needed for a perfect fit.
- Safety Gear: Gloves and goggles protect your hands and eyes during the process.
Ensure you have everything on the list before starting to avoid interruptions.
Surface Preparation Steps
Thorough surface preparation is crucial for long-lasting grout. Follow these steps for optimal results:
- Clean the Tile Surface: Remove dirt, debris, and old grout residues from the tiles using a suitable cleaner. This step ensures better adhesion.
- Inspect for Damage: Check tiles for cracks or loose pieces. Replace or repair any damaged tiles before grouting.
- Dry the Area: The surface must be completely dry for the grout to adhere properly. Allow ample drying time, especially in humid conditions.
- Mix the Grout: Follow the manufacturer’s directions when mixing. Aim for a smooth, lump-free consistency.
- Test the Grout: Apply a small amount to your working area. This trial helps gauge how the grout looks and sets against your tiles.
Completing these preparation steps establishes an ideal environment for grouting pool tiles.
The Grouting Process
Grouting pool tiles requires precision and careful execution. Follow these steps to achieve a professional finish.
Recommended Products

Use to smoothly apply grout to floor and wall tile

Rubber grout float tile float is 9.5 inch * 4 inch with non-slip handle.

Designed for epoxy grout cleanup during tile installation
Mixing the Grout
Mix the grout according to the manufacturer’s instructions. Use a clean bucket and mix only what you can apply within the recommended time frame, usually 30-60 minutes. Aim for a smooth, lump-free consistency. If using a cement-based grout, add water gradually. For epoxy grout, mix the resin and hardener thoroughly before combining with the filler.
Applying the Grout to Pool Tile
Apply the mixed grout using a grout float. Hold it at a 45-degree angle and spread the grout diagonally across the tile joints. Ensure all gaps are filled, pressing the grout firmly into the joints. Work in small sections. For wider joints, consider using a grout bag for better control. If using colored grout, make sure it matches your pool design for a cohesive look.
Cleaning Excess Grout
After applying, let the grout sit for about 15-30 minutes. Then, use a damp sponge to wipe off excess grout from the tile surface. Rinse the sponge frequently to avoid smearing grout back into the joints. Finish cleaning when the grout is set but not fully cured, typically within 1-2 hours. Avoid excessive water, as it can wash out the grout from the joints.
Finishing Touches
Finishing touches enhance the durability and appearance of your pool tile grout. This section covers sealing the grout and maintenance tips to keep everything pristine.
Sealing the Grout
Sealing the grout protects it from moisture and staining. After allowing the grout to cure for at least 24 hours, apply a high-quality grout sealer. Follow these steps:
- Clean the Surface: Ensure the grout and tiles are free from dust or debris.
- Choose a Sealer: Opt for a penetrating sealer specifically made for pool areas.
- Apply the Sealer: Use a small paintbrush or sponge applicator. Work in small sections to avoid overlaps.
- Let It Dry: Follow the manufacturer’s drying time, usually around 30 minutes.
- Reapply as Needed: Sealing every 1-2 years helps maintain protection.
Maintenance Tips for Pool Tile Grout
Routine maintenance keeps your pool tile grout in top shape. Here are key practices:
- Regular Cleaning: Use a gentle cleaner weekly to remove dirt and algae. Avoid harsh chemicals that could damage the grout.
- Inspect Grout Lines: Check for cracks or gaps every season. Catching issues early prevents larger repairs.
- Reapply Sealer: As mentioned, reseal grout every 1-2 years for optimal protection.
- Flush with Water: After heavy use or storms, flush the area with water to wash away debris.
- Use Soft Brushes: For stubborn stains, gently scrub with a soft-bristle brush. Harsh scrubbing tools can damage the grout.
By sealing and maintaining your grout, you ensure long-lasting beauty and functionality in your pool area.
Conclusion
Taking care of your pool tile grout isn’t just about looks; it’s about protecting your investment. By following the right steps for grouting and sealing, you’ll keep your pool area looking fresh and inviting. Regular maintenance is key to preventing issues down the road.
So grab those cleaning supplies and make it a habit to check your grout regularly. With a little effort, you can enjoy a beautiful and functional pool for years to come. Happy swimming!
Frequently Asked Questions
Why is it important to address deteriorating grout in pool tiles?
Deteriorating grout can lead to serious issues such as water damage and mold growth, which can ruin the appearance of your pool. Addressing it promptly helps maintain the aesthetic appeal and longevity of your pool area.
What materials are suitable for pool tile grouting?
Common materials for pool tile grouting include epoxy, polymer-modified cement, and traditional grout. Each option offers different benefits, such as resistance to moisture and stains, making them ideal for pool environments.
What steps are involved in the grouting process?
The grouting process includes preparing the surface by cleaning and removing old grout, applying new grout evenly with a float, and then smoothing the joints. Finally, it’s essential to allow the grout to cure properly before sealing.
How can I protect my grout from moisture and staining?
Sealing your grout is crucial for protection. After the grout has cured, apply a quality grout sealer to prevent moisture absorption and staining, extending its lifespan and maintaining its appearance.
What maintenance tips can help keep pool tile grout in top shape?
Regular cleaning, inspecting for cracks, reapplying sealer, flushing the grout after heavy use, and using soft brushes for stubborn stains are essential maintenance practices to keep your pool tile grout looking great.