Have you ever dreamed of having your own backyard oasis? An oval above ground swimming pool can turn that dream into reality, offering a refreshing escape just steps from your door. But the thought of installation might feel overwhelming.
Table of Contents
- 1 Key Takeaways
- 2 Planning Your Installation
- 3 Preparing the Site
- 4 Assembling the Pool Frame
- 5 Installing the Liner
- 6 Final Steps
- 7 Conclusion
- 8 Frequently Asked Questions
- 8.1 What preparations are needed before installing an oval above ground swimming pool?
- 8.2 How do I assemble the frame of the pool?
- 8.3 What is the process for installing the liner?
- 8.4 How do I connect the filtration system?
- 8.5 How can I test for leaks in my pool?
- 8.6 What accessories should I consider for my pool?
- 8.7 How can I ensure my pool is safe?
Key Takeaways
- Proper Planning is Key: Before installation, choose a suitable location, clear the area, and gather all necessary tools and materials to ensure a smooth setup.
- Level Ground Preparation: Ensure the ground is flat and level. Clear away debris and check for underground obstacles to create a stable foundation for the pool.
- Install a Protective Base: Use sand or foam as a base material to protect the pool liner and provide a solid foundation, ensuring it’s compacted evenly.
- Follow Assembly Instructions: Carefully connect wall panels and secure top rails according to manufacturer guidelines, checking for levelness throughout the process to maintain stability.
- Liner Installation Matters: Properly position and smooth out the liner to prevent leaks and wrinkles, and begin filling the pool with a minimal water level for alignment.
- Add Essential Accessories: Incorporate safety features such as ladders, pool covers, and fencing, along with a filtration system, to enhance usability and maintain water quality.
Planning Your Installation
Planning your installation involves careful consideration to ensure a successful setup. Taking the time to prepare can make the installation process smoother.
Choosing the Right Location
Choosing the right location for your oval above ground swimming pool is crucial. Look for a flat, level area in your yard. Ensure the space is away from overhanging branches and significant debris sources. Select a spot that’s at least 10 feet from fences, walls, or other structures. Check for underground utility lines or other obstacles before digging. Consider sun exposure; a sunny area keeps the water warm and inviting.
Gathering Necessary Tools and Materials
Gathering necessary tools and materials streamlines your installation. You’ll need the following:
-
Tools
- Shovel for digging and leveling
- Level tool to ensure an even surface
- Hammer for stakes
- Wrench for tightening bolts
- Trowel for smoothing ground
- Pool kit (including the liner, frame, and pump)
- Sand for the base (around 2-3 inches recommended)
- A ground tarp to protect the liner
- Hose for filling the pool
- Water test kit to monitor chemical levels
Collect these items before starting your installation to avoid interruptions. Prepare well, and you’ll enjoy your pool sooner.
Preparing the Site
Preparing the site for your oval above ground swimming pool is crucial for a successful installation. Taking the time to ensure a proper foundation helps prevent issues later on.
Recommended Products

High-Quality Filtration: 50 pounds of pre-washed, kiln-dried natural silica sand for pool filter captures dirt, leaves, hair, and debris without clogging or clumping
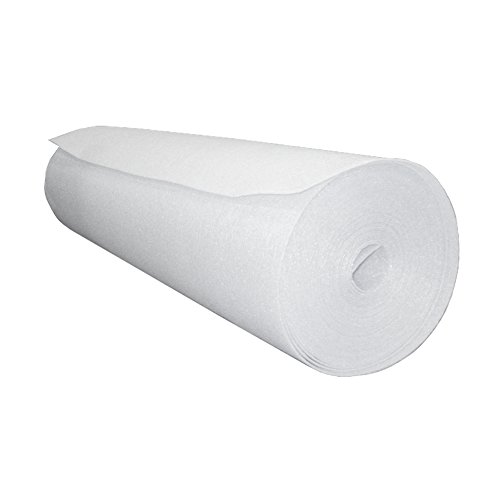
Professional-Grade Pool Wall Foam Protection: This above ground pool wall foam creates a smooth protective barrier between metal walls and the liner, guarding against rips, dents, and punctures that lead to costly liner replacements

What you get :You will receive 2 pcs empty large pool weights,each can be loaded with 50 lbs of sand or 35 lbs of water,which are heavy enough to secure above ground pool steps, stairs and ladders.
Clearing and Leveling the Ground
Clearing the area involves removing any debris, rocks, roots, or vegetation. You want the space to be clean and clear. Use a shovel and rake to level the ground. Measure the area with a tape measure, ensuring it is slightly larger than the pool’s dimensions. After clearing, check the ground for levelness with a long board placed across the space. If the board rocks, you’ll need to dig or fill in spots to create a level surface.
Installing a Base Material
Installing a base material is vital to protect the pool from sharp objects and to ensure a stable foundation. Use a material like sand or foam. Spread 2-3 inches of sand or foam across the leveled area, ensuring even coverage. Compact the base material with a tamper for a solid surface. Test the area again for levelness after applying the base material. Adjust as needed to ensure a smooth, flat surface for your pool.
Assembling the Pool Frame
Assembling the pool frame is a crucial step in installing your oval above ground swimming pool. This process involves connecting the wall panels and securing the top rails for stability.
Recommended Products

Compatible with: 2.16 inch long pool joint pins and pool seals are compatible with Intex 10-12 ft metal frame pools, please do check your pool model number before purchasing to make sure it's the right fitting for your pool

【Your Family’s Safety, Built In】 This above-ground pool ladder comes with a lockable safety barrier to prevent access when the pool is not in use, helping protect children and pets from accidental falls. A clear warning label reminds everyone of potential risks, giving you true peace of mind.

Replacement Vertical Pool Leg / Frame Support Bar – Designed for Bestway Power Steel & Steel Pro Max 16ft x 48in and 18ft x 48in round above ground swimming pools (2022 and newer models).
Connecting the Wall Panels
Connecting the wall panels starts with laying them out in the correct order. Each panel should match the designated positions according to the pool’s diagram. Use the manufacturer’s provided hardware to secure the panels together, ensuring they are square and straight. Implement the following steps:
- Align the Panels: Position each wall panel upright, ensuring they fit snugly against one another.
- Insert the Fasteners: Use bolts and nuts to attach the panels, following the instructions included in your pool kit.
- Check for Level: As you attach each panel, check that they remain level. Adjust as needed to maintain a consistent height across the perimeter.
- Tighten Connections: Once all panels are connected, tighten all fasteners firmly to prevent any movement during filling.
Securing the Top Rails
Securing the top rails enhances the overall strength of your pool structure. These rails help hold the wall panels in place, creating a sturdy frame for your pool. Follow these instructions:
- Position the Rails: Lay the top rails across the connected wall panels, ensuring they fit properly into the designated slots.
- Fasten the Rails: Use the provided screws to attach the top rails to the wall panels, tightening them securely.
- Double-Check Stability: Once they’re attached, apply slight pressure on the rails to ensure they remain in place without flexing.
- Complete the Installation: Repeat this for all sections of the top rail, maintaining consistency along the entire frame.
With the wall panels connected and the top rails secured, your pool frame is now ready for the next steps in the installation process.
Installing the Liner
Installing the liner properly ensures a smooth and secure fit, preventing leaks and enhancing your pool’s overall appearance. Follow these steps for an effective installation.
Recommended Products

60PCS with Size Details – Includes 60 pool coping strips for overlap above-ground pool liners. Each strip measures about 15.7 inches / 40 cm, with a total combined length of about 79 ft, providing enough quantity for routine replacement, backup use, and liner reinstallation

Flexible PVC Material:Our pool liner lock is made of flexible PVC, which is soft, durable and weather-resistant. Its thin, strong T-shaped corner easily fits into the gap between the liner and track, adapting to various pool shapes. It also works as reliable liner coping strips for stable fixation.

Ideal Alternative to Sand Coves: While sand coves shift and settle unevenly, this pool wall foam cove delivers a consistent profile protecting the liner season after season
Unfolding and Positioning the Liner
Remove the liner from its packaging and carefully unfold it. Lay the liner on the ground, allowing it to warm up in the sun if it’s cold. Position the liner inside the pool walls, ensuring the bottom panel fits snugly. Align the corners with the pool corners, leaving enough slack for adjustments. Smooth out any wrinkles, starting from the center and moving outward. This step minimizes the chances of tears and creates a more appealing look once the pool is filled.
Adding Water to the Pool
Begin filling the pool with water. Use a garden hose for an easy and controlled process. As the water level rises, monitor the liner’s positioning. Adjust the liner if necessary to retain a snug fit against the walls. Aim for a water depth of about 2-3 inches during this initial stage. This depth allows the liner to settle evenly and avoids wrinkles or floats. Once you’ve reached the desired depth, check for any bubbles or unevenness. Correct any issues before filling the pool completely. Once satisfied, proceed to fill the pool to its intended level.
Final Steps
After securing the liner, proceed with the final steps to complete your oval above ground swimming pool installation.
Installing the Filtration System
Installing the filtration system is essential for maintaining clean water. Begin by identifying the appropriate location for the pump and filter, typically close to the pool but away from direct sunlight. Follow these steps:
- Gather Tools: You’ll need a screwdriver, wrench, and plumbing supplies.
- Connect the Pump: Attach the hose from the pool to the pump, ensuring a snug fit.
- Connect the Filter: Link the pump to the filter using the designated hoses, following the manufacturer’s guidelines.
- Prime the System: Fill the pump with water to remove air pockets and prepare it for operation.
- Test the System: Turn on the pump and check for leaks around the connections. Adjustment may be necessary.
Adding Accessories and Safety Features
Incorporating accessories and safety features enhances your pool experience. Consider these options:
- Ladders and Steps: Install sturdy, non-slip ladders for safe entry and exit. Choose models designed for above ground pools.
- Pool Covers: Use pool covers to keep debris out and reduce evaporation. Automatic covers offer convenience.
- Lighting: Add underwater lights or surrounding fixtures for evening swimming. Proper illumination enhances safety and ambiance.
- Safety Fences: Protect children and pets by installing a fence around the pool area. Ensure it meets local safety regulations.
- Chemical Dispenser: Use a floating dispenser for chlorine tablets, maintaining water balance without manual handling.
By completing these final steps, you ensure a functional, safe, and enjoyable swimming environment.
Conclusion
You’ve put in the hard work to install your oval above ground swimming pool and now it’s time to enjoy the fruits of your labor. With the right setup and accessories in place your pool can become a refreshing retreat for family and friends.
Make sure to keep up with regular maintenance to ensure your pool stays clean and safe. Whether it’s a sunny day or a starry night your new pool is ready for fun and relaxation. Dive in and make some unforgettable memories!
Frequently Asked Questions
What preparations are needed before installing an oval above ground swimming pool?
Preparing for an oval above ground swimming pool involves choosing a suitable location, clearing debris, leveling the ground, and ensuring proper drainage. It’s crucial to check local regulations and obtain any necessary permits. This foundation will provide a stable and safe environment for your pool.
How do I assemble the frame of the pool?
To assemble the frame of an oval above ground swimming pool, follow the manufacturer’s instructions closely. Typically, this involves laying out the pool pieces, connecting the wall panels, and securing them with bolts and brackets. Ensure everything is level and properly aligned before proceeding.
What is the process for installing the liner?
Installing the liner requires careful placement within the pool frame. Start by laying the liner flat, making sure it fits snugly without folds or wrinkles. Adjust it for even distribution, then carefully fill the pool with water to secure the liner in place, ensuring it conforms to the shape of the pool.
How do I connect the filtration system?
To connect the filtration system, begin by placing the pump and filter close to the pool. Connect the intake and return hoses according to the manufacturer’s guidelines. Ensure all connections are tight to prevent leaks. Finally, prime the pump as instructed to ensure everything operates efficiently.
How can I test for leaks in my pool?
After filling the pool, carefully inspect all seams and connections for leaks. Add water to the pool and monitor for any drops in water level over 24 hours. You can also use food coloring around suspected areas; if it gets drawn into a gap, there’s a leak.
What accessories should I consider for my pool?
Consider adding accessories that enhance safety and enjoyment, such as ladders for easy entry and exit, pool covers for protection when not in use, lighting for evening swims, safety fences to prevent unsupervised access, and chemical dispensers for maintaining water quality.
How can I ensure my pool is safe?
To ensure your pool is safe, install a sturdy safety fence with a lockable gate, use pool covers, and ensure proper lighting. Regularly check for any hazards around the pool area, and educate users about safe swimming practices. Keeping chemicals and equipment organized further enhances safety.