Have you ever struggled to open your pool filter lid when it’s time for maintenance? You’re not alone. Many pool owners find themselves wrestling with stubborn lids that just won’t budge, leading to frustration and wasted time.
Table of Contents
Key Takeaways
- Understand Pool Filter Lids: Familiarize yourself with the types of lids—screw-on, clamp-on, and O-ring sealed—which have different mechanisms for removal.
- Identify Common Challenges: Issues like stuck lids, cracked plastic, and misaligned threads often complicate lid removal; regular maintenance and inspections can help prevent these problems.
- Utilize Practical Tips: Applying lubricant, using a strap wrench, and checking air pressure can significantly ease the process of loosening stubborn lids.
- Gather Essential Tools: Equip yourself with gloves, lubricants, strap wrenches, and rubber mallets to ensure a smooth lid removal process.
- Follow a Step-by-Step Guide: Start by turning off the pool system, apply lubrication, and use the appropriate tools to carefully remove the lid for maintenance tasks.
- Address Common Issues: Inspect for damage, clean O-rings, and replace them if necessary to maintain a proper seal and prevent leaks, ensuring the filter system operates efficiently.
Understanding Pool Filter Lids
Pool filter lids play a crucial role in maintaining your pool’s cleanliness and filtration system. These lids cover the filter, providing access for cleaning and maintenance. Knowing the types of lids and common challenges can ease the process of removal.
Types of Pool Filter Lids
- Screw-On Lids: These lids require turning clockwise to secure and counterclockwise to loosen. They typically fit snugly to prevent leaks.
- Clamp-On Lids: These lids use a clamping mechanism. You open them by releasing the clamps, allowing easy access to the filter.
- O-Ring Sealed Lids: These lids feature rubber O-rings for a tight seal. The O-ring helps keep debris out of the filter while requiring careful handling during removal.
Common Challenges
Pool filter lids can become stubborn over time. Here are some common issues you may encounter:
- Stuck Lids: Debris, dirt, or corrosion can cause lids to stick. Regular cleaning helps avoid this issue.
- Cracked Plastic: Over-tightening or prolonged sunlight exposure can crack lids. Regular inspections can identify cracks early, preventing complete replacement.
- Misaligned Threads: Threads may misalign due to improper tightening. Aligning the lid correctly during installation avoids future complications.
Practical Tips for Removal
- Inspect First: Before attempting to remove the lid, check for any visible damage or debris that might be causing a problem.
- Apply Lubricant: If the lid’s stuck, apply a silicone-based lubricant around the edges. Let it sit for several minutes before attempting to twist it off.
- Use a Strap Wrench: A strap wrench provides a better grip and reduces the risk of damaging the lid. Wrap the strap around the lid and turn it carefully.
- Check for Air Pressure: For some lids, building pressure might make removal difficult. Open the air relief valve if your filter has one, allowing air to escape and easing the lid’s removal.
- Adjustable Wrench: For clamp-on lids, an adjustable wrench can help loosen and remove the lid securely.
- Rubber Mallet: Gently tapping around the lid’s edge can help free a stuck lid without causing damage.
- Gloves: Using gloves protects your hands from sharp edges or cleaning chemicals.
Familiarity with your pool filter lid and these tips can simplify the maintenance process. Taking preventive measures can save time and effort in the long run.
Tools Needed for Removal
To remove a pool filter lid effectively, gather the right tools. Having the necessary equipment ensures a smoother process and minimizes potential issues.
Recommended Products

PERFECT TOOL FOR REMOVING PUMP LID: If your lid is often stuck tight and difficult to open, then pool pump lid removal tool can help to easily remove lid to save time and effort, preventing you from getting injured due to excessive force.
Compatible Model: Specifically designed for Hayward Super II Pump models SP3000 and SP3007, ensuring a perfect fit for easy pump lid removal
Essential Tools
- Gloves: Protect your hands from sharp edges or chemicals during the removal process.
- Lubricant: Use silicone or penetrating oil to ease stuck lids. Apply it around the edges and let it sit for a few minutes.
- Strap Wrench: This tool grips securely without damaging the lid. It’s ideal for stubborn or round lids that are difficult to turn.
- Adjustable Wrench: Use this for any nuts or bolts that need loosening. Make sure it’s sized appropriately for your filter.
- Rubber Mallet: A gentle tap can help dislodge a stuck lid. Avoid using a metallic hammer to prevent damage.
- Screwdrivers: Helpful if the lid has screws that need removal before lifting it off.
- Pliers: Useful for gripping and twisting when you encounter stubborn parts.
- Bucket or Towel: Keep these handy to catch any water that may spill when you remove the lid.
- Shop Vacuum: This tool can help clean up any debris from the filter area after lid removal.
Equip yourself with these tools to simplify the process of removing your pool filter lid.
Step-by-Step Guide on How to Remove Pool Filter Lid
Removing a pool filter lid can seem challenging, but following these steps makes the process straightforward.
Recommended Products

STOP LEAKS ON POOL FILTERS & PUMPS Fix leaking pool filter lids, pump baskets, and union fittings by restoring dry or worn O-rings. Designed as a pool O-ring grease to create a smooth, watertight seal and eliminate air leaks.

STOP LEAKS & RESTORE O-RING SEALS Fix leaking pump lids, filter housings, and fittings by restoring dry or worn O-rings. Creates a smooth, watertight seal for reliable performance.

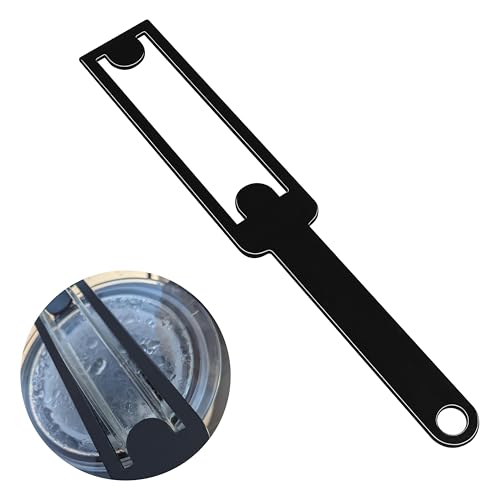
DESIGNED AND BUILT FOR LONG LIFE AND USE: The Aqua Comb body is made of UV protected ABS plastic and the comb and barrel valve are UV protected nylon
Turn Off the Pool System
Always start by turning off the pool system. Locate the power switch for your pump and filter. Make sure to cut off electricity to prevent injury or damage.
Locate the Lid
Next, identify the type of lid you’re dealing with. Different filters have various lid designs, including screw-on, clamp-on, or O-ring sealed lids. Familiarize yourself with your specific lid for an easier removal process.
Applying Lubrication
Before attempting to remove the lid, apply lubricant around the edges. Use a silicone-based lubricant or penetrating oil for stubborn lids. Let the lubricant sit for a few minutes, allowing it to penetrate and loosen any debris or corrosion.
Removing the Lid
Begin by using your hands to turn or lift the lid gently. If it doesn’t budge, grab a strap wrench. Wrap it around the lid and apply steady pressure. For clamp-on lids, release the clamps before lifting. If the lid remains stuck, tap it lightly with a rubber mallet to break the seal. Always wear gloves to protect your hands from sharp edges. If needed, use an adjustable wrench for extra leverage.
With these steps, you’ll find it easier to remove your pool filter lid and keep your pool maintenance on track.
Common Issues and Solutions
Pool filter lids can present various challenges during maintenance. Here are some common issues you may encounter, along with effective solutions.
Recommended Products
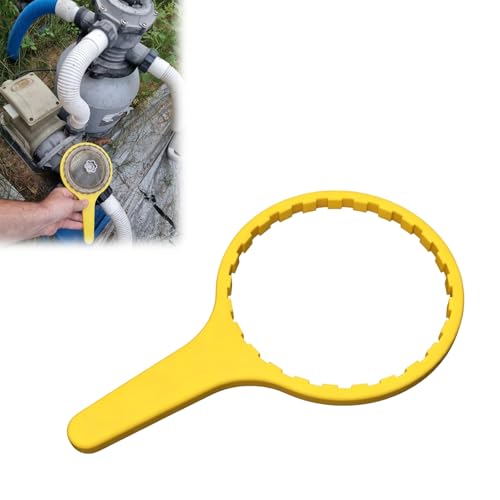
Eliminates Hand-Struggle Forever: Provides massive mechanical advantage. You no longer have to strain your hands or wrists on overtightened or weathered plastic covers. It loosens the lid with one smooth turn.
Stuck or Seized Lids
Stuck lids can cause stress during pool maintenance. If you face this issue, try these steps:
- Inspect the Lid: Check for any visible damage or debris that may be causing the lid to stick.
- Apply Lubricant: Use a silicone-based lubricant on the threads of the lid. Allow it to sit for a few minutes to penetrate the stuck areas.
- Use a Strap Wrench: A strap wrench provides a strong grip without risking damage. Wrap the strap around the lid and rotate counterclockwise.
- Tap Gently: Use a rubber mallet to tap around the lid’s edges. This can help break the seal created by debris or buildup without cracking the lid.
- Check Air Pressure: Ensure there’s proper air pressure in the filter system. Gradually release pressure using the air relief valve, which may help loosen the lid.
Damaged O-Rings
Damaged O-rings can lead to leaks and hinder the removal of your pool filter lid. Here’s how to address this issue:
- Identify the Damage: Inspect the O-ring for cracks, compression, or deterioration. Replace it if you find any signs of wear.
- Remove the Damaged O-Ring: Carefully pry the O-ring off its groove using a flathead screwdriver. Take care not to damage the lid or housing.
- Clean the Grooves: Thoroughly clean the O-ring groove with a soft cloth. Remove any debris or old lubricant to ensure a proper seal.
- Install a New O-Ring: Apply a thin layer of lubricant to the new O-ring before installing it. This makes it easier to slide into place and improves the seal.
- Test the Seal: After reinstalling the lid, run the pool system for short periods. Check for leaks around the lid to ensure the replacement was successful.
Taking these steps can help you effectively manage common pool filter lid issues.
Conclusion
Removing a stubborn pool filter lid doesn’t have to be a daunting task. With the right tools and techniques you can tackle this challenge head-on. Remember to stay patient and approach the process methodically.
Taking care of your pool filter lid not only makes maintenance easier but also helps keep your pool clean and inviting. By following the tips shared you’ll ensure that your pool stays in top shape for you and your loved ones to enjoy all season long. Happy swimming!
Frequently Asked Questions
What are the common types of pool filter lids?
Pool filter lids typically come in three types: screw-on, clamp-on, and O-ring sealed lids. Each type serves the same purpose of connecting the filter to the pool system but may vary in design and ease of use.
Why do pool filter lids get stuck?
Pool filter lids can get stuck due to debris buildup, misaligned threads, cracked plastic, or damage to the O-ring. Over time, these factors contribute to a tight seal that makes removal difficult.
How can I remove a stuck pool filter lid?
To remove a stuck lid, inspect for damage, apply lubricant, and use a strap wrench. If it’s still stuck, check the air pressure and gently tap with a rubber mallet. Using gloves for grip can also help.
What should I do if my O-ring is damaged?
If the O-ring is damaged, remove it and clean the area. Inspect for debris and wear. Consider replacing it with a new O-ring, applying lubricant before installation, and test the seal to ensure it’s secure.
How can I prevent pool filter lid issues?
To prevent issues, regularly inspect and clean the filter lid and O-ring, avoid overtightening, and use a lubricant on the threads. Regular maintenance will keep your pool system running smoothly and prevent stuck lids.