Have you noticed a tear or a leak in your above ground pool liner? You’re not alone. Many pool owners face this frustrating issue, especially as the summer heat sets in. A damaged liner can lead to water loss and even bigger problems if left unchecked.
Table of Contents
- 1 Key Takeaways
- 2 Understanding Above Ground Pool Liners
- 3 Tools and Materials Needed for Repair
- 4 Step-by-Step Guide to Repairing Above Ground Pool Liner
- 5 Tips for Preventing Future Damage
- 6 Conclusion
- 7 Frequently Asked Questions
- 7.1 What is the purpose of an above ground pool liner?
- 7.2 What types of above ground pool liners are available?
- 7.3 What are common issues with above ground pool liners?
- 7.4 How can I prevent damage to my above ground pool liner?
- 7.5 How often should I inspect my pool liner?
- 7.6 What are the signs my pool liner needs to be replaced?
- 7.7 How do I clean an above ground pool liner?
- 7.8 Can I install a pool liner myself?
Key Takeaways
- Understanding Liners: Familiarize yourself with the different types of above ground pool liners (beaded, overlap, J-hook, inflatable) and their unique maintenance requirements to ensure proper care.
- Regular Inspections: Periodically inspect your liner for small tears, punctures, or signs of wear to prevent larger leaks and costly repairs.
- Essential Repair Tools: Equip yourself with necessary tools such as utility knives, patching tools, and high-quality vinyl repair patches, which are crucial for effective liner repair.
- Step-by-Step Repair Guide: Follow a detailed step-by-step guide to prepare and execute repairs properly, including cleaning the area, applying adhesive, and allowing it to set.
- Preventive Maintenance Tips: Implement regular maintenance practices, such as checking water levels, cleaning the liner, and using a pool cover to extend the lifespan of your pool liner.
- Seasonal Preparations: Properly winterize and prepare your pool in spring, ensuring the integrity of the liner against seasonal changes and potential damage.
Understanding Above Ground Pool Liners
Above ground pool liners play a crucial role in maintaining the pool’s structure and water retention. Understanding their types and common issues helps you manage and repair them effectively.
Types of Above Ground Pool Liners
- Beaded Liners: These liners feature a bead that locks into a coping track. They’re easy to install and replace but may shift over time.
- Overlap Liners: These liners extend over the pool wall and are secured with coping strips. They’re cost-effective but can lead to potential wear at the edges.
- J-Hook Liners: These liners hook directly onto the pool wall and eliminate the need for coping strips. They offer a tight fit but can be challenging to install.
- Inflatable Liners: These are affordable, temporary options. While convenient for seasonal use, they may not withstand heavy use.
- Tears and Punctures: Small tears may develop from regular wear or sharp objects. Regularly inspect the liner for damage that can lead to leaks.
- Fading Colors: Sunlight can fade liner colors. Covering with a solar cover during non-use can help maintain color and integrity.
- Wrinkles and Bumps: Improper installation or water level fluctuations can cause the liner to wrinkle. Adjusting water levels or properly stretching the liner during installation can prevent this.
- Algae Build-Up: Stagnant water behind a damaged liner promotes algae growth. Regular maintenance and thorough cleaning can help prevent this issue.
Managing these aspects ensures a longer lifespan for your above ground pool liner and enhances your pool experience.
Tools and Materials Needed for Repair
To repair an above ground pool liner effectively, gather specific tools and materials. The right items streamline the process, ensuring a more durable repair.
Recommended Products
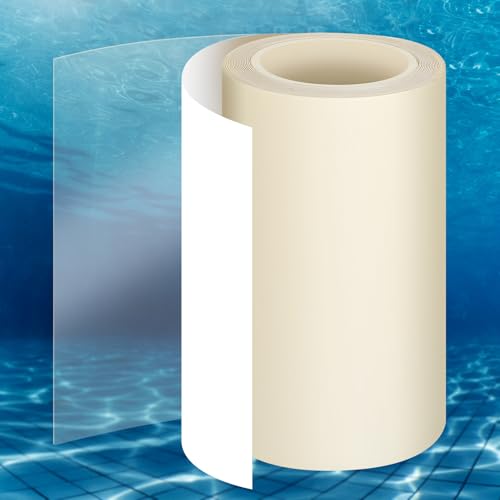
Instant Leak Stop: Stop struggling with patches that curl at the edges; our high-viscosity TPU adhesive creates a long-term bond that won't degrade in chemically treated pool water, ensuring a one-time fix for stubborn leaks
Extra Large Size: Measures about 2.79 x 4.1 ft and can be cut to fit different repair needs, making it suitable for large-area patching on pool liners and inflatable items

THE FIX-IT-ALL TAPE: Most versatile tape for quick repairs; clear color for discreet repairs; add to repair kit for home, marine, sporting and pool patching applications; repair recreational equipment such as pools, pool covers, boat covers, inflatables, tents, canopies and more
Essential Repair Tools
- Utility Knife: Use a sharp utility knife to cut the damaged liner accurately. A clean cut prevents further tearing during the repair.
- Ruler or Measuring Tape: Measure the area around the tear. Accurate measurements guide you in cutting patches to size.
- Sponge or Cloth: Soak excess water around the repair area. Keeping the surface dry helps adhesives bond effectively.
- Patching Tool: A smoothing tool, like a roller or flat edge, assists in applying pressure to patch materials, ensuring a strong seal.
- Scissors: Use scissors to trim patch materials for a precise fit around the tear.
- Vinyl Repair Patches: Purchase high-quality vinyl patches specifically designed for pool liners. Look for patches that match the liner’s thickness.
- Vinyl Adhesive: Select a strong waterproof adhesive compatible with your liner material. This ensures lasting repairs, even in wet conditions.
- Patch Kit: Consider a comprehensive patch kit that includes patches, adhesive, and instructions. Kits simplify the process, especially for first-time repairers.
- Underwater Adhesive: For repairs made underwater, use a specialized underwater adhesive. This type allows you to fix leaks without draining the pool.
- Sealant: Apply sealants around the patched area for extra waterproofing. This precaution helps prevent future leaks.
Step-by-Step Guide to Repairing Above Ground Pool Liner
Repairing an above ground pool liner requires careful attention and the right techniques. Follow these structured steps for an effective repair.
Recommended Products

Choose Your Repair Type: This kit comes in multiple versions; both peel-and-stick patches for quick repairs and glue-down patches for tougher fixes, allowing you to select the ideal option for each need.

This vinyl repair kit from Pool Above includes eight (8) round heavy duty patches, each measuring 2 inches across. Constructed of 1100 denier polyester canvas fabric - extrusion-coated on both sides with waterproof, air proof flexible colored plastic for color-match and superior adhesion.

country of origin : United States
Preparing the Liner for Repair
- Locate the Damage: Find the tear, hole, or any damage area in the liner. Check both inside and outside.
- Drain Water: If the damage is significant, drain the water around the affected area. Partially draining minimizes mess.
- Clean the Surface: Use a sponge and water to clean the area around the damage. Remove dirt, debris, and moisture for better adhesion.
- Dry Thoroughly: Allow the area to dry completely. A dry surface ensures the patch adheres properly.
- Cut the Patch: Use scissors to cut a vinyl patch that extends at least 2 inches beyond the damaged area. The patch should fit well.
- Apply Adhesive: Spread vinyl adhesive evenly on the back of the patch. Follow the manufacturer’s instructions for best results.
- Position the Patch: Firmly press the patch onto the cleaned area of the liner. Make sure the patch covers the entire damaged section.
- Seal Edges: Seal the edges of the patch with a line of adhesive for extra security. This step prevents water leakage.
- Allow to Set: Let the adhesive cure according to the product’s instructions before refilling the pool. This waiting period ensures a strong bond.
Using these detailed steps will help maintain the integrity of your above ground pool liner and prolong its lifespan.
Tips for Preventing Future Damage
Taking steps to protect your above ground pool liner enhances its durability and keeps your pool in top shape. Implementing regular maintenance and seasonal care makes a significant difference.
Recommended Products

FAST-ACTING FORMULA - Quickly removes dirt, scum, and oily stains from pool waterlines, steps, and shelves - Spray, let soak for 30 seconds, wipe with a scrub pad or mitt, and rinse clean.

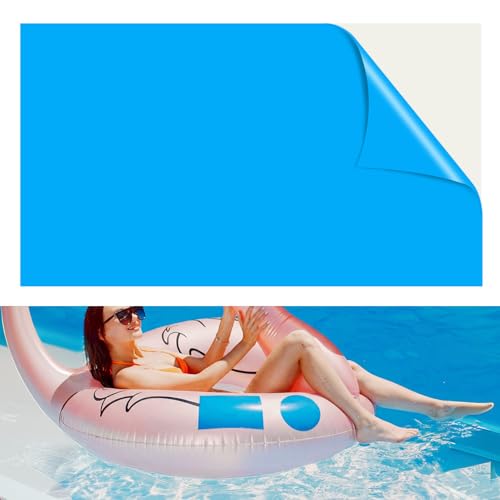
✔ CLASSIC BACKYARD POOL – The 28271EH Rectangular Frame Pool is the pool you need for friends and family to enjoy time together this summer, with a 8 ft 6 in x 5 ft 3 in x 25 in rectangular frame design and a 603 gallon water capacity.

Product: You will receive a set of above ground pool liner coping strips measuring 40cm/15.74 inches long by 2.5cm/1 inch wide, quantity 61pcs.
Regular Maintenance Tips
- Check Water Levels: Maintain adequate water levels to ensure proper liner coverage. This prevents excessive stress on the material.
- Inspect for Damage: Regularly check for small tears or signs of wear. Addressing issues early prevents larger repairs.
- Clean the Liner: Use a soft brush and mild cleaner designed for pool liners. Regular cleaning prevents algae growth and staining.
- Keep Debris Out: Remove leaves, branches, and dirt frequently. Debris can weigh down the liner and cause stretching or tears.
- Use a Pool Cover: Invest in a good-quality pool cover. A cover blocks debris and minimizes UV exposure during off-seasons.
- Winterization: Before winter, properly lower the water level to reduce the risk of ice damaging the liner. Drain water below the skimmer line, but keep enough in to protect the liner.
- Spring Prep: Inspect the liner after winter. Check for any damage and perform any needed repairs prior to refilling the pool.
- Monitor Chemical Levels: Consistently test and balance pool chemicals. Proper pH and chlorine levels protect the liner from deterioration.
- Adjust for Temperature Changes: Be mindful of how temperature impacts the liner. Extreme heat can cause expansion, while cold can lead to brittleness.
- Educate Users: Teach all pool users about proper usage. Preventing rough play and avoiding sharp objects in the pool protects the liner.
Implementing these tips ensures your above ground pool liner lasts longer and maintains its integrity across the seasons.
Conclusion
Taking care of your above ground pool liner doesn’t have to be a daunting task. With a bit of regular maintenance and some simple repairs you can keep your pool looking great and functioning well. Remember to stay proactive by checking for signs of wear and tear.
By following the tips outlined in this post you’ll not only extend the life of your liner but also enhance your overall swimming experience. Enjoy those sunny days by the pool knowing you’ve got your liner covered. Happy swimming!
Frequently Asked Questions
What is the purpose of an above ground pool liner?
An above ground pool liner is essential for maintaining the pool’s structure and ensuring water retention. It prevents leaks, protects against damage, and provides a smooth, safe surface for swimming.
What types of above ground pool liners are available?
There are several types of above ground pool liners, including Beaded, Overlap, J-Hook, and Inflatable. Each type offers different installation methods and benefits tailored to specific pool designs.
What are common issues with above ground pool liners?
Common issues include tears, fading colors, wrinkles, and algae build-up. Regular inspection and maintenance can help identify these problems early, ensuring the liner’s longevity.
How can I prevent damage to my above ground pool liner?
To prevent damage, maintain proper water levels, inspect for tears, clean the liner regularly, keep debris out, use a pool cover, and winterize appropriately. Monitoring chemical levels also helps.
How often should I inspect my pool liner?
It’s recommended to inspect your pool liner at least once a month. Regular checks allow you to catch any signs of wear or damage early, preventing larger issues later.
What are the signs my pool liner needs to be replaced?
Signs that your pool liner may need replacement include visible tears, discoloration, persistent algae growth, and significant wrinkles. If you notice these issues despite regular maintenance, consider replacing the liner.
How do I clean an above ground pool liner?
To clean an above ground pool liner, use a soft brush and a gentle pool cleaner. Focus on areas with dirt or algae build-up, and be sure to rinse thoroughly to avoid chemical residues.
Can I install a pool liner myself?
Yes, many homeowners opt to install their pool liners themselves, especially with overlap or J-Hook types. However, ensure you follow the manufacturer’s instructions carefully to avoid errors.