Have you ever looked at your pool and thought it could use a fresh look? Tiling can transform your outdoor space, making it not just more appealing but also more functional. Whether you’re dealing with cracked tiles or just want to update the style, tiling your pool is a rewarding project.
Table of Contents
- 1 Key Takeaways
- 2 Materials Needed For Pool Tiling
- 3 Preparing The Pool Surface
- 4 The Tiling Process
- 5 Grouting And Finishing Touches
- 6 Conclusion
- 7 Frequently Asked Questions
- 7.1 What are the benefits of tiling a pool?
- 7.2 How do I prepare the pool surface for tiling?
- 7.3 What tools do I need for tiling a pool?
- 7.4 How do I apply adhesive for pool tiles?
- 7.5 Why is grouting important for pool tiles?
- 7.6 How do I select the right grout for my pool?
- 7.7 How can I protect my tiled pool from water damage?
- 7.8 How can I maintain my tiled pool?
Key Takeaways
- Material Selection: Choose durable, water-resistant tiles like porcelain or glass, and consider textured options for safety around the pool.
- Essential Tools: Gather necessary tools such as a tile cutter, notched trowel, level, rubber float, grout sponge, bucket, and safety gear to ensure a smooth installation process.
- Surface Preparation: Thoroughly clean and repair the pool surface to ensure proper tile adhesion, focusing on removing debris and fixing any damages.
- Tiling Process: Follow a structured approach by measuring the pool, setting up a layout, applying adhesive, and carefully placing tiles with even spacing and alignment.
- Grouting and Sealing: Select the appropriate grout to fit your tile type and joint size, and apply a quality sealer post-installation to protect against water damage and staining, maintaining your pool’s appearance.
- Regular Maintenance: Schedule routine maintenance for sealing and check the condition of tiles to prolong the life of your pool’s tile work.
Materials Needed For Pool Tiling
Successfully tiling a pool requires specific materials and tools. Gathering these essentials before starting ensures a smooth process and optimal results.
Recommended Products

Corrosive resistant stainless steel top supports tiles up to 12 x 12-inch

Powerful 10.8 amp (1,300 watts) motor delivers the cutting power to cut through granite, porcelain, concrete, and other stone materials.
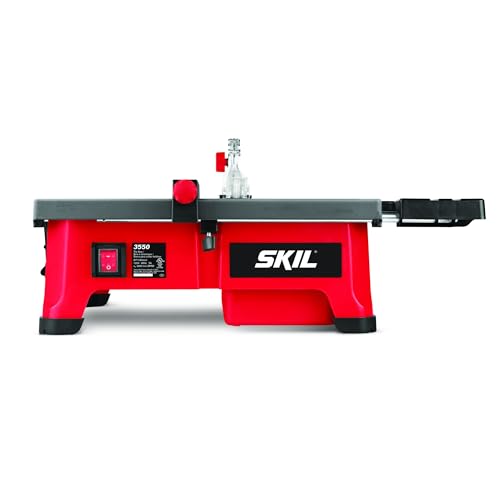
Hydro lock water containment system keeps water contained near the blade and reduce clean-up time
Choosing The Right Tiles
Selecting the right tiles is crucial for both aesthetics and functionality. Focus on durable materials, like porcelain or glass, known for their water resistance and longevity. Choose textured tiles for a slip-resistant surface, boosting safety around the pool. Consider color and design to create a cohesive look that enhances your outdoor space. Popular tile sizes range from small mosaics to larger rectangular pieces, each offering different visual effects.
Essential Tools
Assembling the necessary tools is key for efficient installation. Here’s a list of essential tools you’ll need:
- Tile Cutter: A wet saw provides clean cuts for precise tile fitting.
- Notched Trowel: A notched trowel ensures even application of adhesive.
- Level: Maintaining a level surface prevents uneven tiles, enhancing the overall finish.
- Rubber Float: A rubber float helps apply grout evenly between tiles.
- Grout Sponge: A grout sponge effectively cleans excess grout from tile surfaces.
- Bucket: Use a bucket for mixing tile adhesive and grout.
- Safety Gear: Gloves and goggles protect against sharp tools and materials.
Gathering these materials and tools prepares you for a successful tiling project.
Preparing The Pool Surface
Preparing the pool surface is essential for a successful tiling project. A clean, well-repaired base ensures excellent adhesion and durability.
Recommended Products


One hand-held and one pool pole attachment scrubbing scouring brush sponge pad.

FAST-ACTING FORMULA - Quickly removes dirt, scum, and oily stains from pool waterlines, steps, and shelves - Spray, let soak for 30 seconds, wipe with a scrub pad or mitt, and rinse clean.
Cleaning The Surface
Start by thoroughly cleaning the pool surface. Remove any debris, algae, or existing tiles. Use a pressure washer to eliminate dirt and grime effectively. After washing, let the area dry completely. This step is crucial, as moisture can hinder tile adhesion. For any stubborn stains, a mixture of vinegar and water can help lift remaining residues. Ensure no dust particles remain before proceeding.
Repairing Damages
Inspect the pool surface for any cracks or damages. Repair those areas to create a uniform base for tiling. Use a concrete patching compound for larger cracks and allow it to cure fully. For smaller imperfections, a sandpaper can smooth rough edges. Always check that the repairs blend seamlessly with the surrounding surface. Addressing these issues before tiling will prevent future complications, maintaining the integrity of your work.
The Tiling Process
The tiling process involves multiple steps that ensure a durable and visually appealing pool surface. Follow this structured approach for successful results.
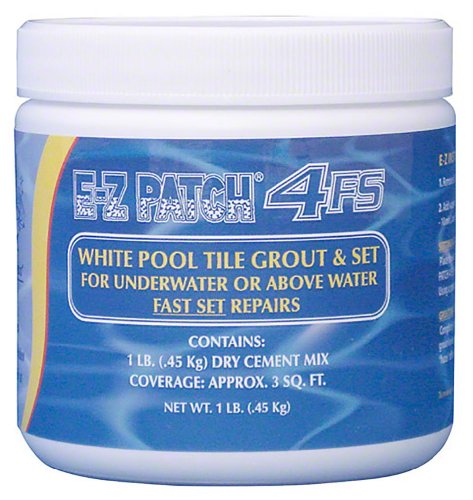
Recommended Products

Easy to Prepare Tile Adhesive - Just mix water & dry cement to start with your DIY tile repair!

REPAIR WITHOUT DRAINING: Save time, water, and chemical costs with a high performance formula specifically designed to bond tiles without the need to drain the water from your pool or spa.
Setting Up A Layout
Start by measuring the pool’s dimensions accurately. Use a chalk line or laser level to create straight reference lines on the pool surface. Plan your tile layout by dry-fitting tiles along the edges. This method helps identify any cuts needed at the edges and ensures a symmetrical design. Mark any cuts on the tiles lightly with a pencil for later reference.
Applying Adhesive
Choose a thin-set mortar suitable for wet environments. Mix the adhesive according to the manufacturer’s instructions until it achieves a creamy consistency. Use a notched trowel to spread the adhesive evenly across small sections of the surface. Apply it in a V-shape to create ridges, allowing better adherence. Work in manageable areas to prevent the adhesive from drying out before laying the tiles.
Placing The Tiles
Begin placing tiles along the marked reference lines. Press each tile firmly into the adhesive, ensuring even spacing. Use tile spacers to maintain consistent gaps between tiles. Adjust any tiles as necessary while the adhesive is still wet. Once all tiles are laid, use a level to check that they are uniformly aligned. After the adhesive cures, grout the gaps between tiles to complete the installation.
Grouting And Finishing Touches
Grouting completes your pool tiling project and ensures long-lasting results. The right grout and sealing techniques protect your tiles and enhance your pool’s appearance.
Choosing The Right Grout
When selecting grout, consider the tile type and pool environment. Non-sanded grout works well for smaller joints, typically under 1/8 inch. For larger joints, sanded grout provides better durability. It’s crucial to pick a grout that is mold and mildew resistant, especially in humid settings. Epoxy grout offers high stain resistance, making it ideal for pools.
- Check manufacturer’s recommendations for tile.
- Assess joint width for proper grout selection.
- Consider color coordination with tile for visual appeal.
Sealing The Tiles
Sealing your tiles protects against water damage and staining. Choose a quality sealer suitable for your tile type. Before applying sealant, ensure the grout has completely cured, generally for about 48 hours. Follow these steps for effective sealing:
- Clean tile surfaces thoroughly, removing debris.
- Use a brush or roller to apply sealant evenly across tiles.
- Allow the sealer to dry as specified by the manufacturer.
Regular maintenance helps extend the life of the sealant. Depending on your pool’s environment, reapply every 1-3 years to maintain optimal protection.
Conclusion
Tiling your pool is a rewarding project that not only boosts its aesthetic appeal but also enhances its longevity. By following the right steps and using quality materials you can create a stunning space for relaxation and fun.
Don’t forget to maintain your tiles and sealant to keep everything looking fresh and beautiful. With a little care your pool will be the envy of your friends and family. Enjoy the satisfaction of your handiwork and dive into your newly tiled oasis. Happy swimming!
Frequently Asked Questions
What are the benefits of tiling a pool?
Tiling a pool enhances its appearance, durability, and functionality. It offers a wide range of design options, making the pool more visually appealing while providing a sturdy surface that withstands water exposure.
How do I prepare the pool surface for tiling?
Begin by cleaning the pool surface thoroughly to remove any dirt, debris, or previous materials. Repair any cracks and ensure a flat and smooth surface for optimal tile adhesion.
What tools do I need for tiling a pool?
Essential tools include a tile cutter, trowel, adhesive spreader, grout float, and a level. Additionally, safety gear like gloves and goggles is recommended for protection during the process.
How do I apply adhesive for pool tiles?
Apply the adhesive to the prepared surface using a notched trowel, spreading it evenly in a thin layer. Work in small sections and press the tiles firmly into the adhesive, ensuring they are level and aligned.
Why is grouting important for pool tiles?
Grouting fills the gaps between tiles, providing structural support and keeping water out. It also enhances the overall look of the tiled surface and prevents dirt and debris from accumulating.
How do I select the right grout for my pool?
Choose grout based on the width of the joints and the type of tiles used. For pools, opt for water-resistant grout formulated to withstand exposure to moisture and chemicals.
How can I protect my tiled pool from water damage?
Seal the tiles after grouting to protect against water damage and staining. Use a high-quality sealant specifically designed for pool tiles and follows the manufacturer’s instructions for application.
How can I maintain my tiled pool?
Regular maintenance includes cleaning the tiles with appropriate pH-balanced pool cleaners, reapplying sealant as needed, and inspecting for any chipped or damaged tiles to ensure longevity.