Have you noticed your above-ground pool losing water faster than usual? It can be frustrating to deal with leaks, especially when you just want to enjoy a refreshing swim. Finding the source of that leak might seem daunting, but it doesn’t have to be.
Table of Contents
Key Takeaways
- Identify Leak Indicators: Observe water level fluctuations, visible cracks, and wet areas around your above-ground pool as key signs of leaks.
- Effective Detection Methods: Utilize the Bucket Test, Dye Test, and Pressure Testing to accurately pinpoint the source of leaks in your pool.
- Common Causes of Leaks: Be aware that cracks, damaged liners, faulty equipment, and skimmer issues are frequent culprits of water loss.
- DIY Repair Strategies: Use pool patch kits and proper techniques to repair minor leaks, ensuring the area is clean and dry before applying patches.
- Seek Professional Help: For persistent issues, complex repairs, or safety concerns, consult a professional to ensure proper diagnosis and repairs.
Understanding Pool Leaks
Understanding pool leaks starts with recognizing the signs. Water loss is evident when you notice an unexplained drop in the water level. If you see water pooling around the base of your pool or wet spots in your yard, a leak is likely present.
Common Causes of Pool Leaks
- Cracks in the Pool Wall: Small or large cracks can lead to significant water loss. Examine the walls for visible signs of wear.
- Damaged Pool Liner: Check for rips, tears, or punctures in the liner. These issues can often be repaired with patch kits.
- Faulty Equipment: Inspect equipment such as pumps, filters, and heater connections. Loose fittings can create leaks.
- Skimmer Issues: Ensure your skimmer box isn’t cracked or poorly sealed. Water can seep out if it is damaged.
How to Detect a Leak
- Water Level Test: Mark the water level on the pool wall. If you notice a drop of more than 1 inch in 24 hours, a leak may exist.
- Dye Test: Use food coloring or dye near suspected leaks. If the dye gets pulled toward any cracks or fittings, a leak is confirmed.
- Visual Inspection: Walk around your pool and check for visible signs of water loss, including wet areas or damaged features.
- Pool Patch Kits: For repairing small liner tears.
- Dye Testing Kit: To help identify leak sources.
- Water Level Marker: For tracking water loss over time.
By understanding these elements, you can effectively pinpoint and address leaks in your above-ground pool. Early detection prevents larger issues and costly repairs.
Common Signs of Leaks in Above Ground Pools
Identifying leaks in above-ground pools is crucial for maintaining water levels and preventing further damage. Look for these common signs to pinpoint potential leaks.
Recommended Products

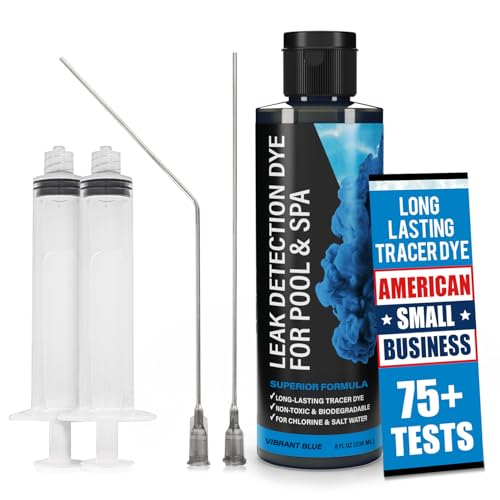
Easily Identify & Locate Leaks - 75+ tests per kit! This pool leak detection kit delivers a High-Contrast UV dye that glows brightly in sunlight and under UV light. It stands out against light and dark surfaces, making it just as effective as traditional blue dyes on light-colored backgrounds. This superior pool dye formula holds together underwater, ensuring easy & accurate leak detection

Pinpoint Leaks with Precision - Symptoms of a pool leak may include rising water bills, chemical imbalance, algae blooms, or cracks in structure. Our DIY leak detection kit helps you quickly identify the exact source of the leak in your in-ground pool, above-ground pool, or hot tub for faster repairs.
Easily Identify & Locate Leaks - 75+ tests per kit! This pool leak detection kit delivers a High-Contrast UV dye that glows brightly in sunlight and under UV light. It stands out against light and dark surfaces, making it just as effective as traditional blue dyes on light-colored backgrounds. This superior pool dye formula holds together underwater, ensuring easy & accurate leak detection
Water Level Fluctuation
Noticeable drops in water levels signal possible leaks. If you’re losing water rapidly—more than 1 inch per week—it’s time to investigate. Mark the water line with tape, and observe over a few days. If the water level drops significantly below your marked line, a leak likely exists.
Visible Cracks or Damage
Inspect the pool’s walls and floor for cracks or visible wear. Small cracks can quickly expand, leading to larger issues. Even minor damage can allow water to escape. If you find any cracks, consider sealing them immediately to prevent further leakage.
Wet Areas Around the Pool
Look for wet spots or puddles outside the pool, especially around the base. These areas often indicate leaks in the pool’s structure or plumbing. Regularly check these spots, as persistent moisture suggests a more serious issue. If water isn’t draining properly or consistently pooling, a leak is probable.
Methods to Identify Leaks
Identifying leaks in an above-ground pool requires specific techniques. Here are effective methods to help you locate those troublesome leaks.
Recommended Products

Easily Identify & Locate Pool Leaks — Designed for precision leak detection, Leak Oracle’s Vibrant Blue UV pool dye delivers strong visual contrast underwater, making leaks easy to spot near cracks, fittings, lights, and plumbing. The concentrated formula holds together underwater for clear, controlled flow toward the leak—no clouding, no guesswork.

Pool Leak Detection Kit: Ultra-concentrated formula clearly highlights even the smallest leaks without staining surfaces.

Trusted Pool Leak Finder - Identify the precise location of structural pool leaks in your system
The Bucket Test
The Bucket Test is a simple and effective way to detect pool leaks. Here’s how to perform it:
- Fill a Bucket: Fill a 5-gallon bucket with water, leaving some space at the top.
- Mark Water Levels: Place the bucket on a step inside your pool. Mark the water level inside the bucket and the pool’s water level on the outside.
- Wait: Let the pool sit undisturbed for 24 hours.
- Compare Levels: After 24 hours, check both water levels. If the pool’s level drops more than the bucket’s, you likely have a leak.
Dye Test
The Dye Test is a precise method to find leaks, especially around fittings and cracks. Follow these steps:
- Get Dye Solution: Purchase a dye testing kit or use food coloring.
- Identify the Area: Look for suspected leak sites, such as skimmers, fittings, and cracks.
- Add Dye: While the pool’s water is still, release a small amount of dye near the suspected area.
- Observe Movement: Watch for the dye being drawn away from your application point, indicating water flow from a leak.
Pressure Testing
Pressure Testing helps identify leaks in the plumbing or equipment. Here’s how to conduct it:
- Close the Valves: Shut off valves to isolate the plumbing systems.
- Use a Pressure Gauge: Attach a pressure gauge to the system.
- Increase Pressure: Increase the pressure within the system.
- Monitor the Reading: If the pressure drops, it indicates a potential leak within the plumbing or connections.
Using these methods allows you to pinpoint leaks effectively and take action before they lead to more significant issues. Regular checks help maintain your pool’s integrity and reduce water loss.
Repairing Leaks in Above Ground Pools
Repairing leaks in above-ground pools can prevent ongoing water loss and potential damage. Knowing how to approach the repairs makes the process easier and more effective.
Recommended Products

THE FIX-IT-ALL TAPE: Most versatile tape for quick repairs; clear color for discreet repairs; add to repair kit for home, marine, sporting and pool patching applications; repair recreational equipment such as pools, pool covers, boat covers, inflatables, tents, canopies and more

country of origin : United States

Choose Your Repair Type: This kit comes in multiple versions; both peel-and-stick patches for quick repairs and glue-down patches for tougher fixes, allowing you to select the ideal option for each need.
DIY Repair Methods
- Identify the Leak Source: Use the methods discussed earlier, like the Bucket Test or Dye Test, to pinpoint the leak location.
- Drain the Pool: If the leak’s in the liner, reduce the water level. Keep enough water to cover the area surrounding the leak.
- Clean the Area: Use a sponge or cloth to dry and clean the area around the leak, ensuring good adhesion for any patch materials.
- Apply a Pool Patch Kit: Follow the instructions on the kit. Cut the patch to size, mix the adhesive if required, and apply it over the leak. Press firmly, ensuring no air bubbles escape.
- Allow Adequate Drying Time: Let the patch cure according to the manufacturer’s recommendations. Avoid filling the pool until the patch has set completely.
- Check for Additional Leaks: Once the repair’s made, fill the pool and monitor the area for any signs of continued leaks.
- Persistent Leaks: If leaks continue despite your repairs, a professional can accurately diagnose the issue and provide an effective solution.
- Complex Repairs: Handling leaks in plumbing or structural components may require specialized tools and expertise, best addressed by a professional.
- Limited Experience: If you’re unsure about the repair process, consulting with an expert can save time and prevent further damage.
- Safety Concerns: If repairs involve your pool’s electrical systems or major structural elements, hire a professional to ensure safety and compliance with regulations.
Assessing your pool’s condition regularly and addressing leaks promptly keeps it in top shape.
Conclusion
Finding a leak in your above-ground pool doesn’t have to be a daunting task. With the right approach and tools you can pinpoint the issue and take action to fix it. Regular checks and quick repairs not only save water but also protect your pool from further damage.
Whether you opt for DIY methods or call in a professional staying proactive will keep your pool in great shape. Enjoy those sunny days splashing around without the worry of leaks ruining your fun. Keep swimming and make the most of your backyard oasis!
Frequently Asked Questions
What are the common signs of leaks in above-ground pools?
Common signs of leaks include a noticeable drop in water levels, wet spots around the pool, and water accumulation near the pool’s base. You may also notice increased water bills or air bubbles emerging from the pool’s walls.
How can I detect a leak in my above-ground pool?
You can detect leaks using methods like the Bucket Test, where you compare water levels in a bucket placed in the pool with the pool itself. The Dye Test involves adding dye near suspected leaks to see if the dye is drawn into cracks. Pressure Testing can also be used for more complex leak detection.
What is the Bucket Test for pool leaks?
The Bucket Test is a simple method to check for leaks. Fill a bucket with water and place it on the pool’s steps, ensuring it matches the pool’s water level. After 24 hours, compare the drop in water levels. If the pool loses more water than the bucket, there may be a leak.
How do I repair a leak in my above-ground pool?
To repair a leak, first identify its location, then drain the pool enough to access the leak area. Clean the site and apply a pool patch kit according to the manufacturer’s instructions. Allow it to dry fully before refilling the pool to check for further leaks.
When should I seek professional help for pool leaks?
You should seek professional help if the leak persists after DIY repairs, if the damage seems complex, or if safety concerns arise. Professionals have specialized equipment and expertise to locate and fix leaks effectively to prevent further damage.