Have you noticed your above ground pool losing water faster than usual? It can be frustrating to deal with a leak, especially when you just want to enjoy a refreshing swim. Understanding how to locate that pesky leak will save you time, money, and a lot of headaches.
In this article, you’ll learn simple steps to identify and fix leaks in your pool. Whether it’s a small crack or a tear in the liner, we’ll cover practical methods to help you find the source of the problem. With the right approach, you can get your pool back in shape and make the most of those sunny days ahead.
Table of Contents
Key Takeaways
- Recognizing Signs of Leaks: Key indicators of a leak include a significant drop in water levels, wet areas around the pool, and spikes in water bills.
- Common Leak Causes: Leaks can arise from worn liners, improper installation, temperature variations, and equipment malfunctions.
- Essential Tools: Utilize tools like dye test kits, submersible pumps, and water level gauges to effectively locate leaks in your above ground pool.
- Visual Inspection Strategies: Regularly inspect the pool liner, equipment, and surrounding areas to identify potential leaks early.
- Preventive Maintenance: Maintain your pool by regularly checking liners, cleaning filters, and monitoring water chemistry to minimize leak risks.
- Winterization Practices: Properly winterize your pool and clean debris to avoid seasonal damage that may lead to leaks.
Understanding Pool Leaks
Identifying leaks in your above ground pool is crucial to maintaining water levels and ensuring the longevity of your pool. Understanding the common causes and signs of leaks can help you address issues promptly.
Recommended Products

Easily Identify & Locate Leaks - 75+ tests per kit! This pool leak detection kit delivers a High-Contrast dye that easily traces flow paths. It stands out against light and dark surfaces, making it just as effective as traditional blue dyes on light-colored backgrounds. This superior pool dye formula holds together underwater, ensuring easy & accurate leak detection

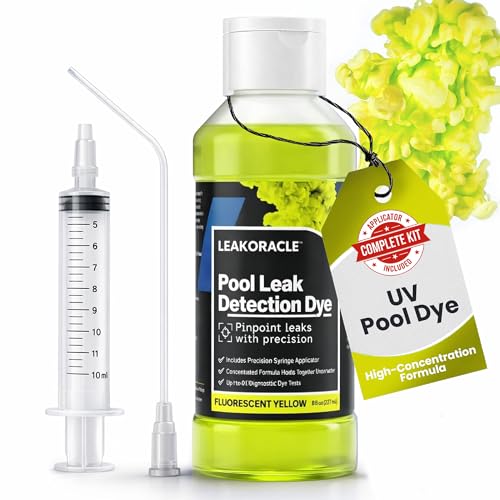
Easily Identify & Locate Leaks - 75+ tests per kit! This pool leak detection kit delivers a High-Contrast UV dye that glows brightly in sunlight and under UV light. It stands out against light and dark surfaces, making it just as effective as traditional blue dyes on light-colored backgrounds. This superior pool dye formula holds together underwater, ensuring easy & accurate leak detection

Pinpoint Leaks with Precision - Symptoms of a pool leak may include rising water bills, chemical imbalance, algae blooms, or cracks in structure. Our DIY leak detection kit helps you quickly identify the exact source of the leak in your in-ground pool, above-ground pool, or hot tub for faster repairs.
Common Causes of Leaks
- Worn Liner: Liners can develop tears or holes due to wear and tear, often from UV exposure or rough usage.
- Improper Installation: If the pool was not set up correctly, stress on the walls and liner could result in leaks over time.
- Sharp Objects: Debris or sharp tools left in or around the pool can puncture the liner.
- Temperature Changes: Extreme weather conditions can cause materials to contract and expand, leading to cracks or separations.
- Equipment Malfunctions: Issues with pumps, filters, or connections can contribute to leaks if they create pressure imbalances.
- Water Level Drop: If the water level drops more than an inch per week, a leak may exist.
- Wet Areas Around the Pool: Puddles or overly damp soil around the pool perimeter often signify a leak.
- Increased Water Bill: Unexpected spikes in your water bill could indicate a significant leak.
- Pool Equipment Malfunction: If the filter or pump runs dry or has pressure issues, a leak might be affecting your system.
- Visible Damage: Cracks or holes on the pool’s surface, especially around fittings or seams, point to potential leaks.
Being aware of these causes and signs helps you act quickly, saving time and resources while keeping your above ground pool enjoyable for everyone.
Tools Needed to Find a Leak
Identifying a leak in your above ground pool requires the right tools to ensure an efficient search. Below are essential and optional tools that aid in pinpointing leaks effectively.
Recommended Products

Precise Leak Identification: The pool leak detection dye kit is formulated with high color saturation dye which easily detects water movement and any leaks above the water's surface. Its deep blue color stands out on light colored surfaces and remains visible even in low light conditions. This superior formula holds together underwater, ensuring precise and accurate leak identification
Family-Safe Formula for All Pools, Spas & Hot Tubs - Our biodegradable, non-toxic dye is safe for families and the environment. Designed to perform in saltwater and chlorine pools, it works across all pool and spa types, including fiberglass, vinyl liner, plaster, inground, and above-ground systems.

Pool Leak Detection Kit: Ultra-concentrated formula clearly highlights even the smallest leaks without staining surfaces.
Essential Equipment
- Dye Test Kit: Use a dye test kit to detect small leaks. Add dye to the water near suspicious areas. If a leak exists, the dye will get sucked in.
- Submersible Pump: Employ a submersible pump to lower water levels in suspected areas. This helps expose hidden leaks along liners or fittings.
- Water Level Gauge: Use a water level gauge to measure water loss accurately. Place it next to the pool and monitor changes over time.
- Flashlight: Utilize a flashlight to inspect tight or dark areas. Shine the light underwater to spot potential cracks or tears in the liner.
- Pool Leak Detection Device: Consider using a pool leak detection device designed to monitor water levels automatically and pinpoint losses.
- Bubble Leak Detector: Apply a bubble leak detector solution to suspect areas. The solution will create bubbles if a leak is present.
- Infrared Thermometer: Use an infrared thermometer to check for temperature differences near suspected leaks. A change in temperature can indicate water loss.
- Camera: A waterproof camera can help document any visible damage underwater, making it easier to assess and repair issues later.
Equipping yourself with these tools enhances your chances of successfully locating leaks, ensuring your above ground pool remains in great condition.
Step-by-Step Guide to Detect a Leak
Detecting a leak in your above ground pool requires careful inspection and specific techniques. Follow these methods to identify potential leaks effectively.
Recommended Products

Pool Leak Detection Kit: Ultra-concentrated formula clearly highlights even the smallest leaks without staining surfaces.

Easily Identify & Locate Pool Leaks — Designed for precision leak detection, Leak Oracle’s Vibrant Blue UV pool dye delivers strong visual contrast underwater, making leaks easy to spot near cracks, fittings, lights, and plumbing. The concentrated formula holds together underwater for clear, controlled flow toward the leak—no clouding, no guesswork.

Visual Inspection Techniques
- Examine the Pool Liner: Look for tears or holes in the liner. Focus on corners, steps, and edges where wear occurs.
- Check the Pool Equipment: Inspect hoses, fittings, and pumps for any signs of water dripping or pooling.
- Identify Wet Spots: Observe the surrounding area for wet patches on the ground that could indicate a leak.
- Monitor Water Levels: Record the water level daily. A drop of more than half an inch per day suggests a leak.
Using Water Dyes
- Gather Supplies: Purchase a dye test kit from your local pool supply store or online. Choose a dye that contrasts with your pool water.
- Perform the Test: At suspected leak sites, add dye to the water. Observe if the dye is drawn toward any areas, which indicates a leak.
- Document Findings: Note the locations where dye was drawn to help pinpoint where repairs are needed.
- Purchase a Pressure Testing Kit: Obtain a specialized kit that includes a pressure gauge and hose attachments for your pool’s system.
- Set Up the Equipment: Attach the pressure gauge to the pool’s plumbing lines, ensuring all fittings connect tightly to prevent false readings.
- Apply Pressure: Pressurize the system while monitoring the gauge. A drop in pressure indicates a leak in the system.
- Inspect Affected Areas: Investigate the plumbing and fittings where the gauge shows pressure loss. This will help you target repairs effectively.
Additional Tips for Leak Prevention
Preventing leaks in your above ground pool involves consistent maintenance and seasonal care. Implementing these practices helps extend your pool’s lifespan and minimizes the risk of leaks.
Regular Maintenance Practices
- Inspect Liners Regularly: Check for tears, punctures, or wear. Addressing these issues quickly prevents more extensive damage.
- Clean Filter and Pump: Regular cleaning ensures optimal function and reduces wear on components.
- Monitor Water Levels: Keep an eye on water levels. A sudden drop might indicate a leak.
- Check Pool Equipment: Inspect filters, hoses, and fittings for cracks or damage. Replace faulty parts immediately.
- Maintain Proper Chemical Balance: Imbalanced water can lead to corrosion and wear on pool materials. Test water weekly and adjust chemicals as necessary.
- Winterize the Pool: Follow winterization steps to protect the pool from freeze damage. Drain water below the skimmer and use covers to avoid debris accumulation.
- Remove Leaves and Debris: Clean your pool regularly to prevent debris buildup that can damage surfaces and create leaks.
- Inspect Before Use: Each spring, check for any signs of wear from the off-season, such as damaged liners or loose fittings. Early detection can save costs.
- Check Ground Level: Ensure that the ground around the pool remains level. Uneven soil can put pressure on the pool structure, leading to leaks.
- Apply Sealants: Consider using sealants on any visible gaps or joints to prevent leaks before they start. Regular application helps maintain the pool’s integrity.
Conclusion
Finding a leak in your above ground pool doesn’t have to be a daunting task. With a little patience and the right tools you can identify and fix issues before they become major problems. Regular maintenance is key to keeping your pool in top shape and preventing leaks from occurring in the first place.
By staying vigilant and following the tips shared you’ll not only extend the life of your pool but also enjoy a worry-free swimming experience. So grab your tools and get started on keeping your pool leak-free and ready for fun all season long!
Frequently Asked Questions
What are common causes of leaks in above ground pools?
Leaks in above ground pools can be caused by worn liners, improper installation, or equipment malfunctions. Additionally, changes in temperature and shifting ground can exacerbate these issues, leading to potential leaks.
How can I tell if my above ground pool has a leak?
Signs of a leak include a drop in water levels, the presence of wet areas around the pool, increased water bills, and visible damage to the pool structure or liner. Regular monitoring is essential for early detection.
What tools are useful for detecting pool leaks?
Effective tools for leak detection include dye test kits, submersible pumps, and pressure testing kits. These can help identify and locate leaks more accurately, allowing for timely repairs.
How can I prevent leaks in my above ground pool?
To prevent leaks, regularly inspect liners, clean filters and pumps, monitor water levels, check pool equipment, and maintain proper chemical balance. Additionally, winterizing the pool and sealing cracks can help extend its lifespan.
What should I do before using my pool after winter?
Before using your pool after winter, inspect the entire structure for any damage, remove debris, check the ground level around the pool, and ensure that all equipment is functioning properly. This helps prevent leaks and ensures a safe swimming experience.