Have you ever noticed your pool light flickering or just not working at all? It can be frustrating when you’re ready to enjoy a night swim, only to find your backyard oasis dim and uninviting. Replacing a pool light might seem daunting, but it doesn’t have to be.
Table of Contents
Key Takeaways
- Types of Pool Lights: Familiarize yourself with various pool light options (incandescent, LED, halogen, fiber optic, solar) to select the best fit for your needs.
- Benefits of Upgrading: Upgrading to LED lights improves energy efficiency, longevity, safety, aesthetic appeal, and requires less maintenance.
- Preparation for Replacement: Gather essential tools (screwdriver, wire strippers, voltage tester) and follow safety precautions to ensure a safe replacement process.
- Step-by-Step Replacement Guide: Follow a clear guide, starting with draining the pool, removing the old fixture, and properly installing the new light to enhance pool ambiance and safety.
- Troubleshooting Common Issues: Understand common problems like flickering lights and leaks, and know how to address them to maintain the functionality and safety of your pool lighting system.
Understanding Pool Lights
Pool lights are essential for enhancing the safety and ambiance of your swimming area during nighttime use. Knowing the different types of pool lights and their benefits can help you make informed decisions when replacing or upgrading them.
Types of Pool Lights
- Incandescent Lights: Traditional and commonly found, incandescent lights provide warm illumination. They’re less energy-efficient and generate more heat, which can lead to higher electricity bills.
- LED Lights: LED lights offer high energy efficiency and a long lifespan, often exceeding 25,000 hours. They come in various colors and styles, making them perfect for aesthetic preferences.
- Halogen Lights: Halogen lights produce bright light and have a medium lifespan. They provide better energy efficiency than incandescent options but still generate considerable heat.
- Fiber Optic Lights: Fiber optic systems include multiple light sources, allowing you to create colorful effects without the heat of traditional bulbs. They’re great for decorative purposes but may require more maintenance.
- Solar-Powered Lights: Solar lights harness sunlight during the day for illumination at night. They’re eco-friendly, easy to install, and cost-effective in the long run, but their brightness depends on sunlight availability.
- Energy Efficiency: Upgrading to LED lights significantly reduces energy consumption. You can expect savings on your electric bill while enjoying bright, vibrant lighting.
- Longevity: Modern pool lights, especially LEDs, last much longer than older models. While traditional bulbs may need frequent replacements, LEDs can function effectively for years.
- Enhanced Safety: Well-lit pools deter accidents by improving visibility. Bright lighting makes it easier to see clear boundaries, ensuring a safer swimming experience.
- Aesthetic Appeal: Upgrading allows for creative lighting designs. Colored LED lights can create stunning effects, enhancing your pool’s ambiance and making it more inviting for gatherings.
- Low Maintenance: Newer lighting technology requires less maintenance. With longer lifespans and more durable materials, you spend less time on upkeep.
By understanding the types of pool lights and the benefits of upgrading, you position yourself to make wise choices concerning your pool’s lighting system.
Preparing for Replacement
Replacement of your pool light requires careful preparation to ensure a smooth process. Gather the right tools and follow safety precautions to achieve the best results.
Recommended Products

Energy-Efficient Performance: The HYMIOR 120V 65W PRO LED pool light bulb offers effortless upgrades, designed as a direct replacement for outdated 300W–800W halogen bulbs. It delivers up to 85% energy savings on electricity bills while maintaining equivalent or superior brightness levels, making it an ideal choice for enhancing pool illumination.

Vibrant & Customizable Lighting: Featuring 456 high-quality LED beads (114 white, red, green, and blue), this pool light delivers stunning, vivid illumination to transform your pool into a colorful oasis.

【2025 Upgraded Remote Control】This 120V pool light bulb is designed for 120V systems and cannot be used in 12V setups. Please confirm the voltage of your pool system before purchasing. The new antenna design improves remote control reception, giving you reliable operation from anywhere in your backyard. No remote around? No worries—just flip your existing wall switch to cycle through colors. ⚠️ Note: Remote requires 1x "12V 23A" battery (not included).
Gathering Necessary Tools
Gather the following tools for the replacement process:
- Screwdriver: A flat-head or Phillips screwdriver, depending on your pool light fixture.
- Pool Light Replacement: Choose the appropriate new light model, such as LED or halogen, based on your preferences.
- Wire Strippers: For stripping the wire insulation if needed.
- Electrical Tape: For securing connections and ensuring they remain insulated.
- Gloves: To protect your hands during the process.
- Safety Glasses: To shield your eyes from debris.
- Voltage Tester: To confirm that the power is off before working on the light.
Having these tools ready simplifies the replacement process and reduces chances of complications.
Safety Precautions
Implement these safety precautions to ensure a safe experience:
- Turn Off Power: Always turn off the circuit breaker supplying power to the pool light before starting work.
- Test for Electricity: Use a voltage tester to make sure no electricity flows to the light fixture. This step guarantees you won’t encounter any electrical hazards.
- Work During Daylight: If possible, work during the daytime. It’s easier to see what you’re doing and avoid accidents.
- Secure Work Area: Keep the surrounding area free from obstacles. This space ensures safe movement while working.
Following these precautions prioritizes your safety and prevents unexpected issues.
Step-by-Step Guide on How Replace Pool Light
Replacing a pool light is a straightforward process when you follow these steps. You’ll ensure your pool remains safe and inviting.
Recommended Products

⚠️⚠️⚠️A Transformer is Required! -Fits 10" standard niches. Ideal as an inground light for pool applications, this LED pool light fits 10-inch wet niches and replaces Pentair 12V pool lights; operates on 12V AC, requiring a transformer(NOT INCLUDED) for safe and reliable pool lighting
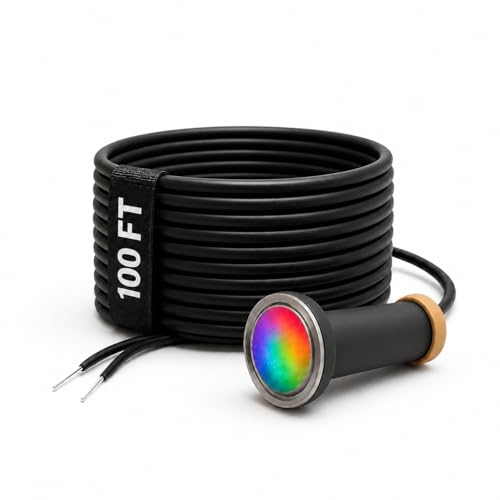
USA BASED COMPANY WITH 2-YEAR NO-HASSLE REPLACEMENT GUARANTEE – SOLID WARRANTY & SUPPORT Enjoy total peace of mind with AquaChrome’s 2-Year Full Replacement Warranty — if your light stops working, we replace it. No forms, no fine print, no delays. Our USA-Based Support Team in is here to help with installation, wiring, or compatibility questions through Amazon Messages or AquaChromeUSA.com same day response. Plus, Lifetime Performance Support ensures you’ll always have access to troubleshooting and parts to keep your pool glowing for years to come.

EXCLUSIVE LIFE-BULB BRAND TECHNOLOGY - The Life-Bulb 120V LED pool light, is designed for those seeking high-performance lighting. This energy-efficient pool LED light bulb offers the brightness of a 500-watt incandescent bulb while consuming less than 40 Watts, making it ideal for eco-conscious pool owners.
Draining the Pool
Draining the pool is essential for safe work on the light fixture. Use a submersible pump to remove the water. Aim to drain the water level below the light fixture, allowing easy access. Depending on your pool type, this may take several hours. Always check local regulations regarding water disposal.
Removing the Old Light Fixture
- Turn Off the Power: Switch off the circuit breaker that controls the pool light. Confirm there’s no power using a tester.
- Access the Light: Remove any screws or fasteners holding the light fixture in place. Gently pull the fixture out of its niche.
- Disconnect Wires: Carefully unscrew the wire nuts connecting the fixture wires to the electrical supply. Take a photo for reference.
- Remove the Fixture: Lift out the old fixture, ensuring no debris falls into the pool.
Installing the New Light Fixture
- Connect Wires: Match the wires from the new fixture to the corresponding wires in the junction box. Use wire nuts to secure the connections.
- Seal Connections: Apply electrical tape around the wire nuts to prevent moisture infiltration.
- Insert the Fixture: Carefully push the new fixture into the niche, ensuring it sits flat against the wall.
- Secure the Fixture: Reattach any screws or fasteners to hold the fixture in place.
- Restore Power: Return to the circuit breaker and switch the power back on.
- Test the Light: Turn on the pool light to ensure it functions correctly. If it doesn’t light up, double-check the wiring connections.
- Check for Leaks: Inspect around the fixture for any leaks or signs of water intrusion. Ensure all seals are tight.
By following these steps, you can successfully replace your pool light, enhancing both safety and ambiance in your pool area.
Common Issues and Troubleshooting
Pool lights enhance safety and ambiance but can experience issues. Understanding common problems helps in troubleshooting effectively.
Recommended Products
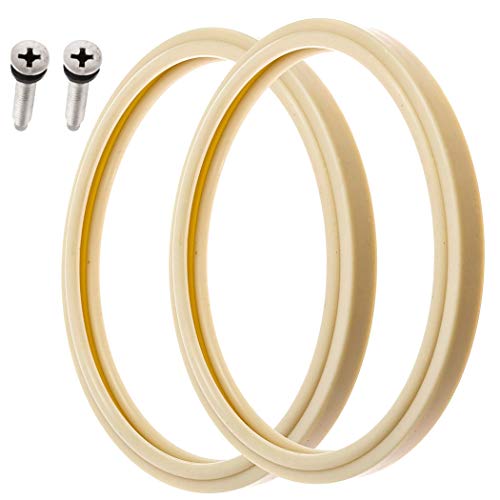
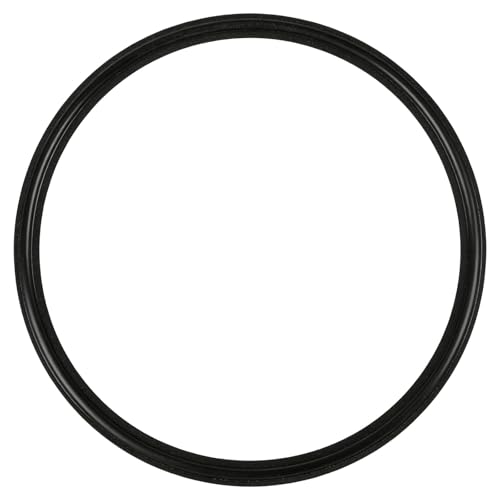
8 3/8" POOL LIGHT LENS GASKET AND STAINLESS PILOT SCREW - Keep pool water out of your pool lights with this high-quality and heavy-duty pool light gasket and stainless pilot screw. At 8 3/8 inches, this pool light gasket is a universal fit for niches made specifically for Pentair lights. The pilot screw is 1 5/16 inches long with threads that are specifically designed to fit on the screw holes on the Pentair pool light niche. No other type of screw will provide the same secure fit!
【Fit】Pool light gasket fits for Hayward Astrolite SP0540/SP0541/SP0542/SP0543

REPLACEMENT FOR 79108500 LENS GASKET: Designed as a replacement for model 79108500, this lens gasket fits 4-inch pool and spa light fixtures that require this gasket size. Please confirm your fixture specifications before ordering
Flickering Lights
Flickering pool lights often indicate a loose connection or electrical issue. Check the following:
- Wiring Connections: Inspect connections at the light fixture and junction box. Ensure all wires are tightly secured.
- Voltage Fluctuations: Measure voltage at the fixture. Inconsistent voltage might cause flickering, signaling a need for professional evaluation.
- Light Bulb Type: Different bulbs can react differently. If using LED lights, ensure they’re compatible with your existing transformer.
If simple checks don’t resolve the flickering, it might be time to consult a professional electrician.
Leaks Around the Fixture
Leaks around the pool light fixture can lead to more significant issues if not addressed promptly. Here’s what to check:
- Fixture Sealing: Inspect the gasket or sealing material around the fixture. Over time, seals can degrade, leading to leaks. Replace any damaged seals immediately.
- Cracks in the Fixture: Examine the light fixture itself for cracks. If cracks are present, consider replacing the fixture to prevent further leaks.
- Water Accumulation: Check for any water accumulation around the fixture. If present, review the pool’s drainage system to ensure it’s functioning correctly.
Addressing leaks promptly helps maintain a safe and enjoyable swimming environment.
Conclusion
Replacing your pool light doesn’t have to be a daunting task. With the right tools and a bit of know-how you can enhance both the safety and ambiance of your pool area. Upgrading to LED lights not only brightens things up but also saves you money in the long run.
Remember to follow safety precautions and troubleshoot any issues that arise to keep your pool in top shape. Enjoy your beautifully lit pool and the peace of mind that comes with a safe swimming environment. Happy swimming!
Frequently Asked Questions
What are the types of pool lights available?
Pool lights come in several types, including incandescent, LED, halogen, fiber optic, and solar-powered lights. Each type has its unique benefits regarding brightness, energy efficiency, and installation.
Why should I upgrade to LED pool lights?
Upgrading to LED pool lights offers multiple advantages like improved energy efficiency, longer lifespan, enhanced safety, aesthetic flexibility, and lower maintenance costs compared to traditional lighting options.
What safety precautions should I take when replacing pool lights?
When replacing pool lights, ensure the power supply is turned off, use proper waterproof fixtures, wear appropriate safety gear, and follow the manufacturer’s installation guidelines carefully.
How can I troubleshoot flickering pool lights?
To troubleshoot flickering pool lights, check for loose wiring connections, inspect for voltage fluctuations, and ensure the light fixture is sealed properly. If issues persist, consult a professional electrician.
What should I do if there’s a leak around my pool light fixture?
If you notice a leak around your pool light fixture, turn off the power immediately, inspect the sealing and gaskets, and replace them if necessary. Seek professional help if the problem continues.