Have you ever noticed water pooling around your swimming pool light? It’s a frustrating problem that can lead to bigger issues if left unchecked. You’re not alone—many pool owners face this dilemma, and it can be tricky to figure out how to fix it.
Table of Contents
Key Takeaways
- Types of Pool Lights: Familiarize yourself with different pool light types, such as LED, incandescent, halogen, and fiber optic, each having unique advantages and maintenance needs.
- Identifying Leaks: Recognize signs of a leak, including water accumulation, flickering lights, rust, and condensation in the light housing, to address issues promptly.
- Repair Process: Follow a step-by-step approach to safely remove, inspect, and repair the pool light fixture, ensuring all damaged components are addressed to prevent future leaks.
- Maintenance Tips: Implement regular inspections and maintenance of pool lights, including cleaning and checking seals, to prolong their lifespan and functionality.
- Preventive Measures: Choose corrosion-resistant and waterproof fixtures, consider LED options, and invest in professional installation to minimize the risk of leaks from the beginning.
Understanding Swimming Pool Lights
Swimming pool lights enhance safety and aesthetics. Familiarity with their types and potential issues helps maintain their functionality and prevent leaks.
Types of Swimming Pool Lights
- Incandescent Lights: These traditional lights produce a warm glow. They’re affordable but less energy-efficient compared to newer options.
- LED Lights: LED lights use less energy and last longer. They offer versatile color options and can be dimmed for ambiance.
- Halogen Lights: Halogen lights are brighter than incandescent options. They heat up quickly and illuminate the pool effectively but have a shorter lifespan.
- Fiber Optic Lights: These lights use fiber optics for a unique lighting effect. They’re safe since they don’t require electricity in the water, but installation costs are higher.
- Water Leakage: Leaks occur when seals degrade. Regular inspections can help identify wear and tear.
- Bulb Burnout: Frequent bulb replacements indicate electrical issues. Check the wiring and connections.
- Corrosion: Metal components may corrode, especially in saltwater pools. Choosing corrosion-resistant materials can extend their lifespan.
- Poor Illumination: Dimming lights can signal bulb issues or inadequate wattage. Upgrading bulbs or fixtures can improve brightness.
Understanding these aspects of pool lights helps you address problems effectively and maintain a safe, inviting pool environment.
Identifying the Leak
Identifying a leak in your swimming pool light is crucial for preventing further damage. If you notice signs of water accumulation or electrical issues, it’s time to investigate.
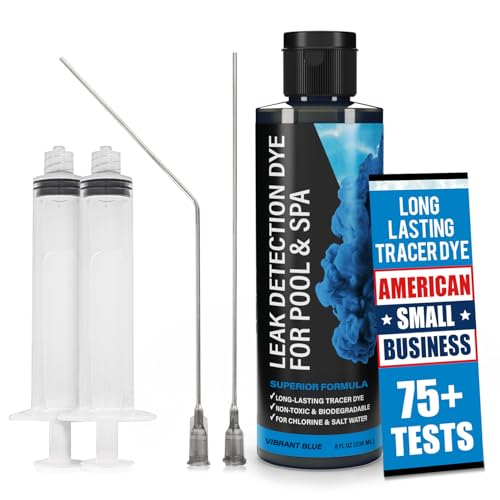
Recommended Products

Easily Identify & Locate Leaks - 75+ tests per kit! This pool leak detection kit delivers a High-Contrast UV dye that glows brightly in sunlight and under UV light. It stands out against light and dark surfaces, making it just as effective as traditional blue dyes on light-colored backgrounds. This superior pool dye formula holds together underwater, ensuring easy & accurate leak detection
Easily Identify & Locate Leaks - 75+ tests per kit! This pool leak detection kit delivers a High-Contrast UV dye that glows brightly in sunlight and under UV light. It stands out against light and dark surfaces, making it just as effective as traditional blue dyes on light-colored backgrounds. This superior pool dye formula holds together underwater, ensuring easy & accurate leak detection

Pinpoint Leaks with Precision - Symptoms of a pool leak may include rising water bills, chemical imbalance, algae blooms, or cracks in structure. Our DIY leak detection kit helps you quickly identify the exact source of the leak in your in-ground pool, above-ground pool, or hot tub for faster repairs.
Signs of a Leaking Swimming Pool Light
- Water Accumulation: Look for water pooling around the light fixture. This is a clear indicator of a leak.
- Flickering Lights: If your pool lights flicker or dim unexpectedly, this could signal water reaching the electrical components.
- Rust or Corrosion: Check for rust on the fixture or corrosion on the bulb. These are signs of water exposure.
- Moisture in the Light Housing: Inspect the light lens for condensation. If you see moisture inside the housing, a leak likely exists.
- Increased Energy Bills: Unexplained increases in your energy bill may stem from malfunctioning lights due to water exposure.
- Turn Off the Power: Ensure safety first. Shut off power at the circuit breaker before starting your inspection.
- Examine the Fixture: Remove the light fixture and look for cracks or damage on the housing. Look closely for any signs of wear.
- Check the Pool Liner: Inspect the area around the light for tears or gaps in the pool liner that could be contributing to leakage.
- Inspect Wiring: Examine the wiring for any signs of fraying or damage. Damaged wiring increases the risk of not just water leaks, but also electrical hazards.
- Perform a Water Test: If needed, cover the light fixture with a plastic bag and fill the pool to check if water still leaks into the fixture. If it stays dry, the leak might be from somewhere else.
By observing these signs and investigating properly, you can pinpoint the source of the leak effectively.
Step-by-Step Guide to Fixing the Leak
Follow this guide to fix leaks in your swimming pool light effectively. Each step provides clear instructions to help you identify and resolve the issue.
Recommended Products
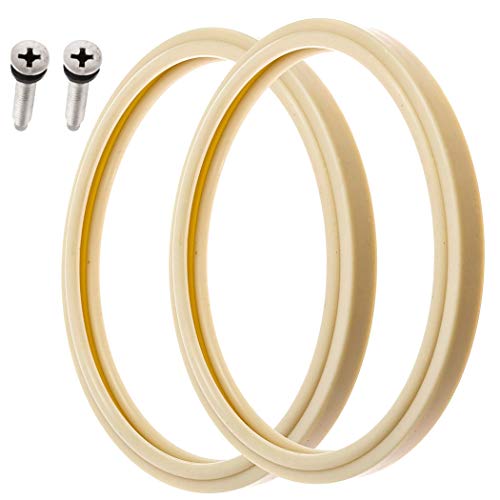
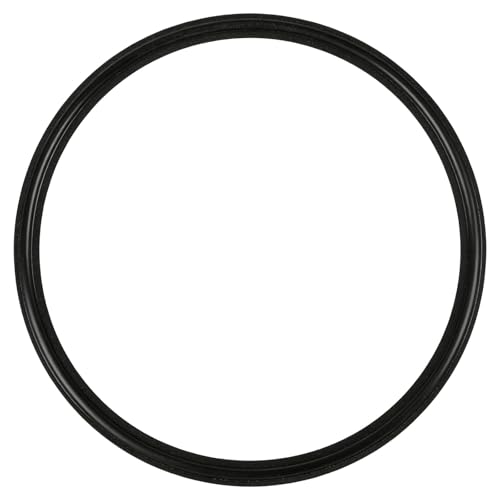
8 3/8" POOL LIGHT LENS GASKET AND STAINLESS PILOT SCREW - Keep pool water out of your pool lights with this high-quality and heavy-duty pool light gasket and stainless pilot screw. At 8 3/8 inches, this pool light gasket is a universal fit for niches made specifically for Pentair lights. The pilot screw is 1 5/16 inches long with threads that are specifically designed to fit on the screw holes on the Pentair pool light niche. No other type of screw will provide the same secure fit!
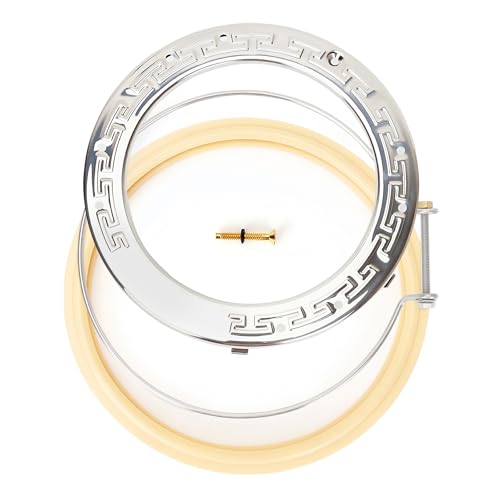
[product includes]79111000 pool light fixing clamp, 79101600Z pool light sealing ring, 79110600 stainless steel face ring, a copper fixing screw; 4 components in total. This set includes all the parts required for replacing pool light components.

COMPATIBLE REPLACEMENT: Designed to replace part number 79101600, this gasket is compatible with Pentair IntelliBrite, AmerLite, and SAM Amerlite pool lights
Gathering Necessary Tools and Materials
Gather the following tools and materials before starting:
- Screwdriver: Use a flathead or Phillips, depending on your light fixture.
- Replacement seals: Choose the correct size for your specific pool light.
- Silicone sealant: Select a waterproof variety for durability.
- Bucket: Catch any water while you work.
- Towel: Dry off surrounding areas after repairs.
Having these items ready makes the process smoother and saves time.
Safely Removing the Pool Light
Follow these steps to safely remove the pool light:
- Turn off the power: Locate the circuit breaker for your pool light and switch it off.
- Let the light cool: If the light was recently in use, wait a few minutes to avoid burns.
- Remove light fixture screws: Use the screwdriver to unscrew the fixture from the wall or deck.
- Gently pull the light out: Carefully remove the light from the niche while avoiding damage to the wiring.
Taking these precautions ensures safety throughout the repair process.
Inspecting and Repairing the Light Fixture
Inspect the light fixture for damage:
- Check for cracks: Look closely for visible cracks or tears in the fixture casing.
- Examine seals: Inspect the rubber seals for wear or degradation.
- Look for corrosion: Check wiring and connections for rust or corrosion.
Repair or replace any damaged components immediately. If the fixture is cracked, consider replacing it to prevent future leaks.
Reinstalling the Pool Light
Reinstall the pool light following these steps:
- Apply silicone sealant: Add a thin layer of sealant to the edge of the fixture.
- Insert the light back into the niche: Position the light carefully, ensuring it fits snugly.
- Secure with screws: Use your screwdriver to fasten the light fixture securely.
- Turn the power back on: Restore power at the circuit breaker and test the light for functionality.
Completing these steps helps maintain a properly functioning and leak-free pool light.
Preventing Future Leaks
Preventing leaks in your swimming pool light saves time and money. Implementing regular maintenance steps ensures your pool remains safe and functional.
Recommended Products
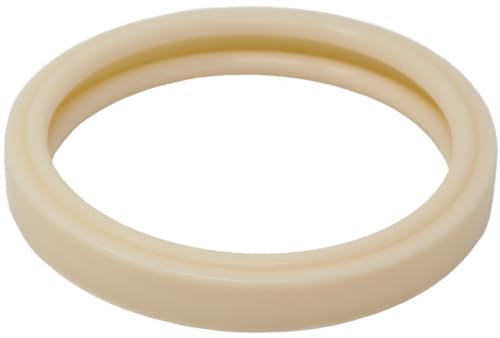
✅ 1 Lens Gasket Compatible with Pentair 79108500 & 79108500Z
【Fit】Pool light gasket fits for Hayward Astrolite SP0540/SP0541/SP0542/SP0543
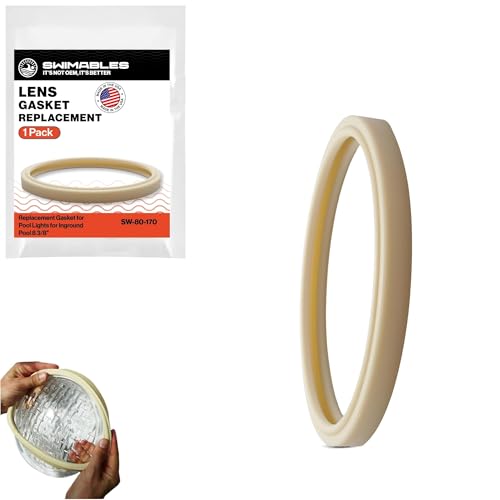
Perfect Compatibility: This pool light gasket is a direct replacement for Pentair 79101600Z,ensuring a secure and leak-proof fit for Pentair Amerlite, Intellibrite, and SAM lights. Ideal for pool light housing in inground pools.
Regular Maintenance Tips
- Inspect pool lights monthly for signs of wear or damage.
- Clean fixtures to remove debris and prevent corrosion.
- Check seals and gaskets routinely; replace any cracked or worn parts.
- Monitor water levels and ensure they stay within appropriate limits to prevent overflows.
- Test the light’s seal every season, especially after heavy storms or pool repairs.
- Select waterproof and corrosion-resistant lighting fixtures to withstand pool conditions.
- Opt for LED lights known for their long lifespan and energy efficiency.
- Look for fixtures with robust warranties, ensuring manufacturer support for any potential issues.
- Purchase from reputable brands with positive customer reviews to reduce chances of leaks and malfunctions.
- Consider professional installation, ensuring proper sealing and placement to minimize leaks from the start.
Conclusion
Fixing a leaking swimming pool light doesn’t have to be a daunting task. By staying vigilant and addressing issues as they arise you can keep your pool safe and enjoyable. Regular inspections and maintenance are key to preventing leaks and ensuring your lights last longer.
Investing in quality fixtures and considering professional help can save you time and money in the long run. With a little effort you can enjoy a beautifully illuminated pool without the worry of leaks. So roll up your sleeves and give your pool lights the attention they deserve. Happy swimming!
Frequently Asked Questions
What are the common signs of leaks in pool lights?
Signs of leaks in pool lights include water accumulation around the fixtures, flickering or dim lights, visible rust or corrosion, and an increase in energy bills. Spotting these early can help prevent further damage.
How can I fix leaks in my pool lights?
To fix leaks, first, turn off the power to the lights. Inspect the fixtures for cracks and worn seals. Replace any damaged parts or seals and ensure they fit snugly. If leaks persist, consider consulting a professional for assistance.
Why should I choose LED pool lights?
LED pool lights are energy-efficient, have a longer lifespan than incandescent or halogen bulbs, and produce less heat. They also come in various colors and are available in waterproof designs, making them a smart choice for pool lighting.
How often should I inspect my pool lights?
It’s advisable to inspect your pool lights at least once a month. Regular checks can help identify potential issues like leaks, rust, and bulb burnout before they become problematic.
What maintenance tips can help prevent leaks?
To prevent leaks, regularly clean fixtures, check seals for wear, monitor water levels, and test lights for proper function. Implementing seasonal inspections can also help catch any issues early on.
Why is professional installation recommended for pool lights?
Professional installation is recommended to ensure fixtures are properly sealed and waterproofed, minimizing the risk of leaks and malfunctions. Experts can also help in choosing the right fixtures for your specific pool environment.