Thinking about upgrading your backyard with a pool deck? You’re not alone. Many homeowners want a beautiful space to relax and entertain but feel overwhelmed by the cost of hiring professionals. The good news is that with some planning and creativity, you can create your own stunning pool deck without breaking the bank.
Table of Contents
Key Takeaways
- DIY Pool Deck Benefits: Building your own pool deck saves money while allowing for complete customization to suit your personal style and outdoor space needs.
- Types of Materials: Common materials for pool decks include wood, concrete, and pavers, each offering unique aesthetics and durability options.
- Essential Tools and Materials: Necessary tools like a saw, drill, and measuring tape, along with quality materials, are crucial for a successful DIY project.
- Step-by-Step Construction: Follow a clear, structured approach for planning, site preparation, framing, and decking installation to ensure a durable and attractive result.
- Maintenance Importance: Regular cleaning, inspection for damage, and sealing are vital to prolonging the life and appearance of your pool deck.
Overview of Do It Yourself Pool Deck Plans
Creating your own pool deck offers a rewarding project for any homeowner. With effective planning and creativity, you can design a deck that enhances your outdoor space without overspending. Here’s a structured approach to DIY pool deck plans.
Types of Pool Decks
- Wood Decks: Wood provides a classic look, ideal for a warm, natural feel. Options include treated lumber, cedar, and composite materials, each offering durability and aesthetic appeal.
- Concrete Decks: Concrete allows for versatility in shapes and colors. Stamping and staining techniques can mimic more expensive materials, adding style without high costs.
- Pavers: Pavers come in various materials such as brick or stone. They create a textured surface and allow for easy repairs.
Planning Your Deck
- Budgeting: Determine your overall budget. Factor in materials, tools, and any permits needed for construction.
- Sizing: Measure your available space. Ensure that the deck size matches your pool and serves its purpose, whether for lounging or entertaining.
- Design: Sketch out your design. Include necessary elements like seating areas, paths, and shade structures.
Necessary Tools and Materials
- Tools: A saw, hammer, drill, level, and measuring tape are essential. Additional tools might include a sander and a concrete mixer, depending on your chosen deck type.
- Materials: Gather wood planks, concrete blocks, or pavers, along with screws, nails, and sealant.
Construction Steps
- Preparation: Clear the area around the pool. Remove debris, old landscaping, or anything that could obstruct your work.
- Framework: Build a solid framework for your deck. Ensure it’s level and secure. If using wood, treat it with a sealant for weather resistance.
- Finishing Touches: Paint or stain your deck as desired. Consider adding railings, lighting, or planters to enhance the overall appearance.
- How long does it take to build? Construction can vary from a few days to several weeks, depending on the size and complexity of your design.
- Do I need permits? Local regulations may require permits for deck construction. Check with your local building authority.
- Can I do this alone? While some may prefer to enlist help, many DIYers successfully build decks solo, relying on clear plans and patience.
By executing a well-thought-out plan, you can craft a functional and attractive pool deck tailored to your needs. This hands-on approach not only enhances your property but also provides a sense of accomplishment.
Benefits of Building Your Own Pool Deck
Building your own pool deck brings many advantages. From saving money to customizing your space, DIY options enhance your outdoor experience.
Cost Savings
Constructing a pool deck on your own leads to significant cost reductions. Labor fees can account for 30%-50% of total project expenses. By handling the construction yourself, you eliminate these costs while purchasing materials directly. For instance, selecting budget-friendly materials like pressure-treated wood or composite decking can keep your expenses low. You might save between $1,000 to $5,000, depending on the size and type of deck you build. Overall, DIY projects foster a more affordable and budget-conscious approach to pool renovations.
Customization Options
Creating your own pool deck allows complete flexibility in design and style. You can choose from various materials, colors, and layouts to suit your personal taste and landscape. For example, opting for a multi-level deck design can enhance visual interest and provide distinct areas for lounging and entertaining. You can also incorporate features like built-in benches or flower planters, adapting the space to your lifestyle. This level of customization ensures that your pool environment reflects your individuality and meets your specific needs.
Essential Materials and Tools
For a successful DIY pool deck project, selection of the right materials and tools is crucial. Choose quality items to ensure durability and longevity.
Recommended Products
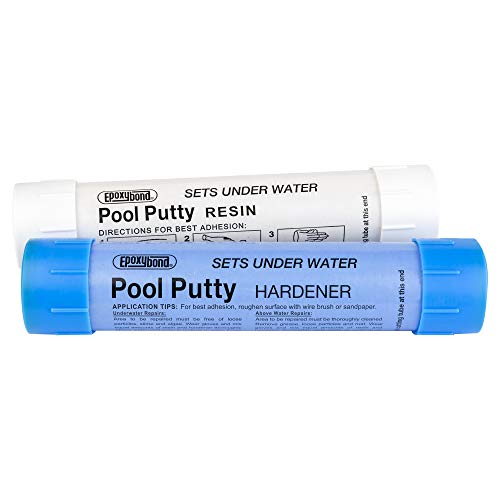
SAFE AND LASTING HAND-MOLDABLE PUTTY APPLY TO FIX LEAKS UNDERWATER: So easy and safe to use. Simply mix 1-to-1, mold putty in your hands, and apply to the area where leak or crack.
Recommended Materials
- Decking Boards: Select pressure-treated wood, composite materials, or pavers. Wood offers a classic look, while composite requires less maintenance.
- Support Beams: Use strong, weather-resistant lumber for structural support. Choose materials like treated wood or metal for added durability.
- Concrete Mix: For concrete decks, opt for high-strength mix to support heavy loads. Consider additives for improved weather resistance.
- Fasteners: Choose stainless steel screws or galvanized nails. These materials resist rust and corrosion, ensuring a secure fit.
- Sealants and Stains: Select weatherproof sealants to protect wood and enhance the finish. Use stains that complement your overall design.
- Landscaping Materials: Consider gravel or mulch for surrounding garden areas. These materials help improve drainage and aesthetics.
- Measuring Tape: Ensure accurate measurements for materials and layout.
- Power Drill: Use for driving screws and making pilot holes. A cordless option provides flexibility around the workspace.
- Circular Saw: Ideal for cutting decking boards and support beams to size. This tool allows for precise angles and lengths.
- Level: Check the evenness of the deck. A level ensures proper water drainage and stability.
- Sledgehammer: Use for setting posts or stakes firmly into the ground. This tool aids in compacting soil in preparation for your deck.
- Safety Gear: Wear gloves, goggles, and dust masks. Protection minimizes risks while working with construction materials.
Ensuring you source reliable materials and have the right tools will streamline your pool deck project. Following these recommendations maintains safety and enhances the final result of your DIY endeavor.
Step-by-Step Guide to Pool Deck Construction
This guide provides clear steps to help you successfully build your DIY pool deck. Follow these instructions for a seamless construction process.
Planning Your Design
Planning involves selecting your deck layout, size, and materials. Consider these elements:
- Size and Layout: Measure your pool area to determine the deck dimensions. Aim for at least 3 feet of space around the pool for safety.
- Material Choice: Pick from wood, composite, concrete, or pavers. Each material offers unique aesthetics and durability levels.
- Style and Functionality: Think about the purpose of your deck. Will it be for lounging, hosting, or poolside dining? Design elements should accommodate your specific needs.
Preparing the Site
Site preparation sets the groundwork for a successful build. Keep these steps in mind:
- Clear the Area: Remove debris, grass, and plants within the deck’s perimeter. Ensure a clean workspace.
- Mark the Layout: Use stakes and string to outline the deck’s location. Double-check the layout before proceeding.
- Level the Ground: Remove dirt to create a level base. Use a level to ensure a flat surface across the entire area.
Building the Deck Frame
Constructing the frame provides structural support for your deck. Follow these steps:
- Select Support Beams: Use pressure-treated wood for longevity. Choose beams strong enough to support the decking material.
- Attach Joists: Space joists 16 inches apart for stability. Use a power drill and connectors for secure attachment.
- Ensure Squareness: Check that corners form right angles using a framing square. Adjust as needed for a precise fit.
Installing Decking Boards
Decking board installation brings your design to life. Complete this stage with these instructions:
- Begin at the Edge: Start at one end, securing the first board to the frame. Use screws appropriate for your decking material.
- Maintain Spacing: Leave a gap between boards, typically 1/8 inch. This allows for expansion and drainage.
- Stagger the Boards: For a visually appealing finish, stagger the ends of the boards. This avoids a uniform line and enhances aesthetic appeal.
By systematically following these steps, you’ll create a durable and attractive pool deck, customized to fit your backyard oasis.
Maintenance Tips for Your Pool Deck
Maintaining your pool deck ensures its longevity and keeps it looking great. Follow these essential tips:
Recommended Products

WATERPROOF CLEAR DECK SEALER: An extremely durable clear finish that helps prevent the return of black stains on composite decks while protecting composite and natural wood surfaces from water damage and UV radiation
Clean Regularly
- Sweep Debris: Remove leaves, dirt, and other debris weekly. This prevents mold and keeps your deck safe.
- Mop with Soap: Use a mild soap solution monthly to clean any stains and remove buildup.
Inspect for Damage
- Check for Cracks: Inspect for cracks or damage in the decking material every season. Small issues can become bigger problems if left untreated.
- Look for Rot: If your deck has wooden components, check for signs of wood rot and replace damaged boards promptly.
Seal Your Deck
- Apply a Sealer: Use a quality sealer every couple of years to protect against water and UV damage. This enhances the color and extends the life of your materials.
- Choose the Right Product: Select a sealer appropriate for your deck material. For example, use a penetrating sealer for wood and a clear acrylic for composite materials.
Protect Against Weather
- Use a Cover: Consider using a cover when your pool’s not in use. This protects both the deck and the pool from weather conditions.
- Clear Snow and Ice: In winter, remove snow and ice as soon as possible to prevent damage and maintain safety.
Maintain Surrounding Areas
- Trim Landscaping: Keep plants and trees trimmed back. This prevents roots from damaging your deck and reduces debris buildup.
- Manage Drainage: Ensure proper drainage to avoid water pooling around your deck. This mitigates moisture-related problems.
- Install Mats: Use non-slip mats or coatings to enhance safety, especially in high-traffic areas.
- Consider Textured Surfaces: Choose materials with a textured finish to improve grip and reduce slipping risks.
Regular maintenance not only preserves the beauty of your pool deck but also ensures a safe environment for you and your family. Consistent care leads to fewer repairs and enhances your outdoor space’s enjoyment.
Conclusion
Creating your own pool deck can be a rewarding project that adds both beauty and functionality to your backyard. With a bit of planning and the right tools you can craft a space that suits your style and meets your family’s needs.
Remember to keep up with maintenance to ensure your deck stays safe and inviting for years to come. By investing time in care and upkeep you’ll maximize your enjoyment and protect your investment.
So grab your tools and get started on your DIY journey. Your perfect poolside oasis is just around the corner!
Frequently Asked Questions
What are the benefits of building a DIY pool deck?
Building a DIY pool deck allows homeowners to save money while creating a personalized outdoor space. It offers flexibility in design and materials, enabling you to tailor it to your style and budget. Plus, engaging in the project can be a rewarding experience, enhancing the joy of outdoor living.
What tools do I need to build a pool deck?
Essential tools for building a pool deck include a saw, drill, measuring tape, level, and safety gear like gloves and goggles. Depending on your design, you may also need a sander, a nail gun, or a concrete mixer. Having the right tools ensures a smoother construction process.
What materials are best for a DIY pool deck?
Common materials for a DIY pool deck include pressure-treated wood, composite decking, and pavers. Each material has its benefits: wood provides a classic look, composite is low-maintenance, and pavers offer durability and design options. Choose materials based on your budget, climate, and desired aesthetics.
How can I maintain my pool deck?
Regular maintenance for your pool deck includes cleaning it weekly, inspecting for damage each season, and sealing it every few years. Additionally, protect it from the weather and ensure landscaping is tidy. Using non-slip mats can enhance safety, making the area enjoyable for family and friends.
Why is sealing important for a pool deck?
Sealing a pool deck prevents moisture from damaging the material, reduces the growth of mold and mildew, and maintains its appearance. A good sealant adds a protective layer, making it easier to clean while extending the life of your deck, ensuring it remains safe and beautiful for years.