
In this comprehensive guide on Gunite Pool Plastering, we’ll dive deep into everything you need to know about this essential aspect of pool maintenance and renovation.
Whether you’re a pool owner looking to refresh your pool’s appearance or a homeowner considering the installation of a new Gunite pool, this guide has you covered. From understanding the benefits to learning about the process and maintenance, we’re here to provide you with valuable insights and expert advice.
So, let’s jump in and explore the world of Gunite pool plastering, ensuring your pool remains a source of joy and relaxation for years to come.
Table of Contents
- 1 The Procedure for Plastering a Pool
- 1.1 Step 1 – Select a Plastering Color
- 1.2 Step 2 – Draining the Pool
- 1.3 Step 3 – Relieve Hydrostatic Pressure
- 1.4 Step 4 – Remove Old Plaster
- 1.5 Step 5 – Examine For Cracks & Hollows
- 1.6 Step 5 – Acid Wash
- 1.7 Step 6 – Bond-Kote
- 1.8 Step 7 – Applying The Plaster
- 1.9 Step 8 – Scrub The Entire Surface
- 1.10 Step 9 – Installing New Tile & Coping
- 1.11 Step 10 – Final Inspection
- 1.12 Step 11 – Refill & Pool Startup
- 2 How Much Does Pool Plastering Cost
- 3 Conclusion
- 4 Frequently Asked Questions
The Procedure for Plastering a Pool
The process of plastering a pool can be extensive and intricate. Here’s a detailed breakdown of each of the steps you provided:
Step 1 – Select a Plastering Color
Selecting the right plaster color for your pool can greatly influence its aesthetic appeal. The color you choose will affect the appearance of the water and can also play a role in the pool’s perceived depth and warmth. Here’s a guide to help you choose the perfect plaster color:
- Consider the Pool’s Surroundings: Look at the landscaping, patio, deck, and other structures around the pool. Select a color that complements these elements. Think about the vibe you want. A tropical setting might call for lighter blues, while a more modern, sleek look might lean towards darker or neutral tones.
- Traditional White: The classic choice, white plaster gives a bright, clean look and reflects sunlight to make the water appear a light blue. It’s usually the most affordable option.
- Shades of Blue: Light blues give a tropical, Caribbean feel to the pool. Medium blues offer a deeper, more serene appearance. Dark blues can give the pool a lagoon-like look, making it appear deeper and more mysterious.
- Grays & Blacks: These can give the pool a natural pond or lagoon appearance. The water will appear a deeper blue or even slightly green. Black plaster can absorb more heat, potentially warming the pool water.
- Tans & Beige: These colors can mimic a sandy beach, providing a natural, beachy feel. The water will take on a slightly green hue.
- Pebble or Quartz Finishes: These are not strictly colors, but they add texture and a variety of color specks to the plaster. They can be more durable than traditional plaster and offer a unique, luxurious look.
- Reflectivity: Some modern plasters incorporate tiny, reflective beads or materials that shimmer in the sunlight, adding an extra layer of allure.
- Maintenance & Longevity: Lighter colors might show stains or algae growth more readily than darker colors. Darker colors, especially black, can fade over time due to the effects of pool chemicals and sunlight.
- Safety: Consider visibility. In deeper pools, dark colors can make it hard to see the bottom, which can be a safety concern.
- Get Samples: If possible, obtain plaster samples. Place them underwater to see how the color changes when submerged. Some pool companies may have showrooms or customer pools you can visit to see different plaster colors in action.
Step 2 – Draining the Pool
Draining a swimming pool is a crucial step before any major maintenance, repair, or renovation work like plastering. However, it’s not as simple as just letting the water out. Here’s a step-by-step guide on how to safely and efficiently drain your pool:
- Check Local Regulations: Before starting, check with local authorities or water districts. Some areas have regulations or restrictions on draining pool water, especially if the water might run off into storm drains.
- Prepare for Draining: Ensure the area where the water will be discharged can handle the volume without causing erosion or flooding. Consider the environment. Chlorinated water can harm plants and aquatic life.
- Turn Off the Pool Equipment: Make sure to turn off the pool pump, heater, and any other equipment to avoid damage.
- Set Up a Submersible Pump: You’ll need a submersible pump to drain the pool. These can be rented from equipment rental companies if you don’t own one. Place the pump at the lowest point of the pool, usually the deep end.
- Start Draining: Connect a discharge hose to the pump. Make sure the other end is positioned where you want the water to drain. Turn on the pump and start draining. Monitor the process to ensure there are no issues.
- Monitor the Drainage: As the water level drops, watch for any debris or dirt that may have settled on the bottom. You may need to remove this debris to prevent it from clogging the pump.
- Safety Precautions: As the pool empties, there can be a risk of the pool “floating” or lifting out of the ground due to groundwater pressure. If you notice the pool starting to shift or if you hear unusual sounds, stop the draining process immediately. Make sure the area around the pool is secured to prevent anyone from accidentally falling into the empty pool.
- Complete the Drainage: Once the water level is as low as the pump can get it, you can use buckets or a wet/dry shop vacuum to remove the remaining water.
Step 3 – Relieve Hydrostatic Pressure
Relieving hydrostatic pressure is vital when draining a swimming pool. Hydrostatic pressure refers to the pressure exerted by groundwater surrounding the pool shell. If a pool is emptied and the hydrostatic pressure is not relieved, the pressure from the groundwater can cause the pool to lift or “float” out of the ground, leading to significant damage. Here’s how to relieve hydrostatic pressure:
- Understand the Risk: Pools in areas with high water tables or those that have recently received significant rainfall are at a greater risk. Even if you think you’re in a low-risk area, always take precautions.
- Hydrostatic Relief Valves: Many pools are equipped with hydrostatic relief valves, usually located in the deep end. These valves automatically open if the pressure outside the pool becomes greater than inside, allowing groundwater to enter and equalize the pressure. Before draining the pool, check to see if these valves are present and functional.
- Manual Relief: If you don’t have hydrostatic relief valves or are unsure of their functionality, you can manually relieve the pressure. Drill relief holes in the lowest part of the pool. These holes allow groundwater to seep into the pool if the hydrostatic pressure rises. Remember, these holes will need to be patched up after the pool maintenance is complete.
- Monitor the Groundwater: As you drain the pool, keep an eye on the groundwater level. If you start to see water seeping into the pool from the bottom or the sides, it’s a sign that the groundwater level is high. If this happens, you might need to halt the draining process and consider consulting a professional.
- Consider Professional Help: If you’re unsure about any of the steps or the risks involved, it might be best to hire a pool professional. They can assess the situation, ensure that hydrostatic pressure is adequately relieved, and provide guidance on safe pool draining.
Step 4 – Remove Old Plaster
Removing old plaster from a swimming pool is an essential step in the resurfacing process. It ensures that the new plaster adheres properly and provides a smooth finish. The removal of old plaster can be labor-intensive, and it’s crucial to follow appropriate procedures to prevent damage to the pool’s underlying structure. Here’s a step-by-step guide:
- Safety First: Wear protective gear, including safety goggles, gloves, and a dust mask or respirator. This will protect you from dust, debris, and any chemicals that might be released during the process. Ensure the work area is well-ventilated.
- Choose the Right Tool: For small areas or minor repairs, a heavy-duty chisel and hammer may suffice. For larger pools or more extensive plaster removal, consider using a pneumatic chipping hammer or a jackhammer with a chisel bit. These tools can speed up the process significantly.
- Start Chipping Away: Begin at the top of the pool and work your way down. This ensures that debris falls to the bottom, making cleanup easier. Hold your tool at a slight angle to the pool’s surface and chip away the old plaster in sections. Be cautious not to damage the gunite or shotcrete (concrete layer) underneath.
- Remove Major Debris: As you work, periodically stop to remove large chunks of plaster and debris. This keeps the work area clear and prevents tripping hazards.
- Grinding: After chipping away the bulk of the old plaster, you might notice some areas where remnants are still adhered. Use a heavy-duty grinder or a diamond grinding wheel to smooth out these spots and ensure an even surface.
- Clean the Pool: Once all the old plaster is removed, thoroughly clean the pool. This includes sweeping, vacuuming, and washing down the surfaces to remove all dust and debris. A clean surface is vital for the new plaster to adhere properly.
- Neutralize the Surface: If you’ve used any chemicals or if there’s residual old plaster, consider applying a neutralizing wash to the pool’s surface. This will ensure a proper bond for the new plaster.
Step 5 – Examine For Cracks & Hollows
Examining your pool’s surface for cracks and hollow spots is crucial before proceeding with any resurfacing project. These imperfections can lead to more significant problems down the road if not addressed, such as water leakage or further structural damage. Here’s how to go about it:
- Visual Inspection: Start with a thorough visual inspection of the entire pool surface. Look for visible cracks, chips, or areas of discoloration. Ensure you have proper lighting, especially if inspecting deeper parts of the pool.
- Physical Inspection: Gently tap the pool’s surface using a small hammer or the back of a screwdriver. Listen for a hollow sound. Solid plaster will produce a sharp, solid sound, while hollow or delaminated areas will sound dull or empty. Mark any hollow-sounding areas with chalk or a waterproof marker for repair.
- Types of Cracks:
- Surface Cracks: These are fine, superficial cracks in the plaster. They usually don’t penetrate deeply and are often caused by shrinkage during the plaster’s curing process.
- Structural Cracks: These are deeper, more severe cracks that extend through the plaster and into the underlying gunite or shotcrete. They can be caused by ground movement, poor construction, or significant pressure differences.
- Measure and Document: For any significant cracks, measure their length, width, and approximate depth. This information can be useful for repair estimates and to understand the extent of the damage. Consider taking photos of the cracks and hollow spots for documentation and future reference.
- Check the Pool’s Surroundings: Sometimes, the cause of cracks in the pool can be external. Check for signs of ground shifting or erosion around the pool area. Tree roots growing near the pool can also exert pressure and cause cracks.
- Consider a Professional Inspection: If you discover multiple cracks, especially structural ones, or if you’re unsure about the extent of the damage, consider hiring a professional. They can provide a comprehensive assessment and recommend appropriate repairs.
- Addressing the Issues:
- Hollow Spots: These areas can be chipped out and then refilled with a fresh plaster patch.
- Surface Cracks: These can often be filled in with a plaster patch or sealed to prevent water infiltration.
- Structural Cracks: These require more extensive repair. The crack needs to be widened slightly (often using a grinder) to create a V-shape. Then it’s filled with a high-quality, waterproof pool patch material. If the crack is significant, it might require staples or stitching (a process where metal staples are installed across the crack to hold it together) before being sealed.
Step 5 – Acid Wash
Acid washing, often referred to as an “acid bath”, is a cleaning process used to remove stains, mineral deposits, and other discolorations from a pool’s plaster or concrete surface. It can restore a brighter, more uniform appearance to the pool. However, acid washing is a potent method and should be used with caution. Here’s a step-by-step guide:
- Safety Precautions: Always wear appropriate protective gear, including rubber gloves, safety goggles, and a respirator or mask to protect against fumes. Ensure the work area is well-ventilated. Keep children and pets away from the pool during the process.
- Prepare the Acid Solution: Typically, a mixture of one part muriatic acid to one part water is used. However, always follow the manufacturer’s recommendations. Always add acid to water, not the other way around, to avoid a dangerous exothermic reaction.
- Wet the Pool Surface: Before applying the acid solution, thoroughly wet the pool’s surface using a hose. This will prevent the acid from being absorbed too quickly.
- Apply the Acid Solution: Using a plastic watering can or a similar container, pour the acid solution over a small section of the pool’s surface. Work in sections to manage the process more easily. Allow the solution to sit for a few minutes, but don’t let it dry.
- Scrubbing: Using a long-handled acid-resistant brush, scrub the pool’s surface. This helps in removing stubborn stains and mineral deposits.
- Neutralize the Acid: After scrubbing, neutralize the acid by applying a base like soda ash. This will prevent the acid from continuing to etch the surface. Typically, a mixture of 2 lbs of soda ash per gallon of acid used is recommended, but follow manufacturer’s guidelines.
- Rinse Thoroughly: Thoroughly rinse the pool’s surface with water, ensuring that all acid residues are washed away.
- Repeat if Necessary: If stains or discolorations remain, you might need to repeat the acid wash. However, frequent acid washing can thin and weaken the pool’s plaster, so it’s not recommended to do this often.
- Dispose of the Acid Properly: The runoff water will contain acid, so it’s crucial to neutralize it before disposal. Additionally, check local regulations for guidelines on disposing of acidic water. Avoid allowing acid runoff to enter storm drains or natural water sources.
Step 6 – Bond-Kote
Bond-Kote is a proprietary product designed to create a strong bond between a pool’s existing surface and a new layer of plaster or other finish. It’s often used in pool resurfacing projects to ensure the new finish adheres well and lasts longer. Here’s a guide on how to apply Bond-Kote:
- Mix Bond-Kote: Follow the manufacturer’s instructions carefully when mixing Bond-Kote. Typically, it comes in a powdered form that you’ll mix with water until it reaches a paint-like consistency.
- Dampen the Surface: Lightly mist the pool’s surface with water. The surface should be damp but not puddling. Bond-Kote adheres better to a damp surface.
- Apply Bond-Kote: Using a thick-bristle brush or a squeegee, apply a thin, even layer of Bond-Kote to the pool’s surface. Start from the deep end and work your way up, ensuring you cover all areas. Make sure to work quickly, as Bond-Kote can start to set in about 20-30 minutes.
- Texture the Surface: After applying, use a broom to lightly sweep across the surface. This creates a texture that further helps the new plaster or finish adhere.
- Let it Dry: Allow the Bond-Kote to dry for a minimum of 4-6 hours, though some manufacturers might recommend letting it set overnight. Check the product’s instructions for specific drying times.
Step 7 – Applying The Plaster
Applying plaster to a pool is a critical step in the resurfacing process. When done correctly, it provides a smooth, durable surface that can last for many years. Here’s a step-by-step guide on how to apply plaster to a pool:
- Prepare the Plaster Mix: Plaster for pools typically consists of white cement, white marble aggregate, and water. Some mixes might include additives or pigments for color. Mix the plaster according to the manufacturer’s instructions. Ensure a smooth, lump-free consistency. A mechanical mixer is often used for this purpose.
- Wet the Pool Surface: Dampen the pool’s surface with water. This helps the plaster bond better and prevents it from drying out too quickly during application.
- Apply the Plaster: Starting from the deep end, apply the plaster mix using a trowel. Spread it evenly across the surface, ensuring a consistent thickness. Work in small sections, moving from the deep end to the shallow end. A typical plaster layer is about 3/8 to 1/2 inch thick.
- Smooth the Surface: Once you’ve applied the plaster to a section, go back over it with a clean trowel to smooth and finish the surface. It’s crucial to work relatively quickly, as the plaster will begin to set in about 4-5 hours.
- Finishing Touches: After the entire pool has been plastered, skilled workers will often give it a final pass to ensure a smooth and even finish. Any imperfections or trowel marks are smoothed out.
- Curing the Plaster: Once the plastering is complete, it’s essential to let it cure properly. This strengthens the plaster and ensures longevity. Begin filling the pool with water as soon as possible after plastering is done. Do not stop the water flow until the pool is full. A continuous stream of water reduces the chances of uneven curing or staining. The plaster will continue to cure even after the pool is filled with water. The total curing time can be several days to a few weeks.
Step 8 – Scrub The Entire Surface
Scrubbing the entire surface of a newly plastered pool is a crucial step known as the “brushing” process. This helps in removing any loose plaster dust and fine particles that can form on the surface as the plaster cures. It also aids in preventing the formation of rough spots or calcium deposits. Here’s how to effectively scrub or brush the entire surface of a freshly plastered pool:
- Start Early: Begin the brushing process within a day or two after the pool has been plastered and filled with water. The plaster will still be curing, and this is the time when most of the plaster dust will form.
- Use the Right Brush: Use a nylon-bristled pool brush. Avoid wire brushes unless specifically recommended, as they can damage the new plaster. For pools with a pebble or aggregate finish, a combination brush (nylon and stainless steel) might be more effective at removing stubborn debris.
- Begin at the Shallow End: Start brushing from the shallow end of the pool and work your way toward the deep end. This allows the loosened materials to be pushed toward the main drain.
- Brush Methodically: Use long, overlapping strokes. Ensure that you cover every inch of the surface, including walls, steps, and other features. Pay extra attention to corners, steps, and other areas where plaster dust might accumulate.
- Brush Twice Daily: For the best results, brush the pool at least twice a day for the first week after plastering. This might seem frequent, but it’s crucial in ensuring a smooth, even finish as the plaster cures.
- Maintain Filtration: Ensure that the pool’s filtration system is running. This helps in capturing and removing the plaster dust and debris that gets brushed off.
Step 9 – Installing New Tile & Coping
Installing new tile and coping can significantly enhance the aesthetic appeal of a pool, giving it a fresh and updated look. Whether you’re replacing old, damaged tile and coping or simply updating for aesthetic reasons, the process requires precision and attention to detail. Here’s a step-by-step guide:
- Select Materials: Choose tiles and coping that suit your aesthetic preferences and are appropriate for pool environments. They should be resistant to pool chemicals, UV rays, and temperature changes. Ensure you have enough material to cover the intended area with some extras for future repairs or replacements.
- Layout and Design: Before adhering anything, lay out the tiles and coping to visualize the final look. This allows you to adjust the design, ensure patterns match, and cut tiles if necessary.
- Installing Tiles: Apply a waterproof thin-set mortar or adhesive to the pool’s edge using a notched trowel. Firmly press each tile onto the adhesive. Use tile spacers to ensure even gaps for grout. Allow the tiles to set for the time recommended by the adhesive manufacturer, typically 24 hours.
- Grouting: After the tiles have set, apply waterproof grout between them. Use a rubber float to press the grout into the spaces and to smooth the surface. Wipe away excess grout with a damp sponge, ensuring the tiles remain clean. Allow the grout to cure for the recommended time, typically another 24 hours.
- Installing Coping: Coping is the material that caps the pool shell wall. Depending on your choice (stone, concrete, brick, etc.), the installation method can vary. For most materials, you’ll apply a thick layer of mortar to the pool’s edge and press the coping into place. Ensure the coping is level and that joints are consistent. Fill any gaps with mortar.
- Sealing: Once the coping is installed and the mortar has cured, consider sealing the coping, especially if it’s a porous material like natural stone. This will protect it from water, chemicals, and stains.
- Final Touches: Clean any excess adhesive, grout, or mortar from the pool area.
Step 10 – Final Inspection
The final inspection is a crucial step in the pool plastering and resurfacing process. It ensures that all the work has been completed to standard, identifies any potential issues, and confirms that the pool is safe and ready for use. Here’s a checklist to guide you through a comprehensive final inspection:
- Visual Inspection: Check the pool’s surface for uniformity in color and texture. Ensure there are no visible cracks, bubbles, or rough patches. Verify that the tile line is straight and level, and that grouting is consistent without gaps. Examine the coping for evenness and proper sealing.
- Surface Smoothness: Gently run your hand over the pool’s surface. It should feel smooth without any sharp edges or rough spots. Pay particular attention to areas near fittings, drains, or where repairs were made.
- Fittings and Fixtures: Ensure all fittings, such as skimmers, return jets, drains, and lights, are securely in place and properly sealed. Check that light fixtures are correctly installed, and there’s no water inside the light housings.
- Equipment Check: Verify that the pool pump, filter, and heater (if applicable) are working correctly. Check for any leaks or unusual noises when the equipment is running.
- Safety Features: Inspect safety features such as handrails, ladders, and diving boards. Ensure they are securely anchored. Check safety barriers, fences, or gates for proper operation.
- Deck and Surrounding Area: Inspect the pool deck for any cracks, uneven areas, or potential tripping hazards. Ensure the deck’s drainage system is clear and functioning to prevent water pooling.
Step 11 – Refill & Pool Startup
Refilling the pool and starting it up correctly after plastering or resurfacing is crucial to ensure the longevity and appearance of the new surface. Here’s a guide on how to properly refill and start up your pool:
- Begin Refilling: Use a clean garden hose with a soft cloth tied to the end to prevent any metal from the hose nozzle touching the fresh plaster. Place the hose at the deep end of the pool to reduce any potential surface damage. Begin filling the pool with water. It’s crucial not to stop the water flow until the pool is entirely full to prevent any waterline marks on the fresh plaster.
- Monitor the Fill: Keep an eye on the pool as it fills to ensure there are no issues, such as leaks or areas where the water flow is eroding the new surface. Remove any debris that might fall into the pool during the filling process.
- Balance the Water: Once the pool is full, you’ll need to balance the water chemistry. New plaster can significantly affect water parameters. Test and adjust the pH, which will likely be high due to the new plaster. Aim for a pH level between 7.2 and 7.6. Monitor and maintain alkalinity between 80-120 ppm. Keep chlorine levels low (around 1.0 ppm) for the first couple of weeks to prevent plaster discoloration. Monitor calcium hardness and aim for a level between 200-400 ppm. Do not add salt to a newly plastered saltwater pool for at least three weeks to allow the plaster to cure.
- Pool Equipment: Clean and backwash the pool filter to ensure it’s ready for operation. Turn on the pool pump and filtration system. Run the pump continuously for at least the first 72 hours. Check and clean the pool skimmers. Ensure there are no leaks and that all equipment is operating correctly.
- Heating: If your pool has a heater, avoid turning it on for at least the first two weeks. The curing plaster generates heat, and additional heating can lead to plaster scaling or other issues.
- Additional Chemicals: Avoid using any pool clarifiers, algaecides, or other additional chemicals for the first 30 days unless there’s a specific issue that requires it.
- Regular Monitoring: For the first month, test the pool water chemistry frequently (daily if possible). The new plaster can cause rapid changes in water parameters.
- Limit Pool Usage: It’s best to wait at least a week before swimming in the newly plastered pool. This gives the plaster time to begin the curing process and allows for initial water chemistry adjustments.
How Much Does Pool Plastering Cost
The average cost of plastering an inground swimming pool falls in the $2,300–5,600 range, including materials and labor. The total cost will depend on factors such as the size of the pool and your location. The cost per square foot is around $4.
Repairs for small cracks can cost between $110 and $300. Additionally, factors such as
- the type of plaster
- draining and refilling the pool
- geographic location
- permits
may also affect the overall cost.
It is recommended to consult with pool plastering professionals in your area to get accurate quotes and estimates.
Recommended Products
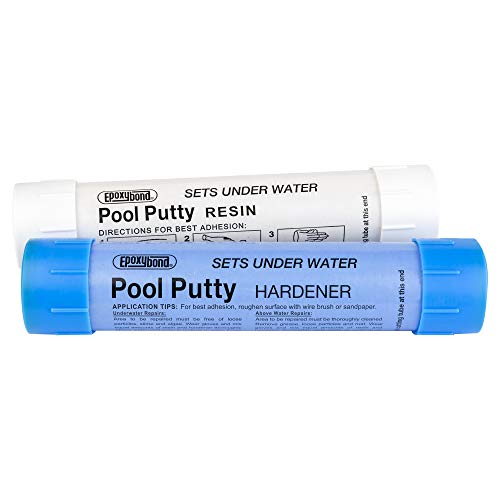
SAFE AND LASTING HAND-MOLDABLE PUTTY APPLY TO FIX LEAKS UNDERWATER: So easy and safe to use. Simply mix 1-to-1, mold putty in your hands, and apply to the area where leak or crack.

country of origin : United States
Conclusion
Gunite pool plastering is a versatile and durable method for finishing swimming pools. It offers several advantages, including strength, longevity, and the ability to create custom shapes and designs.
However, it’s crucial to ensure proper installation and maintenance to maximize its benefits and prevent issues like cracking or staining. With the right care, a gunite plastered pool can provide years of enjoyment and aesthetic appeal for homeowners.
So, whether you’re building a new pool or renovating an existing one, gunite plastering remains a popular choice for creating beautiful and functional aquatic spaces.
Frequently Asked Questions
1. How long does it take to plaster a pool?
The process of plastering a pool typically takes one day for the actual application, depending on the size and complexity of the pool. However, when considering the entire process, including draining the pool, surface preparation, and plaster curing time, it can extend to several days. After plastering, the pool needs to be immediately filled with water, and it’s recommended to let the plaster cure for at least a week before allowing swimmers.
2. What are the top types of pool plastering finishes?
Traditional white plaster, a mixture of white cement and crushed marble, is a classic choice known for its smooth texture and bright appearance. For those seeking more resilient and stain-resistant finishes, quartz aggregate finishes, like Diamond Brite, combine plaster with quartz particles, providing a range of colors and added durability. Pebble finishes, which embed small stones in the plaster, are popular for their natural, lagoon-like appearance and long lifespan. Additionally, there are polished and glass bead finishes that give the pool a luxurious, shimmering appeal.
3. What are the top pool plastering colors?
While white remains a classic choice for its bright and clean appearance, there’s a growing trend towards colored plaster to achieve different water hues and aesthetic feels. Popular colors include shades of blue, gray, and beige. Lighter colors, like soft blues and whites, provide a tropical, clear water appearance, while darker tones, such as deep blues and blacks, can give the pool a more natural, lagoon-like look. The chosen plaster color can significantly affect the water’s apparent color and overall ambiance of the pool area.
4. Does pool plastering fix cracks and leaks?
While pool plastering can address superficial cracks and provide a new, smooth surface, it’s not a definitive solution for structural cracks or significant leaks. Before plastering, any cracks in the pool shell should be properly repaired to ensure they don’t lead to further issues down the line. Structural cracks might require more extensive repairs, like injecting epoxy or even installing staples across the crack. If a pool has leaks, it’s essential to identify and fix the source of the leak before plastering. Simply plastering over cracks or leaks without proper repair can lead to more significant problems in the future.