
A luxurious gunite pool nestled in your backyard is a haven of relaxation and recreation. But what happens when this oasis starts losing water, or worse, incurs damage due to undetected leaks? The importance of promptly identifying and repairing pool leaks cannot be overstated.
Not only do leaks lead to water wastage, but they can also cause structural damage and spike maintenance costs. In this comprehensive guide, we delve into the intricate world of gunite pools and equip you with the knowledge to effectively detect and remedy leaks.
Whether you’re a seasoned pool owner or a newcomer to the world of pool maintenance, this article aims to provide you with valuable insights into the process of leak detection and repair for gunite pools. Let’s dive in and explore the art of preserving your pool’s pristine beauty and functionality.
Table of Contents
- 1 Key Takeaways
- 2 Essential Tools and Materials for Leak Detection
- 3 How Do You Detect a Leak in a Gunite Pool
- 4 How to Repair Detected Leaks?
- 5 The Importance of Detecting and Addressing Pool Leaks
- 6 Common Causes of Pool Leaks
- 7 Signs Your Gunite Pool May Have a Leak
- 8 Ruling Out Other Causes of Water Loss
- 9 When to Call a Professional for Pool Leak Detection and Repair
- 10 Tips for Preventing Future Leaks in Your Gunite Pool
- 11 Conclusion
- 12 Frequently Asked Questions (FAQs)
- 12.1 1. How do you know if your gunite pool is leaking?
- 12.2 2. Where is the most common place for inground pool leaks?
- 12.3 3. How do you find a leak in a pool without draining it?
- 12.4 4. How do I find a leak in my pool under concrete?
- 12.5 5. How long does it take to repair a leak in a gunite pool?
- 12.6 6. Can a leak in a gunite pool cause other damage?
- 12.7 7. Are gunite pool leaks covered by insurance?
Key Takeaways
- The bucket test is a simple yet valuable method for determining if water loss in your gunite pool is due to evaporation or a leak.
- A thorough equipment check is important to inspect all components and plumbing of your pool for signs of leaks.
- A physical inspection of the pool’s shell, fittings, and vulnerable areas is necessary to uncover any hidden leaks.
- The pressure test is an advanced technique that involves isolating sections of the plumbing system and pressurizing them to detect leaks.
- Using specialized tools and materials, such as dye testing kits, underwater dye injectors, and listening devices, can aid in leak detection.
- Repairing minor leaks can be done with vinyl liner patch kits, fiber reinforced polymer repair, hydraulic cement, liquid rubber coatings, polyurethane foam injection, or professional assistance.
- It is important to detect and address pool leaks promptly to prevent water wastage, structural damage, and increased maintenance costs.
- Common causes of pool leaks include cracked shells, damaged plumbing lines or fittings, and deteriorated seals or gaskets.
- Signs of a potential pool leak include rapid water loss, damp spots or puddles around equipment, discoloration or moisture around fittings, and cracks or irregularities in the pool shell.
- Before calling a professional for pool leak detection and repair, it is important to rule out other causes of water loss, such as evaporation or equipment malfunctions.
- Preventing future leaks in your gunite pool can be achieved by regular maintenance, proper installation of equipment and fittings, and addressing any issues promptly.
Essential Tools and Materials for Leak Detection
Effective leak detection in a gunite pool requires the right tools and materials to accurately identify and locate potential leaks. Equipping yourself with the following essentials will streamline the process and ensure accurate results:
- Dye Testing Kit: A dye testing kit consists of concentrated dye that can be added to the water at various points in the pool. If a leak is present, the dye will be drawn towards the leak, helping you pinpoint the area of concern.
- Pool Leak Detection Dye: Specifically formulated pool leak detection dyes are available, designed to stand out against the pool water and make it easier to spot movement caused by a leak.
- Underwater Dye Injector: This tool allows you to inject the dye directly into cracks, crevices, or suspected leak areas underwater, aiding in the detection of leaks below the waterline.
- Pressure Testing Equipment: Pressure testing involves sealing off sections of the pool’s plumbing system and applying air pressure to identify leaks. A pressure testing kit includes plugs, gauges, and hoses necessary for this process.
- Listening Device or Leak Detector: These devices amplify underwater sounds, making it easier to hear leaks. They are especially useful for identifying leaks in plumbing lines or equipment.
- Pool Patch Kit: In the process of leak detection, you might identify minor leaks that can be temporarily patched until a more permanent repair can be conducted. A pool patch kit containing appropriate sealants and materials is essential.
- Marker Flags or Tape: Use these to mark areas where leaks are detected during the testing process. This ensures that you don’t lose track of the identified leak locations.
- Pool Water Level Marker: A simple measuring tool to help you monitor and measure water level changes accurately during the testing period.
- Goggles and Snorkeling Gear: Clear vision underwater is crucial for effective leak detection. Goggles and snorkeling gear allow you to closely inspect the pool’s interior for cracks, gaps, and other potential leakage points.
- Bright Flashlight: A powerful flashlight is essential for examining the pool’s interior, especially hard-to-reach areas where leaks may be present.
- Trowel and Brushes: These tools help clear away debris and sediment from suspected leak areas, allowing for a clear view during inspection.
- Camera or Smartphone: Capturing clear images or videos of suspected leak areas underwater can be helpful for documentation and further analysis.
- Pool Repair Materials: Depending on the severity of leaks detected, you may need materials like epoxy putty, sealants, and patch kits for temporary or minor repairs.
- Notebook and Pen: Keeping detailed notes of the leak detection process, suspected areas, and observations is crucial for effective follow-up and repairs.
How Do You Detect a Leak in a Gunite Pool
Detecting a leak in your gunite pool might seem daunting, but with a systematic approach and the right tools, you can identify and address the issue effectively. In this guide, we’ll walk you through a step-by-step process to help you uncover the source of leaks and take the necessary steps to ensure your pool’s longevity and functionality.
From initial inspection to utilizing specialized techniques, you’ll gain the knowledge needed to tackle leak detection with confidence. Let’s dive into the process and preserve the beauty of your gunite pool.
Recommended Products
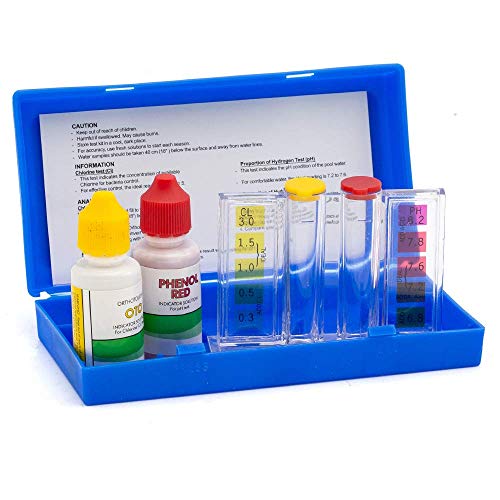
2 Way Pool Water Test Kit For Test For OTO, CL, and PH Level
The Bucket Test
The bucket test is a straightforward yet invaluable technique for identifying whether water loss in your gunite pool is due to evaporation or an actual leak. This method provides a reliable way to differentiate between natural evaporation and more concerning issues. Here’s a breakdown of the methodology and how to interpret the results:
Methodology
- Gather Supplies: You’ll need a large bucket (similar in size to a typical pool bucket or pail), a marker, and access to your pool.
- Fill the Bucket: Fill the bucket with water to about an inch from the top. This water should ideally be at the same temperature as your pool water.
- Mark Water Levels: Place the bucket on a pool step or ledge, ensuring that the water level inside the bucket matches the water level outside the bucket.
- Monitor for 24 Hours: Leave the bucket undisturbed for 24 hours while monitoring the pool water level and the water level inside the bucket.
Interpreting Results
- Equal Water Loss: After 24 hours, compare the water level inside the bucket with the water level in your pool. If both levels have decreased roughly the same amount, it indicates that the water loss is primarily due to evaporation. This is a positive outcome, indicating that your pool is likely not leaking significantly.
- Greater Pool Water Loss: If the water level in the pool has decreased significantly more than the water level in the bucket, it suggests that there might be a leak. This is a potential cause for concern and further investigation.
Differentiating Evaporation from a Leak
The key takeaway from the bucket test is comparing the rate of water loss inside the bucket with the rate of water loss in the pool. If both levels drop at a similar rate, evaporation is likely the main cause. However, if the pool’s water level drops more rapidly, a leak might be present.
Factors to Consider
- Weather Conditions: Keep in mind that weather conditions, such as temperature, humidity, and wind, can influence the rate of evaporation. Warmer and windier conditions lead to faster evaporation.
- Seasonal Variations: Different seasons can affect evaporation rates. During cooler months or in regions with higher humidity, evaporation might be less pronounced.
- Repeat the Test: If you’re uncertain about the initial results, consider conducting the bucket test on multiple occasions to gather more accurate data and confirm your findings.
The Equipment Check
Beyond the initial bucket test, a thorough equipment check is the next crucial step in your quest to locate leaks in your gunite pool. This comprehensive inspection focuses on your pool’s essential components and plumbing to pinpoint potential sources of water loss. Let’s delve into the details of how to examine your pool equipment and plumbing system for signs of leaks:
Inspect Equipment Pads
- Visual Examination: Begin by visually inspecting the equipment pads, which house the pool’s filtration, circulation, and heating systems. Look for any damp spots, puddles, or wetness around these components.
- Check Valves and Connections: Examine all valves, connections, and joints for moisture or drips. Pay special attention to areas where pipes connect to pumps, filters, and heaters.
- Pressure Gauge Monitoring: Observe the pressure gauge on your pool’s filter system. A significant and unexplained drop in pressure could indicate a leak in the filtration system.
Check Plumbing and Fixtures
- Skimmers: Examine the skimmer area for any visible cracks, gaps, or damage. Leaks around skimmers are common and can lead to significant water loss.
- Main Drains: Inspect the main drain covers for any cracks or gaps that might be allowing water to escape. Check the surrounding area for dampness or discoloration.
- Return Jets: Look for signs of leakage around return jets. Discoloration or moisture around these areas could indicate a potential issue.
- Plumbing Lines: Carefully inspect the plumbing lines that connect different components of your pool system. Look for dampness, pooling water, or signs of corrosion along the lines.
- Heater and Pump Connections: Examine the connections of the pool heater and pump to ensure there are no visible leaks or wet spots.
- Inspect Seals and Gaskets: Check the seals, gaskets, and O-rings in your pool system for signs of wear or damage. These components can degrade over time and lead to leaks.
Physical Inspection of the Pool
A thorough physical inspection of your gunite pool’s shell and its vulnerable areas is essential for uncovering hidden leaks and addressing potential issues. This hands-on approach allows you to directly assess the condition of your pool’s structure and identify signs of leaks. Here’s how to conduct a comprehensive physical inspection:
Check the Pool Shell
- Visual Examination: Begin by visually inspecting the entire interior surface of the pool. Look for any visible cracks, chips, or irregularities in the gunite shell. Pay attention to both the bottom and sides of the pool.
- Probe Gaps and Joints: Gently probe around gaps, joints, and seams with a non-invasive tool. Cracks might not be visible to the naked eye, but slight movement or an audible sound while probing can indicate potential issues.
- Tile Lines: Examine the tile lines around the perimeter of the pool. Displaced or cracked tiles can signify movement or structural shifts, which could contribute to leaks.
Look Around Fittings and Vulnerable Areas
- Lights and Fixtures: Examine the pool’s lighting fixtures for signs of water infiltration or damage. Leaks around lights can occur if their seals degrade over time.
- Coping and Deck: Assess the coping stones or materials that edge the pool, as well as the pool deck. Any shifts or separations could indicate ground movement that might lead to leaks.
- Steps and Ladders: Inspect the steps and ladders within the pool for secure attachments and potential sources of leaks, such as gaps around mounting points.
The Pressure Test
When you suspect a leak but can’t visually identify its location, a pressure test emerges as a valuable technique for detecting hidden leaks in your gunite pool’s plumbing system. This method involves isolating specific sections of the plumbing and pressurizing them to identify any drops in pressure, which can indicate the presence of a leak. Here’s how to effectively perform a pressure test and make the most of this advanced leak detection method:
Performing the Pressure Test
- Gather Equipment: To conduct a pressure test, you’ll need a pressure testing kit, including plugs, gauges, and hoses. Ensure the kit is compatible with your pool’s plumbing system.
- Isolate Sections: Begin by shutting off the valves that connect the pool’s different components, such as skimmers, return lines, and main drains. This isolates specific sections for testing.
- Attach Plugs and Gauges: Attach the plugs and gauges from the testing kit to the isolated sections. This seals off the section you’re testing and allows you to measure pressure accurately.
- Pressurize the System: Use an air compressor or a specialized pressure pump to increase the pressure within the isolated section. Monitor the pressure gauge closely to ensure you don’t exceed safe levels.
- Observe Pressure Drop: After pressurizing, watch the pressure gauge for a significant drop in pressure. A sudden loss of pressure indicates a potential leak in the isolated section.
- Investigate the Leaks: With a pressure drop identified, begin investigating the isolated section for leaks. Examine joints, connections, and valves for signs of moisture or water leakage.
Advantages of the Pressure Test
- Detects Hidden Leaks: The pressure test is effective at identifying leaks that are not immediately visible. This is particularly useful for pinpointing plumbing-related leaks.
- Precision and Accuracy: Pressure tests provide a precise way to locate leaks within a specific section of the plumbing system, allowing for targeted repairs.
- Minimizes Guesswork: Instead of relying solely on visual cues, the pressure test offers a data-driven approach to leak detection, reducing guesswork.
The Dye Test (Ink Test)
When you’ve narrowed down the suspected area of a leak, the dye test, also known as the ink test, becomes a valuable technique to pinpoint the exact location of the leak. This method capitalizes on the movement of the dye through the water, revealing even the tiniest of leaks. Here’s how to effectively utilize the dye test and why calm water is crucial for its success:
Performing the Dye Test
- Choose a Calm Day: Pick a day with minimal wind and little surface disturbance in the pool. This ensures that the dye’s movement remains controlled and accurate.
- Dilute the Dye: Dilute the leak detection dye as per the manufacturer’s instructions. The dye is typically concentrated and needs to be mixed with water before use.
- Apply the Dye: Stand near the suspected leak area, and carefully introduce a small amount of the diluted dye into the water. Allow it to disperse naturally without splashing or turbulence.
- Observe Movement: Watch the movement of the dye closely. If a leak is present, you’ll notice the dye being pulled toward the area of the leak due to the pressure difference.
- Focus on Direction: Pay attention to the direction in which the dye is moving. This will guide you toward the exact location of the leak.
Importance of Calm Water
- Accurate Movement Observation: Calm water allows you to accurately observe the movement of the dye. Wind and turbulence can create false movement, making it challenging to identify the actual source of the leak.
- Minimized Surface Disturbance: Surface ripples and waves can disrupt the movement of the dye and make it difficult to determine its direction accurately. Calm water minimizes these disturbances.
- Preserved Dye Concentration: In calm water, the dye remains concentrated and easily discernible, allowing you to track its movement more effectively.
Use Leak Detection Tools
When traditional methods fall short in identifying the source of a leak in your gunite pool, specialized leak detection tools come to the rescue. These advanced tools employ technology to pinpoint leaks with exceptional accuracy. Here’s how to harness the power of leak detection tools to achieve precise results:
Utilizing Acoustic Leak Detection
- Principle of Sound: Acoustic leak detection tools work on the principle of sound. They amplify sounds underwater, allowing you to hear even the faintest sounds associated with leaks.
- Equipment Setup: Use an underwater microphone or listening device specifically designed for leak detection. Position the device in the water and wear headphones to listen to amplified sounds.
- Listening for Sounds: Move the microphone across the pool’s surfaces, including the pool shell, plumbing lines, and fittings. Listen for any unusual sounds, such as hissing, bubbling, or dripping.
- Narrowing Down the Source: If you hear distinct sounds, use the microphone to pinpoint their origin. This helps you locate the precise area of the leak.
Thermal Imaging for Leak Detection
- Thermal Changes: Thermal imaging cameras detect variations in temperature. Leaks can cause water to have a different temperature compared to the surrounding areas, leading to detectable thermal changes.
- Using a Thermal Camera: Use a thermal imaging camera to scan the pool’s surface. Pay attention to areas where temperature differences are visible.
- Interpreting Results: Thermal imaging will display areas of differing temperatures as color variations. Look for temperature anomalies that might indicate the presence of a leak.
Smoke Testing for Plumbing Leaks
- Visualizing Air Flow: Smoke testing involves introducing harmless smoke or fog into the plumbing system. The smoke travels along the path of air, helping visualize the airflow and detect leaks.
- Introducing Smoke: Seal off the plumbing lines except for the one you’re testing. Introduce smoke through the open line, and watch where the smoke exits.
- Observing Smoke Movement: The smoke will exit the plumbing system at areas with leaks. You can identify these exit points and focus on repairing them.
Importance of Professional Help
- Expertise and Equipment: Utilizing leak detection tools requires expertise and proper equipment. Certified pool technicians possess the knowledge to operate these tools effectively.
- Complex Leaks: For complex leaks or if you’re unsure about the source, involving professionals ensures accurate detection and targeted repairs.
How to Repair Detected Leaks?
Once you’ve successfully identified leaks in your gunite pool, the next step is to address them promptly to prevent further water loss and potential damage. Here’s how to tackle minor cracks and leaks using various repair methods and materials:
Repairing Minor Cracks or Leaks
- Pool Patches: Pool patches are designed to seal small cracks and leaks in the pool’s shell. These patches are often made of durable materials that adhere well to the gunite surface. Clean the area around the crack, apply the patch following the manufacturer’s instructions, and smooth it to ensure a tight seal.
- Pool Putty for Skimmer Leaks: Skimmers are vulnerable areas for leaks. Pool putty is a versatile material that can be used to seal gaps or leaks around skimmers. Mold the putty to fit the contours of the skimmer and create a water-tight seal.
- Epoxy or Caulk for Light Leaks: Epoxy or caulk can be effective for sealing light leaks around fittings, fixtures, and other small gaps. Choose a product that is specifically designed for underwater use and follow the application guidelines carefully.
Vinyl Liner Patch Kits
- Patch Adhesive: If your gunite pool has a vinyl liner, leaks can occur in the liner itself. Vinyl liner patch kits typically include adhesive patches that can be applied to the affected area. Ensure the surface is clean and dry before applying the patch.
- Follow Manufacturer Instructions: Whether you’re using pool patches, pool putty, epoxy, or vinyl liner patch kits, it’s crucial to follow the manufacturer’s instructions precisely. Proper application ensures the effectiveness and longevity of the repair.
Fiber Reinforced Polymer (FRP) Repair
- Process: FRP is a composite material that can be used to reinforce and repair structural elements of your pool. This method involves applying layers of FRP to the affected area, creating a strong and durable seal.
- Advantages: FRP repairs are known for their longevity and effectiveness in reinforcing weakened or cracked sections of the pool shell. They provide added structural integrity to the repaired area.
Hydraulic Cement
- Application: Hydraulic cement can be used to seal larger cracks or gaps in the pool shell. It’s mixed with water to form a paste and then applied to the damaged area.
- Quick Setting: Hydraulic cement typically sets quickly, which can be advantageous for immediate repairs that require sealing before water intrusion continues.
Liquid Rubber Coatings
- Application: Liquid rubber coatings are applied as a liquid and can be used to seal cracks, gaps, and leaks in the pool shell. They create a flexible and waterproof barrier.
- Flexibility: The flexibility of liquid rubber coatings allows them to accommodate minor movement in the pool shell without compromising the seal.
Polyurethane Foam Injection
- Process: Polyurethane foam injection involves injecting foam into voids, gaps, or cracks. As the foam expands, it fills the space and creates a water-tight seal.
- Versatility: This method is versatile and can be used for both minor and moderate leaks. It’s particularly effective for filling voids in the pool’s structure.
Professional Assistance
- Complex Leaks: For larger or more complex leaks, seeking assistance from certified pool professionals is recommended. They have the expertise to assess the severity of the issue and perform repairs that ensure the pool’s structural integrity.
- Regular Inspections: After making repairs, continue to monitor the repaired areas and conduct regular pool inspections. This helps catch any recurrence of leaks early and prevents further damage.
Tips for Success
- Dry Surface: Before applying any repair materials, make sure the surface is dry and clean. Proper adhesion is essential for effective repairs.
- Work Safely: When making repairs underwater, prioritize safety. Use appropriate safety equipment and ensure you’re comfortable with the repair method you’re using.
- Document Repairs: Keep records of the repairs you’ve made, including the materials used and the location of the repairs. This information can be valuable for future reference.
The Importance of Detecting and Addressing Pool Leaks
Detecting and addressing pool leaks is a critical aspect of pool maintenance that goes beyond preserving water. Leaks, even seemingly minor ones, can have far-reaching consequences for your gunite pool’s integrity, water quality, and overall enjoyment. Here’s why promptly detecting and addressing pool leaks is of utmost importance:
Prevent Structural Damage: Leaking water can weaken the structural integrity of your pool over time. Moisture can seep into cracks, causing them to expand and potentially compromising the pool’s shell. Addressing leaks early can prevent costly and extensive repairs in the future.
Avoid Water Loss: Even a small leak can result in significant water loss over time. Consistently topping up your pool to compensate for leaks not only wastes water but also leads to higher water bills. Detecting and fixing leaks can help you conserve water and reduce your water expenses.
Preserve Water Chemistry: Leaking water introduces impurities and contaminants into your pool. This can upset the water chemistry and require more frequent chemical adjustments to maintain water balance. Fixing leaks helps you maintain cleaner and healthier pool water.
Prevent Landscape Damage: If your pool is surrounded by landscaping or other features, leaks can lead to erosion, soil saturation, and damage to nearby structures. Timely leak detection prevents potential damage to the surrounding environment.
Energy Efficiency: Leaking water from your pool can cause the water level to drop, affecting the efficiency of your pool’s circulation and filtration system. Your pool equipment might have to work harder to maintain proper circulation, leading to increased energy consumption.
Structural Safety: A leaking pool can compromise the stability of the ground surrounding it. This can create uneven surfaces, settling, or even sinkholes, posing safety risks to swimmers and others in the pool area.
Financial Savings: Fixing leaks promptly is often less expensive than dealing with the consequences of unchecked water damage. Early repairs can prevent the need for extensive structural and equipment repairs down the line.
Prolong Pool Lifespan: By addressing leaks and maintaining your pool’s structural integrity, you’re effectively extending the lifespan of your gunite pool. Regular maintenance and timely repairs can help you enjoy your pool for many more years.
Environmental Responsibility: Conserving water is an important environmental consideration. Addressing leaks demonstrates responsible water management and contributes to a more sustainable approach to pool ownership.
Peace of Mind: Knowing that your pool is in good condition, free from leaks and structural issues, provides you with peace of mind. You can enjoy your pool without worrying about hidden problems that might escalate over time.
Common Causes of Pool Leaks
Pool leaks can result from a variety of factors, ranging from natural wear and tear to external influences. Identifying the root cause of a leak is essential for effective repairs and long-term pool maintenance. Here are some common causes of pool leaks:
Structural Aging: Over time, the materials used in the construction of your pool, such as gunite or concrete, can deteriorate due to exposure to water, chemicals, and the elements. Cracks, gaps, and weakened areas can develop, leading to leaks.
Ground Movement: Ground shifting caused by geological factors, soil erosion, or settling can put stress on your pool’s structure, resulting in cracks and leaks. This is especially common in regions with unstable soil.
Poor Construction: Improper pool construction or inadequate sealing of joints and seams during installation can lead to leaks. Flaws in the construction process can become evident as the pool ages.
Freeze-Thaw Cycle: In colder climates, the freeze-thaw cycle can cause water to expand and contract within cracks, leading to their widening and potential leakage. This phenomenon is especially relevant for pools with concrete or gunite shells.
Pool Movement: Changes in water pressure, water levels, and temperature fluctuations can cause the pool shell to shift slightly. These movements can contribute to the development of cracks and leaks over time.
Wear and Tear: Regular usage of your pool, including swimmers entering and exiting the pool, can contribute to wear and tear on the pool’s shell, fixtures, and plumbing. This wear can result in leaks if not addressed promptly.
Plumbing Issues: Leakage within the pool’s plumbing system, including pipes, valves, and fittings, is a common cause of water loss. Corrosion, joint failure, and pressure issues can lead to plumbing leaks.
Pool Equipment Problems: Faulty or aging pool equipment, such as pumps, filters, and heaters, can cause water to leak. These leaks often occur around connections or fittings within the equipment.
Skimmer and Fitting Leaks: Skimmers, return jets, and other fittings embedded in the pool shell can develop leaks if their seals degrade or if they become dislodged.
Liner Damage (For Vinyl Pools): If your gunite pool has a vinyl liner, tears, punctures, or degradation of the liner material can lead to leaks. Liner leaks are especially relevant in vinyl-lined gunite pools.
Seal and Gasket Deterioration: Seals, gaskets, and O-rings used in fittings, valves, and equipment can degrade over time, leading to water leakage.
Incorrect Water Chemistry: Imbalanced water chemistry can corrode surfaces and fittings, leading to leaks. Proper water chemistry maintenance is essential for preventing this type of damage.
External Factors: Tree roots, landscaping elements, pests, or accidental damage can compromise your pool’s structure and cause leaks.
Signs Your Gunite Pool May Have a Leak
Maintaining the splendor of a gunite pool requires vigilance, and one of the most crucial aspects is detecting leaks early on. Identifying the signs that your pool might be leaking is essential to prevent further damage and ensure the longevity of your investment. Here are some telltale signs to watch out for:
Excessive Water Loss
While some water loss is expected due to evaporation, a sudden and substantial decrease in water level could signal a leak. If you find yourself topping up your pool more frequently, especially at a rate exceeding two inches per week, it’s a red flag that requires further investigation. Beyond the norm of evaporation, persistent water loss might indicate an underlying leak in your pool’s structure.
Algae Formation After Chemical Treatment
Efficient chemical treatment is designed to keep your pool water clear and free of algae. However, if you notice algae forming shortly after a chemical treatment, it could be linked to a leak. Leaking water introduces external contaminants, fostering an environment conducive to algae growth. Addressing the leak is vital to maintaining proper water quality and preventing recurring algae issues.
Cracks in the Pool Shell
Regularly inspect your pool’s interior for cracks in the gunite shell. Even seemingly minor cracks can escalate over time, potentially leading to leaks. Cracks can emerge due to factors such as ground movement, temperature fluctuations, and the natural wear and tear associated with pool usage. Early identification and repair of cracks are essential to prevent water seepage and structural damage. Read our do gunite pools crack article to know more.
Frequent Need to Add Water
While minor water level fluctuations are normal, constantly needing to add water to your pool to maintain the desired level indicates an underlying issue. If your pool is losing water at a faster rate than expected, it’s a sign that something might be wrong, possibly a leak. A persistent need for water addition suggests a need for thorough leak detection.
Unexplained Water Stains
Keep a close eye on your pool’s walls and deck for the appearance of water stains that were not present before. These stains can arise when water seeps through cracks or gaps in the pool’s structure. The presence of water stains serves as a visual indicator of possible leaks that warrant attention.
Unusually Lush or Wet Spots
If specific areas around your pool consistently remain wet or display abnormally lush vegetation, it’s worth investigating for potential water leakage beneath the surface. Leaking water can saturate the ground, leading to localized wetness and promoting the growth of plants in unexpected areas.
Decreased Water Pressure
If your pool features water-based attractions like waterfalls or fountains, a sudden drop in water pressure or reduced flow might point to a leak in the plumbing system. An undetected leak could be compromising the efficiency of these features, requiring prompt attention to maintain optimal water circulation.
Air Bubbles in the Pool
Keep a vigilant watch for air bubbles rising from cracks or gaps in the pool’s shell. The emergence of air bubbles can be a sign of water leakage. If you notice these bubbles, particularly in areas where they aren’t typically seen, it’s an indication that water is escaping and causing the air pockets to form.
Spongy or Soft Deck
The deck surrounding your pool can reveal signs of leakage. If certain areas of the deck become spongy or soft underfoot, it’s possible that water is seeping from the pool and affecting the ground underneath. Changes in the texture or feel of the deck warrant a closer inspection to determine if leakage is the cause.
Higher Chemical Usage
A leak can disrupt the chemical balance of your pool water. Diluted water due to leakage can lead to imbalances in chemical levels. If you find yourself using more chemicals than usual to maintain water quality, it might indicate that water loss is affecting the overall chemistry of the pool.
Increased Energy Bills
For pools with heating systems, leaks can cause the heater to work harder to maintain the desired water temperature. This increased workload can translate to higher energy bills. If you notice a sudden spike in your pool-related energy costs, it could be due to an unnoticed leak.
Visible Structural Damage
Keep a watchful eye on the pool’s overall structure, including both the pool itself and the surrounding deck. If you observe visible cracks, shifts, or changes in the pool’s appearance, it’s essential to investigate further. These changes could be signs of damage caused by leakage, and addressing them promptly can prevent more significant issues down the road.
Ruling Out Other Causes of Water Loss
Before jumping to conclusions about a leak in your gunite pool, it’s essential to consider and rule out other potential causes of water loss. Differentiating between evaporation, splashing, and actual leaks is crucial to accurately diagnose the issue. Additionally, taking into account seasonal factors that can affect water levels will provide a comprehensive understanding of the situation.
Evaporation
Evaporation is a natural process that occurs when water turns into vapor due to heat and air movement. It’s important to remember that some water loss is normal and expected, especially during warmer months or in regions with dry climates. To determine if evaporation is the primary cause of water loss, consider the weather conditions, temperature, and humidity levels. Using an evaporation calculator specific to your area can help estimate the expected evaporation rate.
Splashing and Usage
High pool activity, such as swimming, diving, or playing, can lead to water splashing out of the pool. This can contribute to water level reduction, particularly if the pool is frequently used by children or large groups. Assess the intensity of pool usage and its correlation with water loss. Installing pool covers during periods of high usage can minimize splashing and subsequent water loss.
Seasonal Factors
Different seasons can influence water levels in your pool. Rainfall can cause water levels to rise, while prolonged dry spells might increase evaporation rates. Take into account the patterns of water loss during various seasons. If you notice abnormal water loss during a season with typically low evaporation rates, it’s a sign that a leak might be contributing to the issue.
When to Call a Professional for Pool Leak Detection and Repair
While some minor leaks can be addressed with DIY methods, there are situations where it’s best to enlist the expertise of a certified pool professional. Here’s when you should consider calling a professional for pool leak detection and repair:
Persistent or Undetected Leaks: If you’ve attempted to identify and repair leaks yourself but the issue persists or you’re unable to locate the source, it’s time to bring in a professional. They have specialized tools and training to accurately detect and fix hard-to-find leaks.
Extensive Structural Damage: If you notice significant cracks, shifting, or other structural issues in your pool’s shell, it’s crucial to involve a professional. Structural repairs require expertise to ensure the safety and integrity of the pool.
Equipment and Plumbing Leaks: Leaks within your pool’s plumbing system or equipment require a professional’s knowledge. They can assess the plumbing, valves, and equipment to determine the source of the leak and make necessary repairs.
Vinyl Liner Leaks: Repairing leaks in a vinyl liner, especially in a gunite pool, can be complex. A professional will have experience in assessing the liner’s condition, identifying leaks, and properly sealing them.
Complex or Hidden Leaks: If the leak is challenging to locate due to its location or nature, a professional leak detection service is invaluable. They have access to specialized equipment, such as acoustic and pressure testing tools, that can pinpoint elusive leaks.
Preventing Further Damage: Calling a professional at the earliest sign of a leak can prevent further damage to your pool’s structure, plumbing, and surrounding landscape. Early detection and repairs can save you from more extensive and costly fixes in the future.
Safety Concerns: Structural issues, compromised ground, and electrical components around your pool can pose safety risks. A professional assessment ensures the safety of swimmers and the pool area.
Warranty and Expertise: If your pool is still under warranty, involving a professional ensures that repairs are conducted according to manufacturer guidelines, preserving the warranty. Additionally, professionals bring their expertise and experience to deliver effective and lasting solutions.
Time and Efficiency: Professionals have the training and resources to efficiently detect and repair leaks. This saves you time, minimizes water loss, and ensures that the issue is resolved correctly.
Long-Term Solutions: A professional’s recommendations go beyond fixing the immediate issue. They can provide advice on preventing future leaks, maintaining your pool’s integrity, and optimizing its overall performance.
Tips for Preventing Future Leaks in Your Gunite Pool
Preventing future leaks in your gunite pool requires a combination of regular maintenance, proactive measures, and careful pool management. By following these tips, you can minimize the risk of leaks and maintain the integrity of your pool:
Regular Inspections: Frequently inspect your pool’s surfaces, fittings, and equipment for signs of wear, cracks, or damage. Early detection allows you to address issues before they escalate.
Proper Water Chemistry: Maintain balanced water chemistry to prevent corrosion of surfaces and fittings. Imbalanced water can contribute to leaks over time.
Consistent Maintenance: Keep up with routine pool maintenance tasks, such as cleaning, vacuuming, and skimming. Clean pool equipment, filters, and skimmers regularly to prevent clogs and stress on components. To know more, read our gunite pool maintenance article.
Mindful Usage: Educate pool users about safe practices, such as avoiding sharp objects, rough play, and excessive force on pool fittings. Prevent accidents that could lead to damage or leaks.
Address Pool Settling: If you notice any changes in the pool’s level or structure, have it inspected by a professional. Addressing ground settling promptly can prevent cracks and shifts that lead to leaks.
Proper Landscaping: Ensure that landscaping features, such as trees and shrubs, are planted at a safe distance from the pool. Roots seeking water can compromise the pool’s structure.
Professional Installation and Repairs: When installing new equipment or conducting repairs, rely on certified professionals. Proper installation minimizes the risk of installation-related leaks.
Regular Cleaning of Filters: Dirty or clogged filters can lead to pressure buildup within the system, potentially causing leaks. Regularly clean and maintain your pool’s filtration system.
Be Cautious with Chemicals: Avoid using excessive chemicals, as they can corrode surfaces and fittings. Follow recommended chemical dosage and application guidelines.
Address Humidity and Water Runoff: Manage water runoff and humidity around the pool area to prevent excess moisture from seeping into cracks and contributing to leaks.
Winterization: If you live in a colder climate, ensure proper winterization procedures are followed to prevent freeze-related damage. Draining, covering, and protecting your pool can prevent cracks caused by freezing and thawing.
Schedule Professional Inspections: Regularly engage a certified pool professional to conduct thorough inspections. Professionals can identify potential issues before they become leaks and offer preventive solutions.
Pool Covers: Use a high-quality pool cover when the pool is not in use. A cover prevents debris from entering the pool, reducing strain on filters and preventing potential damage to the pool’s surface.
Address Drainage Issues: Ensure proper drainage around the pool area to prevent water accumulation that can lead to erosion, soil shifting, and damage.
Conclusion
Detecting and resolving leaks in a gunite pool requires a combination of patience, diligence, and the utilization of various techniques. Given the potential complexities of identifying leaks within the durable gunite structure, it’s advisable to begin with simpler methods such as the bucket test and dye testing to gauge the severity of the issue.
As leaks can occur in plumbing fittings, seams, and even beneath concrete, it’s crucial to consider employing professional assistance and specialized equipment when necessary. Modern technology, such as acoustic listening devices and infrared cameras, has significantly improved the accuracy and efficiency of leak detection.
Ultimately, prompt action and collaboration with experienced pool leak detection experts ensure that gunite pool owners can effectively pinpoint and address leaks, preserving the integrity and enjoyment of their aquatic investment.
Frequently Asked Questions (FAQs)
1. How do you know if your gunite pool is leaking?
Signs of a leaking gunite pool can include a noticeable decrease in water level over a short period, wet or soggy spots around the pool area, increased water bills, or the need to add water more frequently than usual. Conducting a simple bucket test, where you compare the water loss from the pool to that of a bucket placed on the steps, can help confirm whether a leak is present.
2. Where is the most common place for inground pool leaks?
In gunite pools, the most common areas for leaks are around the pool’s plumbing fittings, such as skimmers, return lines, and main drains. Leaks can also occur at the point where the pool’s walls meet the floor (the cove), as well as along seams and joints in the pool’s structure.
3. How do you find a leak in a pool without draining it?
To find a leak without draining the pool, a few methods can be employed. One approach involves using dye testing, where colored dye is added near suspected leak points, and the movement of the dye indicates the direction of the leak. Pressure testing the plumbing lines can also help identify leaks in the system. Additionally, specialized equipment like electronic listening devices and infrared cameras can pinpoint leaks by detecting changes in temperature and sound.
4. How do I find a leak in my pool under concrete?
Locating a leak under concrete can be challenging, but it’s possible using various techniques. Pressure testing specific sections of the plumbing system can help isolate the leak’s general location. Acoustic listening devices can be used to detect the sound of water escaping from the pipes or structure beneath the concrete. Infrared imaging can identify temperature variations caused by water leaking. If all else fails, consulting with a professional leak detection service that utilizes advanced technology can provide accurate results without the need for extensive excavation.
5. How long does it take to repair a leak in a gunite pool?
The duration of a leak repair in a gunite pool can vary widely based on factors such as the size and severity of the leak, its location, and the extent of necessary repairs. Minor leaks that are easily accessible might be fixed within a day, while more complex leaks requiring extensive excavation and repair work could take several days or even weeks to complete. Timely action and professional assistance can expedite the process.
6. Can a leak in a gunite pool cause other damage?
Yes, a leak in a gunite pool can potentially lead to various forms of damage. The water escaping from the pool can erode the surrounding soil, causing shifting or settling of the ground. This can result in structural damage to the pool itself or to nearby structures, such as decks or patios. Prolonged leakage can also damage landscaping and affect the pool’s water balance, potentially leading to additional maintenance and repair costs.
7. Are gunite pool leaks covered by insurance?
Whether gunite pool leaks are covered by insurance depends on the specific policy and circumstances. In some cases, homeowner’s insurance might cover damage resulting from a pool leak, especially if the leak leads to significant structural damage or property loss. However, routine maintenance issues and gradual wear and tear are generally not covered. It’s essential to review your insurance policy, document the extent of the damage, and communicate with your insurance provider to determine coverage eligibility and the necessary steps for filing a claim.