Have you noticed your pool skimmer isn’t working like it used to? A malfunctioning skimmer can lead to dirty water and unwanted debris floating around your inground pool. If you’ve ever found yourself frustrated by a clogged or broken skimmer, you’re not alone.
Table of Contents
- 1 Key Takeaways
- 2 Tools And Materials Needed
- 3 Steps To Change The Skimmer
- 4 Common Mistakes To Avoid
- 5 Maintenance Tips For Your Skimmer
- 6 Conclusion
- 7 Frequently Asked Questions
- 7.1 What are the common problems with pool skimmers?
- 7.2 What tools do I need to change a pool skimmer?
- 7.3 How do I prepare my pool for skimmer replacement?
- 7.4 What steps are involved in changing a pool skimmer?
- 7.5 What common mistakes should I avoid when changing a skimmer?
- 7.6 How can I maintain my pool skimmer effectively?
Key Takeaways
- Preparation is Key: Gather all necessary tools and materials, including screwdrivers, pliers, sealant, and a new skimmer, to ensure a smooth replacement process.
- Follow Step-by-Step Instructions: Carefully follow the outlined steps: prepare the pool, remove the old skimmer, install the new skimmer, and test for leaks to guarantee proper installation.
- Avoid Common Mistakes: Always turn off the power before starting and thoroughly check for leaks post-installation to prevent accidents and water loss.
- Routine Maintenance: Regularly clean the skimmer basket and inspect its components to maintain optimal performance and prevent debris buildup.
- Seasonal Checks: Conduct comprehensive checks at the start of each season to look for damage and ensure all parts function correctly, especially before winterization.
Tools And Materials Needed
Changing a skimmer on your inground pool requires specific tools and materials for efficiency and effectiveness. Here’s a list to help you prepare.
Recommended Products

Replacement for Hayward Pool Skimmers: Fits for Hayward pool skimmers model SP1091LX SP1091WM SPX1091C SPX1091B standard skimmer & wide mouth skimmer

This spring-action butterfly V-clips are used for attaching pool maintenance accessories such as skimmer skimmer net, brush, vacuum head, Mini jet vacuum head to standard 1-1/4" telescopic pool poles

Enjoy a Clean Pool: An ideal daily use swimming pool leaf skimmer pool net for fast, easy, and efficient cleanup of leaves and debris from pools, spas, ponds, and kids pools. An excellent long-lasting net with a little bit of flex for easier maneuvering.
Essential Tools
- Screwdriver: Use a flathead and Phillips screwdriver for removing the skimmer cover and screws.
- Pliers: Pliers assist in loosening and tightening connections for plumbing.
- Utility Knife: A utility knife is useful for cutting away old sealant or gasket if necessary.
- Trowel: A trowel helps with applying new sealant around the skimmer.
- Bucket: A bucket catches any water that may spill during replacement.
- Wet/Dry Vacuum: A vacuum effectively removes debris and water from the skimmer before you begin your work.
- New Skimmer: Select a skimmer that fits your pool specifications. Popular brands include Hayward, Pentair, and Intex.
- Gasket or Sealant: Use silicone sealant or a rubber gasket for a proper watertight seal.
- PVC Cement: If your skimmer replacement involves plumbing, a high-quality PVC cement ensures strong connections.
- Thread Tape: Thread tape is essential for sealing threaded pipes and preventing leaks.
- Replacement Screws: New screws are often needed, especially if the original ones are rusted or damaged.
Gathering these tools and materials ensures a smooth skimmer replacement in your inground pool.
Steps To Change The Skimmer
Changing a skimmer in your inground pool can seem daunting, but following these clear steps makes the process manageable.
Recommended Products

HEAVY-DUTY UV-RESISTANT ABS CONSTRUCTION: This skimmer for above ground pool use is built from durable, non-corrosive ABS material engineered to withstand sun exposure and long-term outdoor use

{EFFECTIVE DEBRIS COLLECTION} Experience superior pool maintenance with our Wide Mouth Skimmer, featuring a wide opening for quicker and effective skimming of larger debris, ensuring a pristine pool with less effort compared to standard skimmers.

Suitable for skimmer models: SP1082, SP1083, SP1084, SP1085, SP1086, SP1075, SP1075T, SP1076, SP1077.
Step 1: Prepare The Pool
Turn off the pool pump to prevent any accidents. Remove any debris from the pool surface to avoid extra mess. Drain the water to just below the skimmer level, which makes it easier to access the old skimmer. Gather all necessary tools so you’re ready to move quickly.
Step 2: Remove The Old Skimmer
Start by unscrewing the faceplate and carefully disconnecting the skimmer from the plumbing. Use the utility knife to cut any sealant around the old skimmer. Gently pull the skimmer out of the wall, taking care not to damage the surrounding area. Dispose of the old skimmer properly.
Step 3: Install The New Skimmer
Position the new skimmer in the cut-out area. Ensure the skimmer is aligned with the plumbing. Use replacement screws to attach it securely to the wall. Apply a gasket or sealant around the edges to create a watertight seal. Ensure all connections are tight and secure.
Step 4: Seal And Test
Once everything is connected, check for leaks. Refill the pool water to the proper level and turn on the pump. Observe the new skimmer in action, making sure it operates smoothly. If there’s any leakage, tighten the connections or add more sealant as needed.
Common Mistakes To Avoid
When changing a skimmer on your inground pool, avoiding common mistakes ensures a smoother process and optimal performance. Here are some pitfalls to be mindful of:
Mistake 1: Not Shutting Off Power
Failure to shut off the power before starting work can lead to accidents or damage. Always turn off the pool pump and any other electrical systems connected to the skimmer. This step helps prevent electric shocks and keeps the system safe while you make changes.
Mistake 2: Ignoring Leaks
Neglecting to check for leaks after installation can lead to larger issues down the line. After securing the new skimmer, test for leaks by running the pump and monitoring the area around the skimmer. If you notice any water escaping, address it immediately with additional sealant or gasket material. Prompt action prevents water loss and other potential damage.
Maintenance Tips For Your Skimmer
Proper maintenance ensures your pool skimmer functions optimally, promoting clean and clear water. Regular checks and cleaning prevent debris buildup and keep your pool in top shape.
Recommended Products

UNIVERSAL FIT WITH PRE-PURCHASE SIZE CHECK: This 2-pack pool filter baskets fit most in-ground pool pump and skimmer systems. To ensure a perfect fit, PLEASE CONFIRM OUR DIMENSIONS BEFORE ORDERING: 8-inch top diameter, 5.5-inch bottom diameter, 5.2-inch depth.
COMPATIBILITY: Direct replacement for Pentair U-3 (08650-0007) and Hayward SPX1070E skimmer baskets, perfect for inground pools with precise dimensions of 8 1/8" top diameter and 6.5" bottom diameter

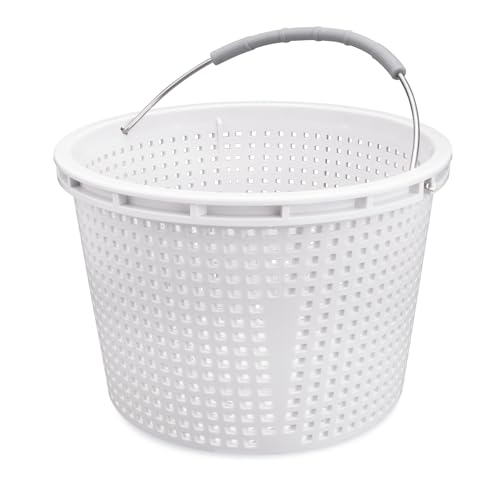
Heavy Duty: This weighted pool filter basket is designed to be very rugged even in extreme weather conditions. This pool skimmer baskets for inground pools can hold up to 30 lbs of debris.
Regular Cleaning
Clean the skimmer basket weekly. Debris accumulates quickly and can hinder skimming effectiveness. Remove leaves, bugs, and other particles to enhance water flow. Rinse the basket with a garden hose to remove any trapped dirt. Check the skimmer throat for larger debris and clear it if necessary. Using a long-handled brush can help reach any stubborn buildup.
Seasonal Checks
Inspect the skimmer’s components every season. Look for cracks or damage in the skimmer body, lid, and gaskets. Ensure that the skimmer weir operates properly; it should open and close freely. Test for any signs of leaks around the fittings and connections. Before closing the pool for winter, drain the skimmer to prevent freezing damage. Cover the skimmer to keep out debris during the off-season.
Conclusion
Changing the skimmer in your inground pool can seem daunting but with the right tools and steps it’s totally manageable. Taking the time to do it properly not only keeps your pool clean but also enhances your swimming experience.
Don’t forget to keep up with regular maintenance and seasonal checks to ensure everything runs smoothly. A little effort goes a long way in preventing future issues. So grab those tools and get started on your skimmer replacement—you’ll be enjoying crystal-clear water in no time!
Frequently Asked Questions
What are the common problems with pool skimmers?
Pool skimmers often malfunction due to debris buildup, clogs, or leaks. These issues can lead to dirty water and hinder the pool’s overall cleanliness.
What tools do I need to change a pool skimmer?
Essential tools for changing a pool skimmer include screwdrivers, pliers, a utility knife, trowel, bucket, wet/dry vacuum, and a new skimmer, along with gasket, PVC cement, and replacement screws.
How do I prepare my pool for skimmer replacement?
Turn off the pump, remove any debris, and drain the water to access the old skimmer. This preparation will ensure an efficient replacement process.
What steps are involved in changing a pool skimmer?
To change a skimmer, remove the old skimmer, install the new one securely, apply gasket or sealant, and test for leaks to ensure everything works properly.
What common mistakes should I avoid when changing a skimmer?
Avoid starting work without shutting off the power and overlooking leaks after installation. These mistakes can lead to accidents and further damage to your pool.
How can I maintain my pool skimmer effectively?
Regularly clean the skimmer basket, conduct seasonal checks for damage, drain the skimmer before winter, and cover it during the off-season to maintain optimal function.