Have you noticed your pool water level dropping faster than usual? It can be frustrating when you suspect a leak but don’t know where to start looking. You’re not alone—many pool owners face this issue, and finding that pesky leak can feel like a daunting task.
In this article, you’ll learn practical steps to locate a pool liner leak quickly and efficiently. From simple tests to common trouble spots, you’ll gain the knowledge you need to tackle this problem head-on. By the end, you’ll be equipped to save water and keep your pool in top shape, so you can enjoy those sunny days without worry.
Table of Contents
Key Takeaways
- Understanding Pool Liner Leaks: Recognize that pool liner leaks can lead to significant water loss and should be identified early to prevent damage.
- Common Causes: Familiarize yourself with typical causes of leaks, including wear and tear, improper installation, sharp objects, temperature changes, and chemical imbalances.
- Signs of Leaks: Be vigilant for signs such as consistent water level drops, wet spots, air bubbles in the liner, and frequent refilling to suspect potential leaks.
- Essential Tools for Detection: Equip yourself with tools like leak detection dye, a flashlight, measuring tape, and pool liner patch kits to aid in locating and repairing leaks.
- Step-by-Step Detection Methods: Utilize visual inspection, mark the water level, and employ the bucket method for a thorough approach to identify leaks accurately.
- When to Seek Help: Assess whether to handle repairs yourself or call a professional based on the severity of the leak and your repair skills, weighing the costs and benefits of each option.
Understanding Pool Liner Leaks
Pool liner leaks often occur, leading to frustrating water loss. Identifying these leaks early helps you maintain the pool’s water level and prevents further damage.
Common Causes of Leaks
Leak causes can vary, but some common sources include:
- Wear and Tear: Over time, pool liners can degrade due to exposure to UV rays and chemicals.
- Improper Installation: Liners incorrectly fitted will likely develop gaps or tears.
- Sharp Objects: Items like toys or debris can puncture liners, causing leaks.
- Temperature Fluctuations: Extreme heat or cold can stress materials, leading to cracks or splits.
- Chemical Imbalance: Unbalanced water chemistry can weaken liner materials.
Signs of a Leak
Recognizing leakage signs is crucial. Look for these indicators:
- Consistent Water Level Drop: A steady drop in water level over a few days suggests a leak.
- Wet Spots: Spots around the pool area may indicate water escaping from the liner.
- Air Bubbles: Bubbles in the liner signal potential punctures where water escapes.
- Damage to Surrounding Areas: Erosion or damage in landscaping near the pool could mean a leak.
- Frequent Refilling: If you’re refilling the pool often, chances are you have a leak.
Address these issues promptly to maintain your pool’s integrity and keep your swimming area pleasant.
Tools and Materials Needed
Finding a pool liner leak requires the right tools and materials. Having these items on hand simplifies the detection and repair process.
Recommended Products

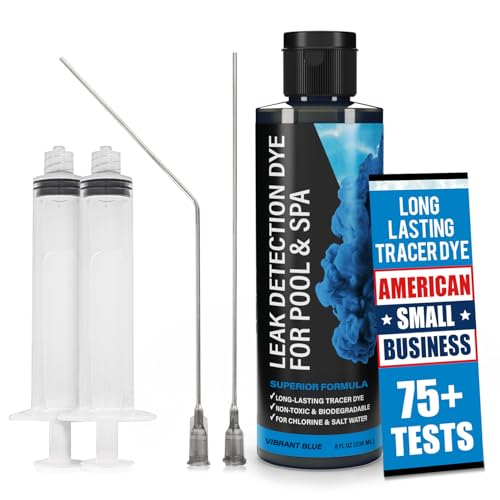
Easily Identify & Locate Leaks - 75+ tests per kit! This pool leak detection kit delivers a High-Contrast UV dye that glows brightly in sunlight and under UV light. It stands out against light and dark surfaces, making it just as effective as traditional blue dyes on light-colored backgrounds. This superior pool dye formula holds together underwater, ensuring easy & accurate leak detection

Pinpoint Leaks with Precision - Symptoms of a pool leak may include rising water bills, chemical imbalance, algae blooms, or cracks in structure. Our DIY leak detection kit helps you quickly identify the exact source of the leak in your in-ground pool, above-ground pool, or hot tub for faster repairs.

Pool Leak Detection Kit: Ultra-concentrated formula clearly highlights even the smallest leaks without staining surfaces.
Essential Tools
- Leak Detection Dye: Use this specialized dye to pinpoint the location of the leak. It’s easy to apply and highly effective.
- Flashlight: A strong flashlight helps illuminate hard-to-see areas around the pool, making leak detection easier.
- Ruler or Measuring Tape: Measure water levels to identify significant drops and track changes over time.
- Sponge: Use a clean sponge for drying areas around the pool. This helps to clearly see where water might be seeping out.
- Scissors: Sharp scissors are handy for cutting away damaged sections of the liner during repairs.
- Pool Liner Patch Kits: These kits typically include adhesive and patches for quick repairs. Ensure you select a kit compatible with your liner material.
- Pool Sealant: Apply this product to small cracks and holes. It creates a flexible bond, helping to prevent future leaks.
- Waterproof Tape: This tape can provide a temporary solution for minor leaks until permanent repairs can be made.
- Detergent Solution: Mix a small amount of dish soap with water. Spray it around the pool seams to identify bubbles, which may indicate leaks.
- Disposable Gloves: Protect your hands while handling chemicals or during repairs by wearing gloves.
Equipping yourself with these tools and materials boosts your chances of effectively finding and repairing your pool liner leak.
Step-by-Step Guide to Finding a Pool Liner Leak
Finding a pool liner leak requires careful inspection and testing. Follow these steps to locate the source of the problem effectively.
Recommended Products
Easily Identify & Locate Leaks - 75+ tests per kit! This pool leak detection kit delivers a High-Contrast UV dye that glows brightly in sunlight and under UV light. It stands out against light and dark surfaces, making it just as effective as traditional blue dyes on light-colored backgrounds. This superior pool dye formula holds together underwater, ensuring easy & accurate leak detection

Trusted Pool Leak Finder - Identify the precise location of structural pool leaks in your system

WATER TRACING MADE EASY: Green Gobbler's highly concentrated fluorescent green water tracing dye is perfect for leak tracing, overflow analysis, discharge testing, dispersion and diffusion pattern analysis, sea marking and time-flow studies. Use it in pools, toilets, septic tanks, sewers and more.
Visual Inspection Techniques
- Examine the Pool Edges: Check areas where the liner meets the pool walls and floor. Look for wrinkles or damage.
- Inspect Accessories: Examine ladders, lights, and skimmers. These areas often hide small tears.
- Look for Water Accumulation: Check around the pool for wet spots or puddles, indicating where water may be seeping out.
- Check for Air Bubbles: Observe the pool liner when it’s filled. Bubbles indicate areas needing attention, often pointing to weak spots.
- Mark the Water Level: Put a piece of tape on the pool wall at the waterline. This serves as a reference point.
- Monitor Water Drop: Leave the pool for 24 hours without adding any water. Measure the drop from the taped mark.
- Calculate Evaporation: If the level drops more than 1/4 inch, a leak exists. Test again with a bucket in the pool to differentiate between evaporation and leaks.
- Use the Bucket Method: Fill a bucket with pool water. Place it on the step and mark the water level inside and outside the bucket. After 24 hours, compare levels. If the pool drops significantly more than the bucket, a leak needs attention.
These steps guide you through the process of locating a pool liner leak. Following these techniques helps maintain your pool’s integrity and reduces water loss.
Professional Help vs. DIY Solutions
Determining whether to seek professional help or tackle the issue yourself depends on the extent of the leak and your comfort level with repairs. Both options have their advantages and can effectively resolve pool liner leaks.
Recommended Products

* Original Pool Tape Repair Patches - This essential 10-pack of pre-sized clear adhesive patches is invaluable for pool professionals and homeowners alike. Each precisely measured 2.75" x 4" patch efficiently seals vinyl pool liner damage without material waste.

THE FIX-IT-ALL TAPE: Most versatile tape for quick repairs; clear color for discreet repairs; add to repair kit for home, marine, sporting and pool patching applications; repair recreational equipment such as pools, pool covers, boat covers, inflatables, tents, canopies and more

country of origin : United States
When to Call a Professional
Calling a professional makes sense if you notice significant water loss or persistent leaks that DIY methods can’t handle. Pool professionals possess specialized tools and experience, enabling quick detection and repair of hard-to-find leaks. If structural damage exists or if the liner shows extensive wear, professional intervention is advised. Costs for professional services typically range from $150 to $500, depending on the complexity.
Tips for DIY Repair
DIY repairs can save you money and help you maintain your pool. Follow these steps for effective DIY repair:
- Prepare the Tools: Gather necessary tools like a patch kit, adhesive, scissors, and a towel.
- Locate the Leak: Use the visual inspection methods outlined earlier to find the leak’s exact location.
- Dry the Area: Ensure the area around the leak is completely dry for proper adhesion.
- Cut the Patch: Trim the patch material to cover the leak adequately, leaving extra around the edges.
- Apply Adhesive: Spread adhesive evenly on the patch and the pool liner around the leak.
- Press the Patch: Firmly press the patch onto the leak, smoothing out bubbles or wrinkles.
- Cure Time: Allow the adhesive to cure according to the manufacturer’s instructions before refilling the pool.
These practical tips enable effective DIY repairs, bringing your pool back to optimal condition.
Conclusion
Finding a pool liner leak doesn’t have to be a daunting task. By staying observant and using the right techniques you can pinpoint the issue before it turns into a bigger problem. Remember to keep an eye on the signs and take action quickly.
Whether you choose to tackle the repairs yourself or call in a professional you’re making a smart choice for your pool’s health. With a little effort you can enjoy your pool without the worry of leaks draining your fun. Happy swimming!
Frequently Asked Questions
What are the common causes of pool liner leaks?
Pool liner leaks can result from various factors, including UV damage, chemical imbalances, improper installation, or physical wear and tear. Additionally, sharp objects, tree roots, and freezing temperatures can contribute to developing leaks over time.
How can I detect a pool liner leak?
To detect a pool liner leak, look for signs like sudden water drops, damp areas around the pool, or air bubbles under the liner. Mark the water level with tape and monitor any changes over a few days to spot potential issues.
What is the bucket method for finding pool leaks?
The bucket method involves filling a bucket with water and placing it on a pool step. Mark the water levels inside the bucket and the pool. After 24 hours, compare the levels; if the pool water drops more than the bucket, it’s likely there’s a leak.
Should I repair my pool liner leak myself or hire a professional?
Deciding between DIY repairs and hiring a professional depends on the leak’s severity and your comfort with repair work. DIY can save money for small leaks, while professionals are recommended for significant damage or if you’re unsure how to proceed.
What tools do I need for a DIY pool liner repair?
For a DIY pool liner repair, you will need a patch kit (including adhesive), scissors, a towel or sponge to dry the area, and possibly a utility knife for more extensive repairs. Ensure you follow all instructions provided with your patch kit for best results.