Have you noticed your pool light flickering or dimming? It might be more than just a bulb issue; a leak could be the culprit. If you’ve ever found yourself dealing with an unexpected pool light problem, you know it can be frustrating and worrying.
But don’t worry! This guide will walk you through the steps to identify and fix that pesky leak. You’ll learn how to troubleshoot the issue and make your pool safe and inviting again. With just a few simple tools and some straightforward instructions, you’ll be back to enjoying your pool in no time.
Table of Contents
Key Takeaways
- Understanding Leaks: Recognize that pool light leaks can stem from damaged gaskets, loose connections, cracked housing, improper installation, and environmental factors.
- Signs of Leakage: Identify symptoms such as flickering lights, dimming brightness, visible water around fixtures, corrosion, and tripping breakers to assess potential leaks.
- Essential Tools: Prepare the right tools, including screwdrivers, socket wrenches, utility knives, submersible pumps, and safety gear, to facilitate the repair process.
- Repair Steps: Follow a structured approach by turning off power, identifying leak locations, replacing damaged components, applying sealants, and monitoring for any further issues.
- Preventive Maintenance: Regularly check seals, clean fixtures, test functionality, and perform seasonal inspections to prevent leaks from occurring in the first place.
- Winter Precautions: Safeguard fixtures by draining the pool below light levels before freezing temperatures and storing lights properly during winter months to avoid damage.
Understanding Pool Light Leaks
Pool light leaks can lead to serious issues if left unchecked. Understanding their origins and symptoms helps address these problems quickly and efficiently.
Common Causes of Pool Light Leaks
- Damaged Gasket: A worn or cracked gasket around the pool light can allow water to seep in.
- Loose Connections: Loose wiring connections may create gaps that allow water to enter the fixture.
- Cracked Housing: Physical damage to the fixture’s housing can lead to leaks. Inspect for visible cracks or signs of wear.
- Improper Installation: Incorrectly installed lights may compromise seals, leading to leaks.
- Environmental Factors: Debris, tree roots, or soil movements can shift the light fixture, causing leaks.
- Flickering Lights: Intermittent flickering suggests water has entered the light fixture.
- Dimming Brightness: A dim light can indicate that moisture has affected electrical components.
- Visible Water: Puddles forming around the fixture signal a leak.
- Corrosion: Signs of rust or corrosion on the light or connections indicate exposure to water.
- Tripping Breakers: Electrical issues that trip circuit breakers point to potential water intrusion.
Identifying these signs and causes is vital. Taking timely action prevents further damage and keeps your pool safe and inviting.
Tools and Materials Required
To effectively fix a pool light leak, gather the right tools and materials beforehand. This preparation helps streamline the repair process and ensures you’re equipped to tackle the issue efficiently.
Recommended Products

Easily Identify & Locate Leaks - 75+ tests per kit! This pool leak detection kit delivers a High-Contrast UV dye that glows brightly in sunlight and under UV light. It stands out against light and dark surfaces, making it just as effective as traditional blue dyes on light-colored backgrounds. This superior pool dye formula holds together underwater, ensuring easy & accurate leak detection
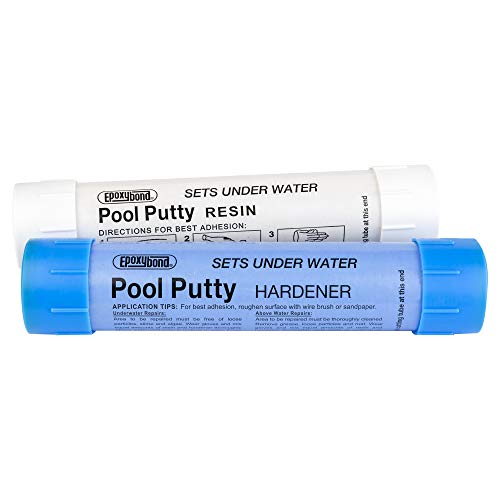
SAFE AND LASTING HAND-MOLDABLE PUTTY APPLY TO FIX LEAKS UNDERWATER: So easy and safe to use. Simply mix 1-to-1, mold putty in your hands, and apply to the area where leak or crack.
Essential Tools for Fixing Leaks
- Screwdriver Set: A complete set for various screw types makes removing the light fixture easy.
- Socket Wrench: Useful for loosening nuts and bolts securely fastened to the light housing.
- Utility Knife: A sharp knife assists in removing old gaskets and sealing materials without damaging surfaces.
- Submersible Pump: Pump out any excess water to access the light fixture more safely and conveniently.
- Safety Goggles: Protect your eyes from debris or chemicals during the repair process.
- Gloves: Wear rubber gloves to prevent injury and ensure a good grip on tools and materials.
- Marine-Grade Silicone Sealant: This waterproof sealant forms a tight bond, perfect for underwater repairs.
- Epoxy Resin: Suitable for filling cracks in the light housing, creating a durable and waterproof seal.
- Gasket Maker: Ideal for creating custom gaskets when old ones are damaged or missing, ensuring a secure fit.
- Electrical Tape: Use high-quality tape to protect connections from moisture and enhance insulation.
By collecting these tools and materials, you prepare yourself to fix the leak efficiently and restore your pool lighting without hassle.
Step-by-Step Guide to Fixing a Pool Light Leak
Fixing a pool light leak requires attention to detail and safety. Follow these steps to effectively repair any leaks and ensure your pool lighting remains functional.
Safety Precautions
- Always turn off the power to the pool light at the circuit breaker before starting repairs. This prevents electric shock.
- Wear safety goggles to protect your eyes from debris and sealant.
- Use gloves to keep your hands safe from sharp edges and chemicals involved in the repair.
Identifying the Leak Location
- Examine the light fixture closely for visible signs of damage, such as cracks or worn-out gaskets.
- Check for water accumulation around the light’s base. This indicates water is leaking into the fixture.
- Investigate the wiring, ensuring it doesn’t show signs of corrosion, which could point to moisture problems.
Repairing the Leak
- Disassemble the light fixture using a screwdriver. Remove the lens cover and the light bulb to access the internal components.
- Replace damaged gaskets with new, marine-grade silicone gaskets. Ensure a tight fit to prevent future leaks.
- Apply marine-grade silicone sealant around the edge of the fixture where it meets the pool wall. Smooth it out for a watertight seal.
- Reassemble the light fixture carefully, placing the bulb back in and securing the lens cover.
- Restore power to the light by switching the circuit breaker back on.
- Observe the light for any flickering or malfunctioning signs. If everything runs smoothly, your repair is successful.
- Monitor the area for a few days after repair to ensure no water accumulation occurs. This confirms the leak is resolved.
Preventive Measures
Preventing pool light leaks involves consistent maintenance and preparation for seasonal changes. Implementing these strategies helps ensure your pool lights remain functional and leak-free.
Regular Maintenance Tips
- Check Seals Often: Inspect gaskets and seals for wear or damage at least once a month. If you notice cracks or discoloration, replace them immediately.
- Clean Fixtures Regularly: Remove debris around the light fixtures to prevent corrosion. Use a soft cloth or sponge with mild soap. Avoid abrasive materials that could scratch surfaces.
- Test Light Functionality: Periodically test your pool lights. If they flicker or fail to turn on, it could indicate a potential problem that requires further investigation.
- Monitor for Water Accumulation: After heavy rains or usage, check for water pooling around light fixtures. Excess water can signal a leak or drainage issue needing attention.
- Inspect Before Winter: Before winter sets in, examine your pool lights for any signs of wear. Remove fixtures to check for moisture or corrosion.
- Safeguard from Freezing: Drain the pool to below light levels before freezing temperatures. This prevents ice formation, which can damage fixtures and create leaks.
- Store Fixtures Properly: If you’re removing lights for the winter, store them in a dry place. Protect them from moisture and potential damage.
- Spring Startup Check: In spring, recheck all fixtures for leaks or damage. Make repairs as needed before regular pool use resumes.
Following these preventive measures keeps your pool lights functioning properly and reduces the likelihood of leaks.
Conclusion
Fixing a pool light leak doesn’t have to be a daunting task. With the right approach and a bit of patience you can tackle the issue effectively. Remember to prioritize safety and take your time during the repair process.
By following the preventive measures you can help ensure your pool lights stay leak-free for seasons to come. Regular maintenance checks will save you time and money in the long run. Enjoy your sparkling pool and the peace of mind that comes with knowing your lights are in great shape. Happy swimming!
Frequently Asked Questions
What causes pool light leaks?
Pool light leaks can occur due to damaged seals, cracked fixtures, or improper installation. Water may enter through these vulnerabilities, leading to electrical hazards and damage. Regular maintenance can help identify and address these issues early.
How can I identify a pool light leak?
To identify a leak, check for water accumulation around the light fixture. You may also see moisture in the light housing or experience flickering lights. Inspecting seals and fixtures regularly can help catch leaks before they worsen.
What are the repair steps for pool light leaks?
Repairing pool light leaks involves turning off the power, draining the pool, checking seals and fixtures for damage, and replacing any faulty parts. Follow safety precautions, and if unsure, consult a professional for assistance.
How can I prevent pool light leaks?
Prevent pool light leaks by regularly inspecting seals, cleaning fixtures, and testing their functionality. Monitor for water accumulation and ensure lights are properly stored during winter. Conduct a spring startup check to ensure everything is functional.
When should I inspect my pool lights?
Inspect pool lights regularly, especially before winter and after winterization. Regular checks help identify any wear and tear that could lead to leaks, allowing you to address them promptly and maintain safety.