Are you tired of struggling to get in and out of your above ground pool? A sturdy ladder could be the solution you need. Installing a ladder not only makes access easier but also enhances safety for everyone enjoying the water.
Table of Contents
- 1 Key Takeaways
- 2 Tools and Materials Required
- 3 Preparing the Pool for Installation
- 4 Step-by-Step Installation Process
- 5 Safety Considerations
- 6 Conclusion
- 7 Frequently Asked Questions
- 7.1 What are the benefits of installing a sturdy ladder for an above ground pool?
- 7.2 What tools do I need for ladder installation?
- 7.3 How do I prepare my pool for ladder installation?
- 7.4 Can you provide a brief step-by-step installation guide?
- 7.5 What maintenance is required for a pool ladder?
- 7.6 How can I ensure the ladder is stable?
Key Takeaways
- Essential Tools & Materials: Ensure you have a power drill, wrenches, screwdrivers, a level, measuring tape, ladder kit, anchor bolts, pool sealant, and safety pads for a successful installation.
- Prepare the Pool: Check the integrity of your pool’s wall and floor, and select a stable, accessible location for the ladder to ensure safety and ease of use.
- Follow Step-by-Step Instructions: Adhere to a structured process for positioning, aligning, and securing the ladder with brackets, anchor bolts, and sealant for optimal stability.
- Prioritize Safety: Ensure ladder stability by keeping it level against the pool edge and using proper securing methods to prevent accidents.
- Regular Maintenance: Conduct weekly inspections and seasonal checks on the ladder for wear, rust, and loose fittings to maintain safety and functionality.
Tools and Materials Required
Installing a ladder in an above ground pool requires specific tools and materials. Gathering everything beforehand makes the process smoother and more efficient.
Recommended Products

MADE IN THE USA: Confer 7200 RollGuard A-frame safety ladder makes it easy to enter and exit your pool and accommodates pool heights from 48 to 56 inches tall; Supports up to 300 pounds

REPLACEMENT POOL LADDER PAD - This Swimming Pool Ladder Mat used as a cushion between ladder base and pool liner and protects swimming pool liner from damage caused by ladder base. The high quality Protective Pool Ladder Pad Step Mat makes you feel more at ease with it.

Adjustable Pool Stairs: Pool ladder accommodates deck heights from 46 to 56 inches tall, giving you flexibility when setting up your above ground pool steps; Ladder must be attached to deck
Essential Tools
- Drill: Use a power drill for making necessary holes in the pool’s side.
- Wrenches: A set of adjustable wrenches helps tighten nuts and bolts securely.
- Screwdrivers: Phillips and flat-head screwdrivers assist in fastening and adjusting components.
- Level: A level ensures the ladder sits evenly, promoting safety and accessibility.
- Measuring Tape: Use a measuring tape for accurate placement and adjustments to the ladder.
- Ladder Kit: Choose a ladder designed specifically for above ground pools. Ensure it fits your pool’s height and style.
- Anchor Bolts: Heavy-duty anchor bolts secure the ladder to the pool deck, preventing movement.
- Pool Sealant: Use waterproof sealant to protect any drilled holes from water ingress.
- Safety Pads: Install pads beneath ladder feet to minimize damage to the pool liner and enhance stability.
- Instruction Manual: Always keep the ladder’s instruction manual handy. It provides guidance tailored to your specific model.
Assembling these tools and materials prepares you for a successful installation.
Preparing the Pool for Installation
Preparing your above ground pool for ladder installation requires careful consideration to ensure stability and safety. Follow these essential steps for a successful setup.
Checking the Pool’s Integrity
Check your pool’s wall and floor for any signs of damage. Look for cracks, dents, or rust that could compromise structural integrity. Inspect all components, focusing on the joints where the wall meets the liner. If you notice any issues, address them before proceeding, as they could affect the ladder’s stability.
Selecting the Right Location
Select a location that provides easy access to the pool. The ladder should be positioned on flat, stable ground. Avoid areas with loose soil or debris. Consider the pool’s usage; place the ladder away from any obstructions to ensure a safe entry and exit. Mark the spot with stakes or chalk for precise installation.
Step-by-Step Installation Process
Installing a ladder in your above ground pool enhances safety and accessibility. Follow these steps to ensure a successful installation.
Recommended Products

Heavy-Duty Cast Aluminum Build: Crafted from solid cast aluminum, this pool ladder deck flange set holds its shape under daily use without bending or flexing; anchors pool ladders securely to prevent movement & wobbling
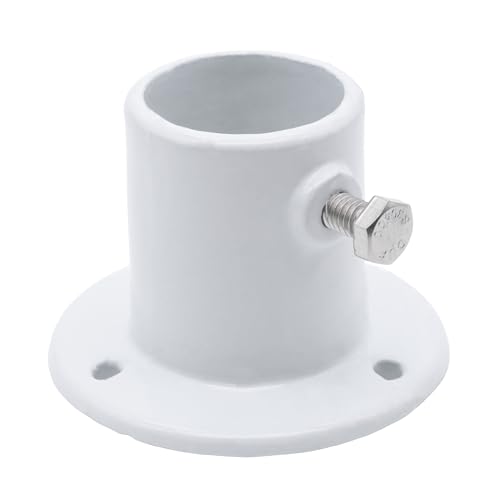
Two deck flanges are required to mount a new ladder to your deck.

【Suitable for】Our stainless steel deck flange is suitable for 38mm/1.5" pool ladder above ground. Please measure the size of the rods you already have in your home before placing an order.
Attaching the Ladder to the Pool
- Position the Ladder: Place the ladder at your predetermined location, ensuring it sits on even ground.
- Align with Pool Edge: Confirm the ladder’s base aligns with the pool’s edge. This alignment prevents unnecessary strain on the pool’s wall.
- Install Brackets: Secure the brackets included in your ladder kit to the pool’s wall. Use a drill to attach them, following the manual for guidance on positioning.
- Insert Ladder Components: Insert the ladder into the secured brackets, ensuring a snug fit.
- Use Anchor Bolts: Insert anchor bolts through the ladder and into the pool wall to enhance stability. Tighten them securely with a wrench.
- Check Levelness: Utilize a level to verify that the ladder is even. Adjust if necessary by repositioning the base.
- Apply Pool Sealant: Seal any gaps between the ladder and the pool wall with pool sealant. This measure prevents water leaks and enhances stability.
- Add Safety Pads: Attach safety pads to the foot of the ladder. These pads protect the pool’s vinyl lining and provide additional grip.
By following this structured process, your pool ladder will be secure and ready for safe use.
Safety Considerations
Safety must be a priority when installing a ladder for your above ground pool. A well-installed ladder enhances access and reduces the risk of accidents. Follow these key safety guidelines to ensure a secure setup.
Recommended Products

Practical & Elegant: Our deck flange is a reliable choice for your pool accessories, the sturdy structure makes the pool handrail more stable, and the simple white color appearance makes your pool more elegant and beautiful. The full set of screw accessories makes the installation easier

【Products Introduction】Pool deck flanges effectively secure pool ladder handles pool ladders and pool railings. Simply align the 3 pre-drilled flange holes and bolt them into place. It can also be used for things like securing hangers and holding any long poles you need, etc.

Strong Material: Our pool ladder replacement deck flange is made of full 304 stainless steel, resist rust, corrosion, and UV damage and it has a heavy-duty construction, great bearing capacity. Surface coated with white finish, adds extra protection against pool chemicals and weathering
Ensuring Stability
Stability is crucial for ladder safety. Position the ladder so it’s level against the pool edge, preventing any tipping during use. Make sure the base sits firmly on the ground. Secure it using brackets and anchor bolts to prevent movement. Check the installation regularly to keep it tight and stable.
Regular Maintenance Tips
Regular maintenance ensures the ladder remains safe to use. Inspect the ladder every week for signs of wear, such as rust, loose bolts, or damaged parts. Clean the ladder regularly to remove algae or debris that can affect grip. Tighten any loose fittings immediately. Seasonal checks before pool use can prevent hazards.
Conclusion
Installing a ladder in your above ground pool can make a world of difference for you and your family. With the right tools and a bit of patience you can create a safe and accessible entry point for everyone to enjoy.
Don’t forget to keep an eye on your ladder’s condition over time. Regular checks and maintenance will help ensure it stays secure and safe.
Now that you’ve got the steps down you can dive into fun-filled days by the pool with peace of mind. Enjoy your summer splashes and happy swimming!
Frequently Asked Questions
What are the benefits of installing a sturdy ladder for an above ground pool?
Installing a sturdy ladder enhances safety and access to your pool. It provides stable entry and exit points, reducing the risk of slips and falls. A well-installed ladder also facilitates easier maintenance and enjoyment of your pool.
What tools do I need for ladder installation?
You’ll need basic tools such as a screwdriver, wrench, drill, measuring tape, and level. Additionally, ensure you have safety equipment like gloves and goggles for added protection during the installation process.
How do I prepare my pool for ladder installation?
Begin by inspecting the pool area for any damage and clean the surrounding space. Choose a flat, stable location for the ladder and ensure there is enough clearance for safe usage.
Can you provide a brief step-by-step installation guide?
To install the ladder, position it at the chosen site, align it with the pool edge, and secure brackets. Use anchor bolts for stability, check for levelness, apply pool sealant as needed, and add safety pads to complete the installation.
What maintenance is required for a pool ladder?
Regular maintenance includes weekly inspections for wear and tear, cleaning the ladder to maintain grip, and tightening loose fittings. This ensures the ladder remains safe and secure for users.
How can I ensure the ladder is stable?
When installing the ladder, ensure it’s properly aligned and secured with brackets and anchor bolts. Regularly check the levelness during maintenance to prevent wobbling, which can lead to accidents.