Have you ever noticed a pesky hole in your above ground pool just when you want to enjoy a sunny day? It’s a frustrating situation that can put a damper on your plans. But don’t worry—you’re not alone, and fixing it is easier than you might think.
Table of Contents
- 1 Key Takeaways
- 2 Assessing The Damage
- 3 Preparing For The Repair
- 4 Executing The Patch
- 5 Testing The Repair
- 6 Maintenance Tips
- 7 Conclusion
- 8 Frequently Asked Questions
- 8.1 How do I identify a hole in my above ground pool?
- 8.2 What size hole requires a patch kit?
- 8.3 What materials do I need for repairing an above ground pool?
- 8.4 How do I drain my above ground pool for repairs?
- 8.5 How long should I let a patch set before refilling the pool?
- 8.6 What should I do after patching the pool?
- 8.7 How can I maintain my above ground pool to prevent future holes?
- 8.8 Should I use a sealant after repairs?
Key Takeaways
- Assess the Damage: Identify the size and location of the hole in your above ground pool before starting any repairs.
- Gather Materials: Collect essential items like a patch kit, scissors, clean cloth, and tape to streamline the repair process.
- Drain the Pool: Safely drain the pool water to access the damaged area, ensuring the structure remains intact.
- Apply the Patch: Clean the surrounding area thoroughly, then apply the patch carefully to ensure a secure seal.
- Allow Proper Setting Time: Let the patch cure for at least 24 hours before refilling the pool to ensure optimal adhesion.
- Regular Maintenance: Perform weekly inspections and take preventive measures to extend the life of your pool and avoid future repairs.
Assessing The Damage
Assessing the damage to your above ground pool is crucial for effective repairs. Start by determining the size and location of the hole.
Identifying The Hole
Look closely at the pool’s surface. Pinpoint small leaks, punctures, or tears. Use your hand to feel for water escaping, which can help locate even minor holes. Mark the area around the hole with tape to track your progress during repairs. For visual clarity, take a photo to refer back to later.
Determining The Repair Type
Evaluate the size and severity of the damage. Small holes under 1 inch often require patch kits, while larger holes might need a more extensive repair. Repair kits typically include adhesive and patches made from vinyl or similar materials. For more significant damage, consider using a pool liner repair tape or replacing the affected section entirely. Always consult your pool’s manufacturer guidelines for specific repair recommendations.
Preparing For The Repair
Preparing for the repair of your above ground pool requires a few essential steps. Gathering the right materials and draining the pool water creates an effective environment for patching.
Gathering Necessary Materials
Gather the materials needed for the repair. Collect the following items:
- Patch Kit: Ensure it matches your pool’s liner material.
- Scissors: Use sharp scissors for precise cuts.
- Clean Cloth: Keep a clean cloth handy for wiping the area.
- Marker or Tape: Use a marker or tape to outline the hole.
- Pool Water Test Kit: Check the water pH after the repair.
Assemble these items before you start. Having everything on hand saves time and ensures a smoother repair process.
Draining The Pool Water
Draining the pool water is crucial for effective patching. Follow these steps:
- Turn Off Pump: Shut off your pool pump to halt water circulation.
- Set Up a Drainage System: Use a sump pump, hose, or a gravity-fed system to drain the water.
- Drain Safely: Remove water until the surface is accessible, depending on the hole’s location.
- Monitor Levels: Keep an eye on water levels to avoid damaging the pool structure.
Draining the water simplifies the repair process, allowing for thorough work without additional complications.
Executing The Patch
Executing the patch creates a reliable seal that restores your above ground pool. Follow these steps carefully for a successful repair.
Recommended Products

【Super Strong Self-Adhesive, No Extra Glue Needed】 iGoevo pool repair patch uses a powerful self-adhesive backing that bonds instantly without heat or messy glues. Just peel, stick, and press firmly. The pool patch creates a permanent waterproof seal that holds up to sun and daily pool use. No more buying separate tubes of glue that dry out or leave sticky residue. Ideal for above-ground pools, pool liners, and inflatable pools when you need a fast, reliable fix without the hassle.
Cleaning The Area Around The Hole
Clean the area around the hole thoroughly to ensure proper adhesion. Use a clean cloth to remove dirt, debris, and moisture. A vacuum or a soft brush can help remove stubborn particles. Mark the hole with a marker or tape, giving you a clear reference point for placing the patch. Make sure the surface is completely dry before applying the patch, as moisture can interfere with the adhesive.
Applying The Patch
Apply the patch carefully for a secure fit. Cut the patch material from the kit to cover the hole, leaving extra material around the edges for adhesion. Remove the backing from the patch if it has one. Center the patch over the hole, pressing firmly to eliminate air bubbles. Smooth the edges outward to ensure full contact with the pool surface. If you’re using a patch with adhesive, wait for a few seconds to allow it to bond properly. Follow the patch kit’s instructions for specific application details if necessary.
Allowing The Patch To Set
Allow the patch to set properly for optimal results. Wait at least 24 hours before refilling the pool with water. This time ensures that the adhesive cures completely. During this period, keep the area clear of any stress or movement that could disrupt the bond. Once the waiting period concludes, slowly refill the pool, monitoring the patch to confirm it holds securely under pressure.
Testing The Repair
Testing the repair is essential for ensuring the patch holds effectively. Follow these steps to confirm your work.
Recommended Products

Easily Identify & Locate Leaks - 75+ tests per kit! This pool leak detection kit delivers a High-Contrast dye that easily traces flow paths. It stands out against light and dark surfaces, making it just as effective as traditional blue dyes on light-colored backgrounds. This superior pool dye formula holds together underwater, ensuring easy & accurate leak detection

Pinpoint Leaks with Precision - Symptoms of a pool leak may include rising water bills, chemical imbalance, algae blooms, or cracks in structure. Our DIY leak detection kit helps you quickly identify the exact source of the leak in your in-ground pool, above-ground pool, or hot tub for faster repairs.
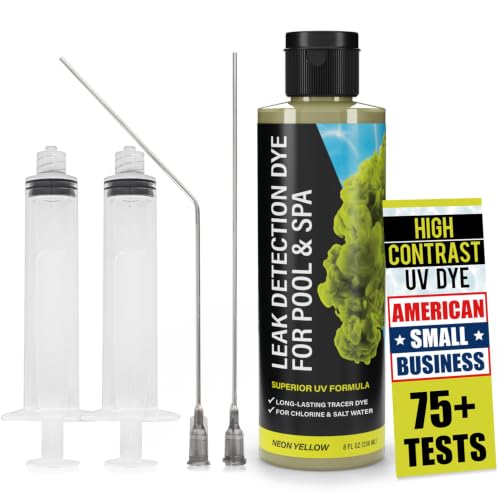
Easily Identify & Locate Leaks - 75+ tests per kit! This pool leak detection kit delivers a High-Contrast UV dye that glows brightly in sunlight and under UV light. It stands out against light and dark surfaces, making it just as effective as traditional blue dyes on light-colored backgrounds. This superior pool dye formula holds together underwater, ensuring easy & accurate leak detection
Refilling The Pool
Refill the pool gradually to avoid overwhelming the patch. Start by adding a few inches of water and monitor the patched area closely. As the water level rises, watch for any signs of leaking around the patch. Once the water reaches about halfway up the wall, pause and inspect the repair again. If everything appears intact, continue refilling until the pool is full.
Monitoring For Leaks
After refilling, keep a vigilant eye on the patched area for at least 24 to 48 hours. Check for dampness or water seepage around the patch. If you notice any issues, mark the area for a second repair. If no leaks appear, the patch is secure. Regularly check your pool’s water level for any unexpected drops, indicating a potential leak elsewhere.
Maintenance Tips
Maintaining your above ground pool helps prevent future issues. Regular care ensures longevity and keeps it safe for use.
Regular Inspections
Inspect your pool at least once a week. Look for any signs of wear, such as cracks, holes, or fading. Pay special attention to the seams and corners. If you notice any irregularities, address them immediately to prevent larger problems.
Use a clean cloth to wipe down the pool’s walls and floor during each inspection. This removes debris that could cause damage over time. Keep a checklist handy to track what you’ve inspected and any issues found.
Preventive Measures
Taking preventive measures reduces the chances of significant damage. During the swimming season, avoid sharp objects around the pool area. Install a protective cover when the pool isn’t in use.
Regularly clean your pool’s filter and maintain proper chemical balance. Use a pool water test kit weekly to check pH, chlorine levels, and alkalinity. Proper chemical balance helps avoid algae and bacteria growth, protecting your pool liner.
Consider applying a sealant after repairs are done. A good sealant protects against moisture infiltration, which can lead to further damage. Always keep a patch kit on hand for quick repairs. This readiness allows for immediate action if new damage occurs.
Conclusion
Repairing a hole in your above ground pool doesn’t have to be a daunting task. With the right tools and a bit of patience you can restore your pool to its former glory. Remember to take your time during the assessment and repair process to ensure everything’s done correctly.
Once you’ve patched the hole keep an eye on it as you refill the pool. Regular maintenance and inspections will help you catch any issues before they become major problems.
By staying proactive you’ll keep your pool in great shape for many summers to come. Enjoy your time in the water and happy swimming!
Frequently Asked Questions
How do I identify a hole in my above ground pool?
To spot a hole, inspect the pool surface for leaks, punctures, or tears. Keep an eye out for lower water levels or wet spots. Mark any damage with tape for easier tracking during repairs.
What size hole requires a patch kit?
Patch kits are suitable for small holes or tears, typically less than 4 inches. For larger or more severe damage, you may need to consult the manufacturer’s guidelines for appropriate repair solutions.
What materials do I need for repairing an above ground pool?
Gather essential materials including a patch kit, scissors, a clean cloth, a marker or tape, and a pool water test kit. These tools will help ensure a smooth and effective repair process.
How do I drain my above ground pool for repairs?
Turn off the pool pump, set up a drainage system, and monitor the water levels during the draining process. Ensure safe practices while draining to prevent any damage to the pool structure.
How long should I let a patch set before refilling the pool?
Allow the patch to set for at least 24 hours before refilling the pool. This time lets the adhesive bond effectively, ensuring a more durable repair.
What should I do after patching the pool?
After patching, refill the pool gradually and monitor the patched area for signs of leaks. Keep an eye on the water level for 24 to 48 hours to confirm the patch holds.
How can I maintain my above ground pool to prevent future holes?
Regular inspections for wear and tear, cleaning with a cloth, and avoiding sharp objects are key preventive measures. Also, maintaining the right chemical balance will help keep the pool in good condition.
Should I use a sealant after repairs?
Yes, applying a sealant post-repair can help protect the patched area and enhance its durability. Keeping a patch kit handy for future repairs is also a wise practice.