Are you dreaming of a backyard oasis but not sure where to start? Preparing the ground for a swimming pool can feel overwhelming, but it doesn’t have to be. Imagine transforming your outdoor space into a refreshing retreat where you can relax and enjoy sunny days with family and friends.
This article will guide you through the essential steps to get your yard ready for that perfect pool. From assessing your space to leveling the ground, you’ll learn practical tips that make the process smoother and more enjoyable. With the right preparation, you’ll be one step closer to making your swimming pool dreams a reality.
Table of Contents
- 1 Key Takeaways
- 2 Understanding The Importance Of Ground Preparation
- 3 Steps To Prepare The Ground For A Swimming Pool
- 4 Excavation Process
- 5 Soil Considerations
- 6 Leveling The Ground
- 7 Drainage Solutions
- 8 Conclusion
- 9 Frequently Asked Questions
- 9.1 What is the importance of ground preparation for a swimming pool?
- 9.2 How can I assess the soil quality before installing a pool?
- 9.3 What are effective drainage solutions for pool installation?
- 9.4 How do I level the ground for pool installation?
- 9.5 What challenges might I face during ground preparation?
Key Takeaways
- Understand Ground Preparation: Proper ground preparation is essential for the stability, safety, and longevity of your swimming pool installation.
- Assess and Measure: Carefully assess the space, measure the area, and consider potential hazards and utility lines before beginning the project.
- Level and Compact: Achieve a level surface using techniques like laser levels or stakes, and ensure soil is compacted to support the pool’s weight.
- Establish Drainage: Implement effective drainage solutions such as French drains to prevent water accumulation and protect your pool’s structure.
- Test Soil Quality: Conduct soil tests to identify issues like high clay content or rocky terrain, and address these appropriately for a stable foundation.
- Follow Excavation Steps: Utilize the right tools and techniques during excavation to create an accurate and reliable base for your swimming pool installation.
Understanding The Importance Of Ground Preparation
Ground preparation plays a crucial role in the installation of a swimming pool. A well-prepared site ensures stability, safety, and longevity for your pool.
Stability
Sturdy ground supports the pool structure. Uneven ground can lead to shifting and settling, causing cracks or leaks. A solid base also helps maintain the pool’s shape over time, preventing costly repairs.
Safety
Proper preparation reduces hazards. A level surface minimizes the risks of slips and falls around the pool. It also decreases the chances of water accumulation in uneven areas, which can lead to slips or drownings.
Longevity
Well-prepared ground contributes to the lifespan of your pool. Proper drainage prevents water from pooling near the foundation. It decreases the risk of structural damage, ensuring your pool remains intact for years.
- Assess Your Space: Measure the area where the pool will go. Ensure you have sufficient space for the pool dimensions plus additional clearance around it.
- Clear The Area: Remove rocks, vegetation, and debris. Clear space helps you identify any problematic areas that may need additional attention.
- Level The Ground: Use a laser level or string level to check elevation. Create a flat surface using soil or gravel to fill any low spots.
- Compact The Soil: Compacting the soil ensures it can support the weight of the pool. Use a plate compactor or hand tamper to achieve a firm base.
- Build A Drainage System: Proper drainage prevents water accumulation. Install a French drain or surface drainage system to direct water away from the pool area.
By following these steps, you ensure your swimming pool’s foundation is strong, safe, and long-lasting. Proper ground preparation sets the stage for a successful installation and enhances your overall pool experience.
Steps To Prepare The Ground For A Swimming Pool
Preparing the ground for a swimming pool involves several critical steps. Each step contributes to a safe, stable, and inviting swimming environment.
Recommended Products

Easy to Use

ACCURATE UNDERGROUND WIRE LOCATOR. Quickly isolate, trace the path and determine the depth of buried conductors (wires or metallic pipes) over distances of 4,000 feet (1.2 km) and depths of 7 feet (2.2 m) with the 501 underground wire locator.

TRAFFIC SIGNAL CABLE DANGER SIGN – “DANGER / Traffic Signal Cable / Service Disruption Risk / Call 811 Before You Dig” marks buried traffic signal infrastructure and alerts crews before trenching, boring, augering, or post driving begins.
Assessing The Location
Assess the area where you plan to install the pool. Identify any potential hazards such as large trees, unstable ground, or sloping terrain. Look for adequate space, ensuring you allow enough distance from fences and structures. You can use a tape measure to determine dimensions. This careful assessment helps you choose a suitable location for a successful installation.
Checking For Utilities
Check for underground utilities before digging. Call your local utility companies to request a utility markout. This process identifies buried lines for water, gas, electricity, or telecommunications. If you encounter any utilities, adjust your pool placement accordingly to avoid damage, which can lead to costly repairs or safety hazards.
Determining Pool Size And Shape
Determine the size and shape of your pool based on available space and preferences. Consider shapes like rectangular, oval, or freeform, each offering unique designs and benefits. Measure your space to ensure the chosen pool fits comfortably while maintaining safe distances from obstacles. Use string or stakes to outline the proposed shape, giving you a visual framework to adjust as needed.
Excavation Process
Preparing the ground for a swimming pool involves careful excavation. This process ensures accurate pool dimensions, a stable site, and proper drainage.
Recommended Products

Pool Tool Inc. Lid Removal Tool 110


Tools Needed For Excavation
Gather essential tools before starting the excavation. The right tools simplify the process and enhance efficiency.
- Shovel: A sturdy shovel, either spade or round-point, helps in digging and removing soil.
- Pickaxe: Useful for breaking hard ground or rocks.
- Excavator: A small excavator or mini-loader speeds up the digging process and handles larger volumes of soil.
- String Line: Use a string line to outline the pool’s shape and dimensions accurately.
- Level: A level tool ensures the ground is even after excavation.
- Rake: A rake helps in smoothing the soil and clearing debris after excavation.
- Safety Gear: Wear gloves, eye protection, and a hard hat for safety while working.
Techniques For Effective Excavation
Implement effective techniques to ensure a successful excavation process. Following these steps will provide a solid foundation for the pool.
- Mark the Area: Use stakes and string to outline the pool’s shape and dimensions clearly.
- Start Digging: Begin excavation from the center, working outward. Remove soil gradually, ensuring the shape remains consistent.
- Check Depth: Regularly measure the depth as you dig. Ensure it matches the pool specification, accounting for any adjustments.
- Remove Excess Soil: Store or dispose of excess soil appropriately. Ensure the surrounding area remains clear and safe.
- Compact the Subsoil: Once excavation is complete, compact the subsoil to create a stable base. Use a plate compactor for effectiveness.
- Evaluate Drainage: After excavation, assess the drainage. Ensure water will flow away from the pool area to prevent future issues.
Following these excavation steps creates a solid foundation for your swimming pool.
Soil Considerations
Soil plays a crucial role in preparing the ground for your swimming pool. Evaluating soil quality and addressing any issues ensures a stable base for your pool.
Recommended Products
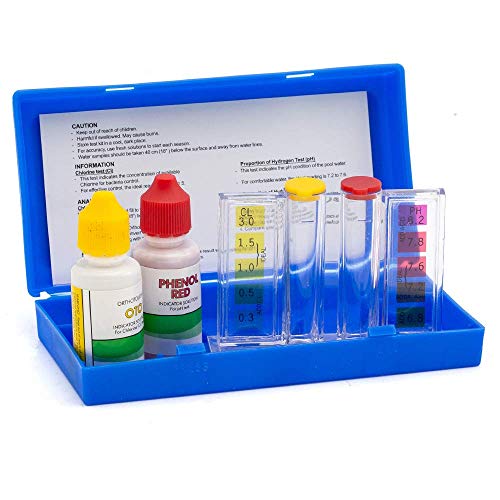
2 Way Pool Water Test Kit For Test For OTO, CL, and PH Level
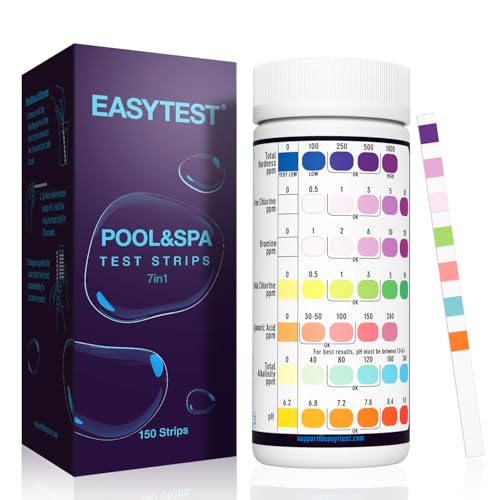
AFFORDABLE 150 STRIPS: This water chemical testing kit contains 150 test strips. Enough balanced for your swimming pool, hot tub, spa and other water testing. At least testing twice a week is recommended to keep your pool sparkling clean and safe.
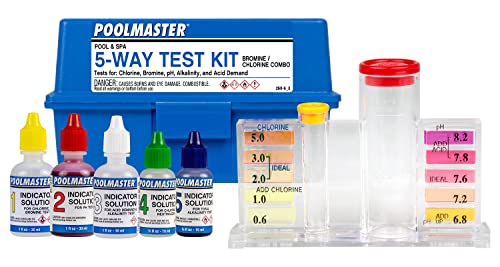
For maintaining proper water chemistry; tests for Chlorine, Bromine, pH, Acid Demand, and Total Alkalinity
Testing Soil Quality
Testing soil quality helps determine its suitability for a swimming pool installation. You can perform a soil test by following these steps:
- Collect Samples: Gather soil samples from various locations within the designated pool area.
- Analyze Texture: Examine the texture by rubbing the soil between your fingers. Sandy soil feels gritty, while clay soil feels sticky.
- Check Drainage: Conduct a drainage test by digging a hole about one foot deep and filling it with water. If the water drains within 24 hours, the soil has good drainage.
- Professional Testing: For more accurate results, consider sending samples to a local agricultural extension office for a detailed analysis. They’ll assess pH levels, nutrient content, and more.
Addressing Soil Issues
Addressing soil issues ensures a sound foundation for your pool. Common problems include excessive clay, loose sand, or rocky soil. Here’s how to handle these challenges:
- Excess Clay: If you encounter heavy clay, mixing in sand or gravel improves drainage and stability.
- Loose Sand: For sandy soil, compact it thoroughly. Use a mechanical compactor or a tamper to ensure strength.
- Rocky Soil: Remove large rocks and debris. If the soil is highly rocky, consider enlarging the excavation to ensure stability.
- Drainage Solutions: Install proper drainage systems like French drains to mitigate water accumulation, preventing soil erosion and instability.
By carefully testing and addressing soil quality and issues, you create a robust base for your swimming pool installation.
Leveling The Ground
Leveling the ground is crucial for a stable swimming pool installation. Proper leveling ensures that the pool holds water evenly and remains structurally sound. Follow these detailed methods and techniques for effective ground leveling.
Methods For Leveling
- Site Assessment: Walk the area where you’ll install the pool. Identify any slopes or uneven patches.
- Using Stakes and String: Drive stakes into the ground where the pool corners will be. Run string between the stakes at the desired height to create a level reference.
- Laser Level: Employ a laser level for high precision. Position it in the center of the area and measure the height from the laser beam to the ground at various points.
- Bubble Level: For small areas, a simple bubble level can suffice. Place it on a long board across the surface to check for evenness.
- Excavation: Remove high spots using a shovel or excavator. Fill low spots with soil to achieve a flat surface.
- Manual Compaction: For small areas, use a hand tamper to compact the soil. Press down firmly to eliminate air pockets.
- Plate Compactor: Rent a plate compactor for larger areas. This machine vibrates to compact the soil effectively.
- Moisture Control: Lightly water the soil before compacting. Slight moisture helps the soil particles adhere together.
- Layering: Work in 4- to 6-inch layers when adding soil. Compact each layer before adding the next for better stability.
- Test Compactness: Perform a simple test by walking on the compacted area. It should feel solid underfoot; if not, repeat compaction until firm.
By following these methods and techniques, you create a well-leveled base for your swimming pool, enhancing its longevity and performance.
Drainage Solutions
Effective drainage solutions play a critical role in preparing your ground for a swimming pool. Proper drainage protects your pool from water damage and ensures a stable installation.
Importance Of Proper Drainage
Proper drainage prevents water accumulation around your pool. Standing water can erode the soil, leading to instability or even structural issues. Designing drainage systems lowers the risk of flooding, enhancing the longevity of the pool. Effective drainage also prevents algae growth and minimizes maintenance needs.
- Evaluate the Site
Observe the area where the pool will sit. Look for natural slopes and water flow patterns. Identify low spots where water collects. - Choose Your Drainage System
Select an appropriate drainage solution, such as:
- French Drains: These consist of a trench filled with gravel and a perforated pipe to redirect water away from the pool.
- Surface Drains: These catch surface water before it reaches the pool.
- Dig Trenches
For French drains, dig a trench that slopes away from the pool. Ensure it’s at least 6 inches wide and 18-24 inches deep. - Lay the Pipe
Place the perforated pipe at the bottom of the trench. Ensure the holes face downward for effective drainage. - Add Gravel
Fill the trench with gravel up to 2-3 inches above the pipe. This helps filter debris while allowing water to flow through. - Cover with Soil
Top off the gravel with soil, leveling it to match the surrounding area. - Test the System
Check your drainage by running water through it. Ensure the water flows away from the pool effectively.
Following these steps ensures a well-drained area around your pool, providing a stable and clean environment for your swimming experience.
Conclusion
Preparing the ground for your swimming pool is a crucial step that sets the foundation for years of enjoyment. By taking the time to assess your space and address any soil issues you might face, you’re ensuring a stable and safe environment for your pool.
Remember that proper drainage solutions not only protect your investment but also keep your pool area clean and inviting. With careful planning and execution, you’ll create a perfect oasis right in your backyard. Enjoy the process and get ready for countless fun-filled days ahead!
Frequently Asked Questions
What is the importance of ground preparation for a swimming pool?
Ground preparation is crucial for a stable swimming pool installation. It ensures the site is level, well-drained, and free from soil issues like clay or rocks that can affect the pool’s integrity. Proper preparation prevents future problems such as water damage, instability, or algae growth.
How can I assess the soil quality before installing a pool?
To assess soil quality, conduct soil tests that evaluate its composition and drainage capabilities. Look for signs of clay, sand, or rocky terrain. Engaging a professional can help determine how to address any identified issues effectively before installing your pool.
What are effective drainage solutions for pool installation?
Effective drainage solutions include implementing systems like French drains or surface drains to prevent water accumulation. This involves evaluating the site, digging trenches, laying pipes, adding gravel, and covering with soil. Proper testing ensures that the drainage system functions correctly, promoting pool stability.
How do I level the ground for pool installation?
To level the ground, start with a thorough site assessment. Utilize stakes and string to outline the area, and then use laser or bubble levels to check elevation. Excavate, compact the soil, control moisture, and test compactness to achieve a solid base for pool installation.
What challenges might I face during ground preparation?
Challenges may include dealing with varying soil types, such as clay or rocky ground. Each type requires specific handling techniques, such as adding amendments for clay or excavation for rocks. Poor drainage and soil instability can also pose risks, making proper assessment and solutions essential.