
Owning a hot tub can be a source of immense relaxation and enjoyment, especially for those living in coastal or sandy regions. However, to truly relish the soothing waters of your hot tub, it’s crucial to ensure that it remains free from sand particles.
Whether you’re a hot tub owner, a vacation rental host, or a maintenance professional, understanding the significance of a sand-free hot tub is essential.
In this comprehensive guide, we’ll delve into the reasons why a sand-free hot tub matters and provide you with actionable steps to remove sand from your hot tub effectively. Additionally, we’ll share preventive measures that can help you avoid sand-related issues in the future. So, let’s dive in and uncover the secrets to maintaining a pristine hot tub experience.
Table of Contents
- 1 Why is There Sand in My Hot Tub
- 2 The Implications of Sand in Your Hot Tub
- 3 How to Remove Sand From Hot Tub
- 4 Other Methods to Remove Sand from Your Hot Tub
- 5 Preventive Measures to Avoid Future Sand Issues
- 5.1 1. Upgrade to a High-Quality Filter System
- 5.2 2. Employ a Pre-filter System
- 5.3 3. Instill a Rinse-off Rule
- 5.4 4. Schedule Regular Draining and Cleaning
- 5.5 5. Always Use a Cover
- 5.6 6. Regularly Inspect Plumbing
- 5.7 7. Incorporate Flocculants
- 5.8 8. Install a Windbreak or Privacy Screen
- 5.9 9. Placemats and Shoe Racks
- 5.10 10. Water Softening
- 5.11 11. Regular Cleaning of Surroundings
- 6 Maintenance Schedule to Keep Sand Out of Your Hot Tub
- 7 Conclusion
- 8 Frequently Asked Questions
- 8.1 1. How often should I clean the hot tub to prevent sand buildup?
- 8.2 2. Can sand damage the hot tub’s plumbing or jets?
- 8.3 3. How long does it take to remove sand from a hot tub using different methods?
- 8.4 4. How can I remove sand stuck in the small crevices of my hot tub shell?
- 8.5 5. How can sand in a hot tub affect the water chemistry?
Why is There Sand in My Hot Tub
The presence of sand in your hot tub might seem perplexing, but there are several plausible reasons behind this occurrence. Understanding these factors can help you not only address the issue but also prevent future sand-related inconveniences.
- External Contaminants: Sand can be carried into your hot tub by wind, rain, or people entering the tub with sand on their feet or clothing. This is a common reason for sand accumulation, especially if your hot tub is located near a beach or a sandy area.
- Filter Issues: The primary purpose of the hot tub’s filter is to remove debris and contaminants from the water. If the filter is not functioning properly, it might not effectively catch sand particles, allowing them to circulate in the water.
- Water Source: If you fill your hot tub with water from a well or other sources that contain sediment, the sand particles might enter the tub along with the water.
- Deteriorating Equipment: Over time, certain components of your hot tub’s infrastructure, such as pipes or seals, can deteriorate or degrade, leading to the release of sand or other debris into the water.
- Incorrect Chemical Balance: An improper balance of chemicals in the water can lead to various issues, including the coagulation or precipitation of particles, which might appear as sand-like sediment.
- Algae or Biofilm Growth: Sometimes, certain types of algae or biofilms can create sand-like particles as they grow and break down.
The Implications of Sand in Your Hot Tub
Having sand in your hot tub might appear inconsequential at first glance, but it can lead to a host of problems that impact both the enjoyment and the maintenance of your hot tub.
- Clogging and Damage to Equipment: Sand particles can clog your hot tub’s filters and plumbing system over time. This can reduce water circulation efficiency and strain the pump and other equipment, potentially leading to malfunctions and expensive repairs.
- Uncomfortable Experience: Sand at the bottom of the hot tub can create an uncomfortable sensation for bathers. Instead of a smooth, soothing experience, you might find yourself sitting on abrasive surfaces that detract from the relaxation you seek.
- Water Quality Concerns: Sand can affect water clarity and quality. It can make the water appear cloudy and diminish the effectiveness of sanitizers, leading to an unhygienic environment that is not suitable for soaking.
- Aesthetic Impact: A layer of sand in the hot tub doesn’t look appealing and might deter you and your guests from using it. For vacation rental owners, this could negatively affect the overall guest experience.
- Time-Consuming Cleaning: Dealing with sand in your hot tub demands frequent and thorough cleaning efforts. This takes away from the convenience and leisure your hot tub should provide.
How to Remove Sand From Hot Tub
Now that we understand the importance of maintaining a sand-free hot tub, let’s explore the steps to effectively remove sand and restore your hot tub to its pristine state. Whether you’re a diligent hot tub owner, a vacation rental host, or a maintenance professional, these actionable strategies will help you tackle the issue head-on.
By following these steps, you’ll not only enhance the quality of your hot tub experience but also extend the lifespan of your equipment. So, let’s roll up our sleeves and get started on the journey to a sand-free oasis.
Step 1: Gather the Required Tools and Equipment
Before you embark on the journey to remove sand from your hot tub, ensure you have all the necessary tools and equipment at your disposal. Being prepared will streamline the process and make the task more efficient.
- Hose: A garden hose with a nozzle attachment for rinsing the interior of the hot tub.
- Soft Bristle Brush or Non-Abrasive Scrubber: To gently scrub the surfaces of the hot tub and dislodge sand particles.
- Hot Tub Vacuum or Siphon: Specifically designed for hot tubs, these tools will effectively remove sand from the bottom of the tub.
- Replacement Filter: If your hot tub’s filter is old or damaged, consider having a replacement on hand.
- Water Testing Kit: To ensure proper water balance after the cleaning process.
- Water Softener (Optional): Helps prevent mineral buildup that could resemble sand particles.
- Towels or Rags: For wiping down surfaces and cleaning up any spills.
- Hot Tub Cover Strap (if needed): To secure the hot tub cover and prevent sand from blowing in.
- Bucket: For carrying tools, collecting debris, or storing small items.
Step 2: Drain and Empty the Hot Tub
To effectively remove sand from your hot tub, you’ll need to start with a clean slate. Draining and emptying the hot tub is the crucial first step in this process.
- Turn Off the Power: Before you begin, make sure to turn off the power to the hot tub to ensure your safety.
- Locate the Drain Plug: Most hot tubs have a drain plug located at the base. This plug allows you to release the water from the tub.
- Attach a Hose (Optional): If your hot tub has a hose attachment for draining, you can attach a garden hose to direct the water away from the tub. This can prevent flooding in the immediate area.
- Open the Drain Valve: Carefully open the drain valve or remove the drain plug. Allow the water to flow out of the hot tub. Keep in mind that hot tubs can hold a substantial amount of water, so ensure that the draining area can handle the volume.
- Flush Out Debris: As the water drains, you might notice debris, sand, or dirt coming out with it. This is a good opportunity to get rid of any large particles that might be present in the tub.
- Inspect the Bottom: Once the hot tub is empty, take a close look at the bottom and corners. Any accumulated sand will now be visible, and you can proceed to the next steps to address it.
- Close the Drain Valve: After the hot tub is completely drained, close the drain valve or replace the drain plug.
Quick Tip: While the hot tub is empty, take a moment to inspect the tub’s interior for any signs of damage, cracks, or wear that might require attention.
Step 3: Rinse the Interior
With the hot tub emptied, it’s time to give the interior a thorough rinse. This step helps dislodge any remaining sand particles and prepares the surfaces for further cleaning.
- Attach the Hose: Connect a garden hose to a water source and ensure it has a steady flow of water.
- Start at the Top: Begin rinsing from the top of the hot tub and work your way down. This allows the water to carry away debris as it flows downward.
- Focus on Bottom and Corners: Pay particular attention to the bottom and corners of the hot tub. These are the areas where sand is likely to settle.
- Use Adequate Pressure: Adjust the hose nozzle to a pressure that effectively dislodges the sand without damaging the hot tub’s surfaces.
- Circular Motion: Move the hose in a circular motion as you rinse. This helps cover a larger area and ensures thorough cleaning.
- Inspect as You Go: Keep an eye out for any remaining sand particles. If you spot stubborn sand patches, gently scrub them using a soft bristle brush or non-abrasive scrubber.
- Allow Water to Drain: Allow the water and loosened debris to flow out of the hot tub. This will prevent recontamination as you proceed with the cleaning process.
Step 4: Scrub the Surfaces
After rinsing the interior, it’s time to give the surfaces of the hot tub a gentle but effective scrub. This step helps remove any sand particles that might be clinging to the surfaces.
- Choose the Right Tool: Opt for a soft bristle brush or a non-abrasive scrubber. This prevents any damage to the hot tub’s finish while effectively removing sand.
- Focus on Sand-Prone Areas: Concentrate your scrubbing efforts on areas where sand was present or where it’s more likely to accumulate. These could include the bottom, corners, and seating areas.
- Gentle Circular Motion: Use a gentle circular motion to scrub the surfaces. Apply even pressure and avoid excessive force, as the goal is to remove sand without causing scratches.
- Inspect as You Go: As you scrub, keep an eye out for any stubborn sand particles that might be clinging to the surfaces. Focus on these areas a bit more to ensure thorough cleaning.
- Rinse Periodically: Periodically rinse the brush or scrubber to remove any sand particles that might have accumulated on them. This prevents reintroducing sand to the hot tub.
- Allow Debris to Settle: After scrubbing, allow any loosened debris to settle at the bottom of the tub.
Pro Tip: If you’re dealing with stubborn sand spots, dampen the area slightly before scrubbing. This can help loosen the particles for easier removal.
Step 5: Vacuum the Sand
Removing sand from the bottom of the hot tub requires specialized equipment. Invest in a hot tub-specific vacuum or a siphon to efficiently and effectively eliminate sand particles.
- Choose the Right Equipment: Ensure you have a hot tub-specific vacuum or a siphon designed for this purpose. Regular household vacuums are not suitable for this task.
- Position the Vacuum: Place the vacuum or siphon in the hot tub, making sure the nozzle is close to the bottom surface without touching it.
- Slow and Steady: Move the vacuum or siphon slowly across the surface of the hot tub. Allow it to pick up sand particles as well as any other debris that might be present.
- Pay Attention to Corners: Make sure to reach into corners and crevices, as sand can accumulate in these areas.
- Empty the Collection Chamber: If your vacuum has a collection chamber, empty it regularly to ensure optimal suction power.
- Inspect and Repeat: After the first pass, inspect the bottom of the hot tub to see if any sand particles remain. If needed, make additional passes to thoroughly clean the surface.
- Dispose of Debris: Properly dispose of the collected debris in a suitable manner. Be mindful not to reintroduce sand into the environment.
Step 6: Clean the Filter
A clean and properly functioning filter is essential for maintaining a sand-free hot tub. Sand particles can easily clog the filter, affecting water circulation and overall water quality. Let’s delve into the process of cleaning and maintaining your hot tub’s filter.
- Turn Off the Power: Before you proceed, turn off the power to the hot tub to ensure your safety.
- Locate the Filter: Identify the location of the hot tub’s filter. It’s usually positioned near the pump or in a designated compartment.
- Remove the Filter: Carefully remove the filter according to the manufacturer’s instructions. This might involve twisting, unscrewing, or releasing latches.
- Inspect the Filter: Take a close look at the filter. If you notice visible sand particles or debris, it’s a sign that the filter needs cleaning.
- Rinse the Filter: Use a hose to rinse the filter thoroughly. Direct the water at an angle that washes away debris without pushing it deeper into the filter.
- Soak and Clean (if needed): If the filter is heavily clogged with sand or debris, consider soaking it in a filter cleaning solution. Follow the manufacturer’s recommendations for soaking time.
- Brush Gently (if needed): For stubborn sand particles, use a soft brush to gently scrub the filter’s surface. Be cautious not to damage the filter media.
- Rinse Again: After cleaning, give the filter another thorough rinse to ensure all cleaning agents and debris are removed.
- Allow to Dry: Allow the filter to air dry completely before reinserting it into the hot tub. A wet filter can foster bacterial growth.
- Inspect and Replace: Before reinserting the filter, inspect it for any signs of wear or damage. If the filter is too worn, it’s a good idea to replace it with a new one.
Pro Tip: To extend the lifespan of your hot tub’s filter, consider having a spare filter on hand. This allows you to rotate between filters during cleaning and reduces wear on each individual filter.
Discover the essential steps for effectively cleaning and maintaining your hot tub filters in our informative guide. Learn how to remove debris, sand, and particles that can hinder your hot tub’s performance and water quality. From rinsing techniques to soaking tips, this guide offers expert advice on maintaining pristine filters for an optimal hot tub experience.
Step 7: Refill and Balance the Water
After successfully removing sand and ensuring your hot tub’s interior is clean, it’s time to replenish the water and restore the balance of its chemical composition. Proper water chemistry is crucial for a safe and enjoyable hot tub experience.
- Close Drain Valve: Ensure the drain valve is closed securely to prevent water leakage.
- Refill the Hot Tub: Use a garden hose to refill the hot tub with clean, fresh water. Be cautious not to overfill the tub.
- Test Water Parameters: Use a water testing kit to measure the pH, alkalinity, and sanitizer levels of the water.
- Adjust pH: If the pH level is not within the recommended range (typically 7.2 to 7.6), adjust it using a pH increaser or decreaser according to the manufacturer’s instructions.
- Balance Alkalinity: If alkalinity levels are too high or too low, use the appropriate chemicals to balance it. Proper alkalinity helps stabilize the pH levels.
- Sanitize the Water: Ensure the sanitizer levels (usually chlorine or bromine) are within the recommended range. Adjust as needed to maintain a safe and hygienic environment.
- Allow Water Circulation: Run the hot tub’s circulation system for a few hours to ensure the chemicals are evenly distributed.
- Retest and Adjust: After a few hours, retest the water parameters and adjust as necessary to achieve optimal balance.
- Cover the Hot Tub: Once the water is properly balanced, cover the hot tub securely to prevent debris and sand from entering.
Quick Tip: Consider using a water clarifier after refilling the hot tub to aid in removing any residual particles and achieve sparkling clear water.
Discover the art of filling and maintaining your hot tub for an indulgent and worry-free soaking experience. Our step-by-step guide on how to fill a hot tub walks you through the process of proper water preparation, balancing, and sanitization. Learn the essential techniques to ensure crystal-clear water, optimal chemical levels, and a refreshing oasis that’s ready for relaxation.
Other Methods to Remove Sand from Your Hot Tub
Finding sand in your hot tub can be a perplexing situation, but fear not – there are several methods at your disposal to effectively remove sand and restore your hot tub to its pristine state. Let’s delve into the details of each method:
Recommended Products
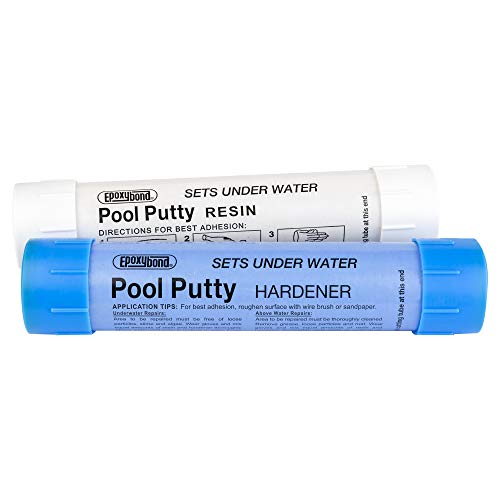
SAFE AND LASTING HAND-MOLDABLE PUTTY APPLY TO FIX LEAKS UNDERWATER: So easy and safe to use. Simply mix 1-to-1, mold putty in your hands, and apply to the area where leak or crack.
1. Silly Putty
It might sound surprising, but silly putty has proven itself as an unconventional yet effective tool for addressing sand accumulation in your hot tub. This innovative approach introduces a unique way to tackle sand and maintain the pristine environment of your hot tub.
How it Works
The magic of silly putty lies in its adhesive properties, which can be harnessed to attract and trap small sand particles. Here’s how this creative method works:
- Submerge Silly Putty: Begin by submerging a piece of silly putty underwater in your hot tub. Allow it to sink to the bottom, where the sand is likely to accumulate.
- Adhesion and Trapping: Silly putty’s natural tackiness comes into play as it adheres to the sand particles. As you press the putty onto the sand-laden areas, it traps the sand within its malleable texture.
- Lifting Action: Gently lift the silly putty, along with the trapped sand, from the water. The sand particles should remain stuck to the putty’s surface.
- Repeat as Needed: Depending on the amount of sand present, you might need to repeat the process in various areas of your hot tub.
Considerations
While using silly putty can be effective, there are a few considerations to keep in mind:
- Putty Residue: After using silly putty, ensure that any remnants are thoroughly removed from the hot tub to prevent them from accumulating over time.
- Regular Cleaning: While this method is creative, it might not be suitable for comprehensive cleaning. Consider other methods for more extensive sand removal.
2. Turkey Baster
Who would have thought that a humble turkey baster, typically associated with kitchen endeavors, could play a vital role in your hot tub maintenance routine? This unexpected twist in hot tub care offers a focused and hands-on approach to dealing with sand accumulation.
How it Works
Taking a creative detour, the turkey baster transforms from a culinary tool into a hot tub maintenance ally. Here’s how this innovative method works:
- Targeted Sand Removal: Identify specific areas within your hot tub where sand tends to accumulate, such as corners or crevices.
- Suction Action: Submerge the open end of the turkey baster into the water and press the bulb to expel air. Release the bulb to allow the baster to suck in water along with sand particles.
- Manual Extraction: As the turkey baster fills with water and sand, remove it from the hot tub and empty the contents into a suitable disposal location.
- Repeat as Needed: Depending on the extent of sand accumulation, you might need to repeat the process in different sand-prone areas.
Considerations
While the turkey baster method offers precision in sand removal, it’s important to note a couple of considerations:
- Manual Effort: This method requires manual effort as you squeeze and release the bulb of the turkey baster. However, it’s a small investment for the targeted cleaning benefits it provides.
- Specific Areas: Given its focused approach, the turkey baster method might not be suitable for cleaning the entire hot tub. Reserve it for areas where sand tends to accumulate.
3. Siphon Using a Garden Hose
When it comes to simplicity and effectiveness, the garden hose siphon method takes the spotlight as a straightforward technique to remove sand and debris from your hot tub. This method capitalizes on the force of gravity to facilitate effortless sand removal.
How it Works
The garden hose siphon method utilizes the principle of gravity to create a flow of water that carries away sand particles from the bottom of your hot tub. Here’s how to harness this natural force for effective sand removal:
- Setup: Begin by connecting a garden hose to a water source. Ensure that one end of the hose is immersed in the hot tub water while the other end remains outside the tub.
- Prime the Hose: Submerge the end of the hose inside the hot tub water, ensuring it’s completely filled with water. This primes the siphon and establishes the initial flow.
- Position the Hose: Keeping the end of the hose submerged, position it at a lower point than the water level of the hot tub. This elevation difference is crucial for creating a continuous flow.
- Gravity Takes Over: The weight of the water in the hose, combined with the elevation difference, initiates a siphoning effect. Water flows out of the hot tub, drawing sand and debris with it.
Considerations
While the garden hose siphon method is straightforward, there are a few considerations to keep in mind:
- Flow Rate: The effectiveness of this method can depend on the flow rate of your water source and the elevation difference between the hose ends.
- Comprehensive Cleaning: While it efficiently removes sand from the bottom, this method might not be as effective for cleaning the entire hot tub interior.
4. Shop Vacuum
For a thorough and intensive cleaning session, a shop vacuum equipped with wet vacuuming capabilities emerges as the star player. This method showcases its prowess in not only removing sand but also achieving a comprehensive drainage of your hot tub, making it ideal for situations that demand a deeper cleaning approach.
How it Works
The shop vacuum with wet vacuuming capabilities harnesses the exceptional suction power it’s known for to effectively remove sand and debris from your hot tub. Here’s why it takes center stage in intensive cleaning:
- Wet Vacuuming Setup: Begin by setting up your shop vacuum for wet vacuuming. Ensure that all the necessary components are in place and that the vacuum is ready for action.
- Powerful Suction: Position the vacuum nozzle at the bottom of the hot tub and activate the wet vacuuming function. The powerful suction of the shop vacuum instantly pulls in water, sand, and debris.
- Comprehensive Drainage: As the vacuum works its magic, not only is sand lifted, but the water in the hot tub is also effectively drained. This ensures a thorough cleaning session.
Considerations
While the shop vacuum method with wet vacuuming capabilities is highly effective, there are a few considerations to bear in mind:
- Equipment Handling: Shop vacuums can be heavy and might require some effort to maneuver, especially if your hot tub is large.
- Water Control: Ensure that you have a plan for controlling the water that’s being vacuumed, especially if you’re draining the hot tub completely.
5. Spa Wand
When it comes to maintaining a sand-free and inviting hot tub, the spa wand emerges as a reliable and user-friendly tool. Designed to simplify the process of sand removal and surface cleaning, the spa wand offers a hassle-free solution that caters to hot tub owners’ needs.
How it Works
The spa wand’s operation is ingeniously uncomplicated, offering a straightforward solution to sand accumulation:
- Submersion: Begin by submerging the spa wand into your hot tub. Ensure that the wand’s intake end is fully immersed in the water, allowing it to effectively draw in water, sand, and debris.
- Activation: With the spa wand underwater, activate its suction power. This is typically achieved by squeezing a rubber bulb or activating a button, depending on the specific model.
- Suction Power: As the spa wand’s suction power comes into play, water along with sand and debris is drawn into the wand’s intake end. The powerful yet controlled suction lifts the particles from the hot tub’s bottom.
- Collection Chamber: The drawn-in water and debris are directed into a collection chamber within the spa wand. This chamber temporarily holds the sand and debris, preventing them from re-entering the hot tub.
- Surface Movement: To effectively remove sand from the bottom, move the spa wand in a deliberate and systematic manner. Cover the entire bottom surface to ensure comprehensive sand removal.
- Release and Repeat: Once you’ve covered the desired areas, release the suction and lift the spa wand out of the water. With the spa wand removed from the hot tub, empty the collection chamber to dispose of the collected sand and debris.
Considerations
While using a spa wand is hassle-free, there are a few considerations to keep in mind:
- Water Level: Maintain an appropriate water level in your hot tub to ensure effective sand removal. The spa wand’s suction power works optimally when submerged to the recommended level.
- Regular Cleaning: Empty the spa wand’s debris container regularly to prevent clogs and ensure consistent suction performance.
- Non-Abrasive Surfaces: Use the spa wand on surfaces that won’t be scratched or damaged by its suction force. Avoid using it on delicate or abrasive materials.
- Intuitive Use: The spa wand’s simplicity makes it suitable for all hot tub owners, regardless of their experience level. Its intuitive design ensures easy and effective usage.
6. Homemade Siphon
When it comes to tackling sand accumulation in your hot tub, ingenuity knows no bounds. Enter the homemade siphon, a DIY solution that harnesses the power of a basic principle to effectively remove sand and debris from your hot tub’s depths.
Creating Your Homemade Siphon
Crafting a homemade siphon involves simple materials and a straightforward process. Here’s how you can set up your own DIY sand removal tool:
Materials You’ll Need:
- Two lengths of flexible tubing
- A container or bucket
- Water source (such as a garden hose)
- Gravity (the secret ingredient!)
Steps:
- Cut the Tubing: Begin by cutting two lengths of flexible tubing. One length should be shorter, connecting your hot tub to the container, while the longer length connects the container to the water source.
- Priming the Siphon: Fill the longer tubing with water by immersing it in your hot tub and allowing water to flow through it. This primes the siphon, kickstarting the flow of water.
- Position the Container: Place the container or bucket at a lower elevation than your hot tub. This elevation difference ensures that gravity facilitates water flow.
- Gravity Takes Over: As the primed tubing carries water from your hot tub to the container, gravity takes over. The continuous flow creates a siphon effect, drawing water, sand, and debris out of your hot tub.
Considerations
While the homemade siphon is an ingenious method, there are a few considerations to keep in mind:
- Elevation Difference: The effectiveness of the siphon relies on the elevation difference between your hot tub and the container. Ensure that the container is positioned lower than the hot tub.
- Flow Rate: The flow rate might vary based on factors such as the length and diameter of the tubing and the water source’s pressure.
7. Use the Grit-Gitter
When it comes to spot cleaning sand and dirt from your hot tub or spa, the Grit-Gitter takes the lead as a versatile and effective handheld cleaning tool. Designed exclusively for hot tubs, this innovative device offers a range of features that make sand removal a breeze.
How it Works
The Grit-Gitter’s operation is elegantly simple yet highly effective:
- Squeeze to Create Suction: To initiate the cleaning process, squeeze the rubber bottle of the Grit-Gitter. This action creates a suction force within the tool.
- Debris Collection: As the bottle is squeezed, the suction force draws in water along with sand, dirt, and other debris from your hot tub.
- Release to Expel: Release the bottle’s pressure to expel the accumulated water and debris. The collected debris remains trapped in the container, while water is expelled back into the hot tub.
- Repeat as Needed: Depending on the extent of sand and dirt accumulation, you might need to repeat the squeezing and releasing process multiple times until the desired cleaning results are achieved.
Considerations
While using the Grit-Gitter is straightforward, considering a few important factors can help you make the most of this tool:
- Spot Cleaning: The Grit-Gitter is primarily designed for spot cleaning rather than large-scale sand removal. Focus on high-traffic areas or specific spots with sand accumulation for optimal results.
- Effort and Persistence: While the Grit-Gitter simplifies the cleaning process, manual effort is still required for effective debris removal. Be persistent in squeezing and releasing the tool to ensure thorough cleaning.
- Compatible Surfaces: The Grit-Gitter is designed for use on hot tub surfaces. Avoid using it on abrasive or delicate materials that could be damaged by the tool’s suction force.
- Gentle Suction: While the Grit-Gitter’s suction force is effective for sand and debris, avoid using excessive force to prevent damage to your hot tub’s surfaces.
Preventive Measures to Avoid Future Sand Issues
Maintaining a sand-free hot tub involves more than just cleaning—it requires adopting preventive strategies that keep sand at bay in the first place. By taking these measures, you can ensure a consistently enjoyable and hassle-free hot tub experience.
Recommended Products

GLACIER FRESH garden hose filter contains coconut shell-activated carbon particles, which can effectively remove particles, odor, chlorine removal, and other substances, to provide you with purer and healthier water.
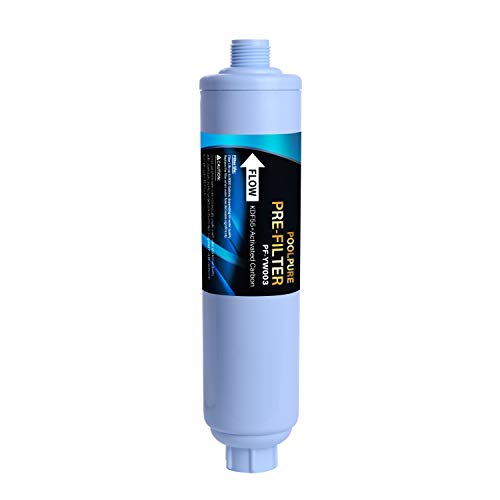
🏊Proud Partner of Florida Gators Swimming & Diving: PoolPure officially partners with the Florida Gators to support elite-level aquatic training. This collaboration reflects our shared focus on high-performance water quality, reliability, and consistency in demanding competitive environments.
1. Upgrade to a High-Quality Filter System
A hot tub’s filter system is its first line of defense against contaminants. A high-quality filter effectively captures sand and debris, ensuring they don’t circulate in the water or damage the plumbing. Even the best filters have a lifespan. Over time, they can become clogged or less effective. Cleaning or replacing them regularly, as per the manufacturer’s guidelines, ensures they operate at peak efficiency.
2. Employ a Pre-filter System
When it comes to maintaining a sand-free hot tub, pre-filters offer an ingenious solution that adds an extra layer of protection. Positioned before the main filter, these devices effectively capture larger debris and a substantial portion of sand, easing the workload on the primary filter. This not only extends the life of your main filter but also offers potential long-term savings in maintenance costs.
3. Instill a Rinse-off Rule
Rinsing off before slipping into the soothing embrace of your hot tub isn’t solely about keeping sand at bay. It’s a practice that serves a dual purpose, encompassing both sand prevention and maintaining water quality. By washing away lotions, oils, and other contaminants from the skin, you’re not only contributing to a sand-free soak but also preserving the purity of your hot tub’s water.
4. Schedule Regular Draining and Cleaning
Over time, water chemistry can become imbalanced, and contaminants can accumulate. Regular draining ensures the water remains fresh and clean. Opt for cleaners specifically designed for hot tubs. They’re formulated to tackle the unique challenges posed by hot tub surfaces and water chemistry.
5. Always Use a Cover
A high-quality hot tub cover acts as a protective barrier against sand and various contaminants. A securely fastened cover creates a barrier that prevents sand from being blown into the hot tub, ensuring your soak remains undisturbed by unwanted particles. By keeping sand and debris out, the cover helps maintain water clarity, enhancing the overall visual appeal and inviting atmosphere of your hot tub.
6. Regularly Inspect Plumbing
Even a small breach in your hot tub’s plumbing or structure can disturb the delicate balance of pressure. This can create a suction effect, drawing in external elements like sand. Over time, this can lead to sand accumulation in your hot tub, affecting water clarity and the overall enjoyment of your oasis. Regular inspections are your first line of defense against such issues. By identifying and addressing minor leaks promptly, you can prevent them from evolving into major, costly problems.
7. Incorporate Flocculants
Flocculants are substances that promote the aggregation of fine particles in the water, causing them to form larger clusters. This process, known as flocculation, aids in the effective removal of suspended particles, including sand, from the water. Flocculated particles become larger and heavier, making them easier for the filtration system to capture. This leads to more efficient removal of sand and debris from the water.
8. Install a Windbreak or Privacy Screen
Windbreaks or privacy screens are physical barriers that shield your hot tub area from strong winds and blowing sand. By strategically positioning these screens, you create a protective zone that prevents sand particles from infiltrating the water. This is particularly beneficial for hot tubs located in coastal or windy areas.
9. Placemats and Shoe Racks
Positioning mats and shoe racks at the entrance of the hot tub area encourages bathers to remove their footwear before entering. This prevents sand from being tracked in, reducing the likelihood of sand contamination in the water. Periodically inspect the placemats for wear and tear. Replace them if they start to lose their effectiveness. Additionally, routinely clean the placemats and shoe racks to remove collected sand and debris, ensuring their continued functionality.
10. Water Softening
Hard water can contribute to sand buildup by promoting the adhesion of particles to hot tub surfaces. This can lead to rough textures and cloudy water. Water softening aims to reduce the mineral content, enhancing the effectiveness of your hot tub maintenance efforts. Invest in pre-softening filters that are designed to remove minerals from the water before it enters the hot tub. Chemical water softeners can also be used. They are designed to chemically bind with minerals in the water, preventing them from causing problems and facilitating their removal through filtration.
11. Regular Cleaning of Surroundings
Clean surroundings discourage the accumulation of sand and debris near the hot tub, reducing the likelihood of these particles finding their way into the water. Use a broom or outdoor brush to sweep the area around the hot tub on a routine basis, removing leaves, dirt, and loose debris. Regularly wipe down any nearby surfaces, such as tables, chairs, or decking, to prevent sand and dirt buildup. Use a hose to rinse the immediate area around the hot tub, washing away any remaining sand or debris.
Maintenance Schedule to Keep Sand Out of Your Hot Tub
Preventing sand from infiltrating your hot tub requires consistent and proactive maintenance. By adhering to a well-structured schedule, you can minimize the risk of sand accumulation and ensure a pristine and enjoyable hot tub experience. Here’s a comprehensive preventive maintenance plan:
Weekly Tasks
- Check Water Clarity: Regularly inspect your hot tub’s water for clarity. Cloudiness could indicate the presence of sand or other debris.
- Skim the Surface: Use a skimmer net to remove leaves, insects, and debris from the water’s surface. This prevents larger particles from sinking and contributing to sand buildup.
- Inspect Filters: Remove and inspect the hot tub’s filters. Clean or replace them as needed to maintain effective filtration.
Bi-Weekly Tasks
- Clean Surfaces: Gently scrub the hot tub’s surfaces using a soft bristle brush. Focus on areas prone to sand accumulation, such as steps and seating areas.
- Balance Chemicals: Test and adjust water chemistry parameters, including pH, alkalinity, and sanitizer levels, to maintain optimal water quality.
Monthly Tasks
- Drain and Refill: Monthly draining and refilling of the hot tub water helps refresh the environment and reduce the buildup of contaminants, including sand.
- Clean Jet System: Use a jet cleaner to remove debris and particles that might be trapped in the jet system, preventing their release into the water.
Quarterly Tasks
- Inspect Components: Perform a thorough inspection of your hot tub’s internal components, including pipes and jets. Look for signs of deterioration or wear that could introduce sand particles.
- Vacuum and Clean: Use a hot tub-specific vacuum to remove any settled debris, preventing it from becoming a source of sand accumulation.
Annual Tasks
- Deep Clean: Conduct a comprehensive deep cleaning of your hot tub, including draining, scrubbing, and disinfecting all surfaces.
- Inspect Cover: Inspect the hot tub cover for any tears or damage. A well-maintained cover helps keep sand and debris out when the hot tub is not in use.
Ongoing Tips
- Educate Users: If you have guests or renters using the hot tub, educate them about proper foot rinsing and towel usage to minimize sand introduction.
- Choose a Clean Water Source: When refilling your hot tub, use a clean water source free from sediment to avoid introducing sand particles.
Conclusion
Maintaining a hot tub that’s free from the intrusion of sand is essential to create a serene and enjoyable oasis for relaxation. By understanding the causes of sand infiltration, implementing effective removal techniques, and adopting preventive measures, you can ensure that your hot tub remains a sanctuary of comfort and luxury.
From the innovative use of tools like spa wands and Grit-Gitters to the straightforward methods of siphoning and vacuuming, there’s a solution for every sand-related challenge. Remember that consistent maintenance and diligent care not only remove sand but also contribute to the overall longevity and efficiency of your hot tub.
As you embark on your journey to a sand-free hot tub, stay proactive, informed, and attentive to the unique needs of your hot tub environment. Whether you’re a hot tub owner, a vacation rental provider, or a maintenance professional, your commitment to maintaining a sand-free haven ensures that every dip in your hot tub is a blissful and rejuvenating experience.
Frequently Asked Questions
1. How often should I clean the hot tub to prevent sand buildup?
Regular maintenance is key to preventing sand buildup in your hot tub. Cleaning your hot tub’s filter, surfaces, and components every 1-2 weeks, or as needed based on usage and sand exposure, will help keep sand accumulation in check. Regular maintenance not only prevents sand from settling but also contributes to a cleaner and more enjoyable hot tub experience. Additionally, more frequent cleaning might be necessary if your hot tub is located in an area prone to sand infiltration, such as a coastal region.
2. Can sand damage the hot tub’s plumbing or jets?
While sand might not cause immediate damage, it can potentially clog filters and plumbing components over time. Clogs can affect water circulation, water quality, and the overall performance of your hot tub. Regular cleaning and maintenance are crucial to prevent such issues. If sand accumulation is not addressed, it can lead to reduced efficiency and costly repairs.
3. How long does it take to remove sand from a hot tub using different methods?
The time required to remove sand from a hot tub using different methods can vary based on factors such as the extent of sand accumulation, the method employed, and your familiarity with the tools. Generally, methods like using a spa wand or a vacuum cleaner with proper attachments can offer relatively quick results, often within 15-30 minutes.
4. How can I remove sand stuck in the small crevices of my hot tub shell?
Removing sand from small crevices in your hot tub shell requires a gentle and targeted approach. You can use a soft bristle brush, a spa wand with a narrow nozzle, or a vacuum cleaner with fine attachments. Carefully work on these areas to dislodge and remove sand without scratching the hot tub’s surface. Regular cleaning and attention to detail will ensure a thorough removal process.
5. How can sand in a hot tub affect the water chemistry?
Sand particles can alter the pH levels of your hot tub water. If sand is introduced, it might contribute to increased alkalinity, leading to higher pH levels. Imbalanced pH levels can cause skin and eye irritation for hot tub users. Sand particles can also absorb and bind to sanitizer chemicals like chlorine or bromine. This binding effect reduces the efficacy of sanitizers, making it harder to maintain proper disinfection levels. Additionally, sand can contribute to calcium buildup, particularly if it contains calcium carbonate. This buildup can lead to scaling on surfaces and potential damage to equipment.


