Is your Hayward pool heater ready for winter? If you’re like most pool owners, the thought of closing up for the season can be a bit daunting. You want to protect your investment without the hassle.
Table of Contents
- 1 Key Takeaways
- 2 Importance Of Winterizing A Hayward Pool Heater
- 3 Tools Needed For Winterization
- 4 Step-By-Step Guide On How To Winterize A Hayward Pool Heater
- 5 Common Mistakes To Avoid
- 6 Conclusion
- 7 Frequently Asked Questions
- 7.1 Why is it important to winterize a Hayward pool heater?
- 7.2 What are the main steps in winterizing a Hayward pool heater?
- 7.3 What common mistakes should I avoid during winterization?
- 7.4 How does proper winterization benefit my pool heater?
- 7.5 When should I start winterizing my Hayward pool heater?
Key Takeaways
- Importance of Winterizing: Properly winterizing your Hayward pool heater prevents costly damage, maintains efficiency, and extends its lifespan during the off-season.
- Prevent Freezing Damage: Draining water from the heater eliminates the risk of freezing, which can cause cracks and leaks in key components.
- Smoother Spring Start-Up: A well-winterized heater allows for easier spring maintenance and less troubleshooting, enabling you to quickly enjoy your pool.
- Essential Tools: Gather necessary tools such as a wrench set, air compressor, and garden hose to ensure an effective winterization process.
- Common Mistakes to Avoid: Be mindful of avoiding improper drainage, ignoring insulation needs, and neglecting valve disconnections to protect your investment.
- Follow Manufacturer Guidelines: Always refer to your heater’s specific instructions to ensure thorough and correct winterization procedures are followed.
Importance Of Winterizing A Hayward Pool Heater
Winterizing a Hayward pool heater protects your investment during cold months. Proper winterization prevents costly damage and ensures efficient operation in warmer seasons.
Prevents Freezing Damage
Freezing temperatures can cause significant harm to pool heater components. Water trapped inside pipes and heat exchangers expands when frozen, leading to cracks and leaks. Winterizing removes water to eliminate this risk.
Maintains Efficiency
A well-maintained heater runs more efficiently. Cleaning the unit and removing debris during winterization improves performance. A clean heater saves energy and reduces operational costs in the future.
Extends Lifespan
Regular winterization can prolong the life of your pool heater. By following proper procedures, you prevent unnecessary wear and tear, keeping your heater in top condition for years.
Reduces Spring Start-Up Hassles
Winterizing makes spring start-up smoother. When you prepare your heater for winter, less troubleshooting is necessary in the spring. This approach allows you to enjoy your pool without delays or extensive maintenance.
Ensures Safety
Avoiding damage through winterization also enhances safety. A well-protected heater prevents potential hazards, such as gas leaks or electrical issues, ensuring your pool area remains safe for you and your family.
Tools Needed For Winterization
Gathering the right tools is essential for winterizing your Hayward pool heater effectively. Having everything ready ensures a smooth process and avoids any unnecessary delays.
Essential Tools
- Wrench Set: Use a wrench set to disconnect plumbing connections. Proper disconnection prevents water damage and makes winterization easier.
- Screwdriver: A screwdriver helps remove panels and access essential components. It’s vital for reaching internal areas of the heater.
- Garden Hose: Use a garden hose to drain water from the heater. An empty heater reduces the risk of freeze damage.
- Air Compressor: An air compressor blows out remaining water from the lines. This step prevents ice formation in the pipes during winter.
- Towels: Keep towels handy for drying surfaces and managing spills. Towels help maintain a clean workspace.
- Pliers: Pliers assist in gripping and pulling stubborn connections. They provide extra leverage when needed.
- Bucket: A bucket collects drained water during the winterization process. This keeps your work area tidy.
- Lubricant: Use lubricant to apply on O-rings and seals during reassembly. It helps prevent leaks and extends the life of components.
- Protective Gear: Safety goggles and gloves offer protection while working. Ensuring personal safety is crucial during maintenance tasks.
Step-By-Step Guide On How To Winterize A Hayward Pool Heater
Winterizing your Hayward pool heater involves a series of straightforward tasks to ensure efficient operation come spring. Following these steps protects your investment and prevents potential issues.
Recommended Products
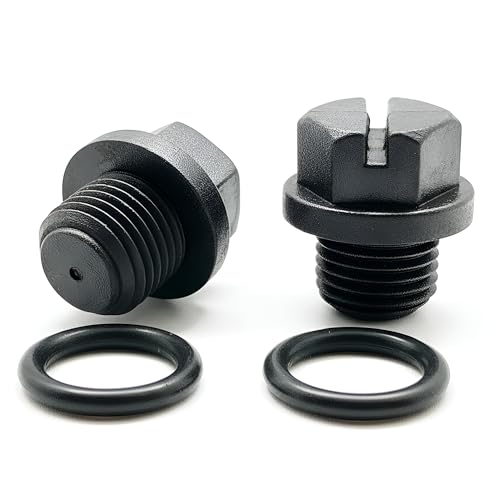
MADE IN THE USA & UNIVERSAL FIT – Expertly engineered for compatibility with Pool Cleaner Pumps and the Power-flo LX Pump series. These precision-molded drain plugs ensure a snug, leak-free fit for your existing equipment, providing a reliable domestic solution for pool maintenance.
Preparing The Heater
Gather your tools before starting. You’ll need a wrench set, screwdriver, garden hose, air compressor, towels, pliers, a bucket, lubricant, and protective gear. Turn off the heater at the main control panel, and give it time to cool down before proceeding. Ensure the heater is clean and free of debris, particularly around the ventilation area. This prevents any obstructions during the winterization process.
Draining Water From The Heater
To prevent freezing, drain the water completely from the heater. Locate the drain plug typically found at the bottom of the heater. Attach a garden hose to redirect the water into a bucket or drainage area. Open the drain valve, and let the water flow out until it’s fully drained. After draining, use towels to wipe down any remaining moisture within the heater. Inspect for any leaks that might need repair before winter.
Disconnecting The Power Supply
Disconnect the power supply to ensure safety when winterizing the heater. Shut off the circuit breaker dedicated to the pool heater. If your heater has a gas supply, turn off the gas valve as well. Using a voltage tester can confirm that there’s no electricity flowing to the heater. Safety precautions during this step are vital to avoid electrical hazards.
Insulating The Heater
Insulate the heater to provide extra protection against freezing temperatures. Cover the heater with a weatherproof cover designed for this purpose. For added insulation, use foam pipe insulation on exposed pipes and connectors. A tarp or plastic sheet can also help protect the heater from snow and ice build-up. Secure all coverings to withstand winter winds, ensuring the heater stays protected throughout the season.
Common Mistakes To Avoid
Avoiding common errors while winterizing your Hayward pool heater can save you from costly repairs. Here’s a list of frequent pitfalls and tips to steer clear of them:
- Neglecting Proper Drainage
Ensure all water drains completely from the heater. Leaving water inside can lead to freezing and cracking. - Overlooking Filter Maintenance
Clean or replace filters before winterizing. Dirty filters can lead to rust and damage when heaters aren’t in use. - Ignoring Insulation Needs
Insulate the heater and pipes properly. Failing to do so can expose them to harsh temperatures, causing failure. - Skipping Valve Disconnection
Disconnect valves and fittings. Not sealing them can leave pathways for cold air or ice to enter, causing damage. - Postponing Power Disconnection
Turn off the power supply. Forgetting this step leaves your heater vulnerable to electrical surges during winter storms. - Rushing the Winterization Process
Take your time with each step. Hurrying can lead to missed parts or improper protection, increasing the risk of damage. - Ignoring Manufacturer Guidelines
Always refer to the manufacturer’s instructions. Each model may have specific requirements that ensure proper winterization.
Address these common mistakes to keep your heater in great shape through winter. Recognizing these pitfalls helps maintain your investment for spring’s return.
Recommended Products
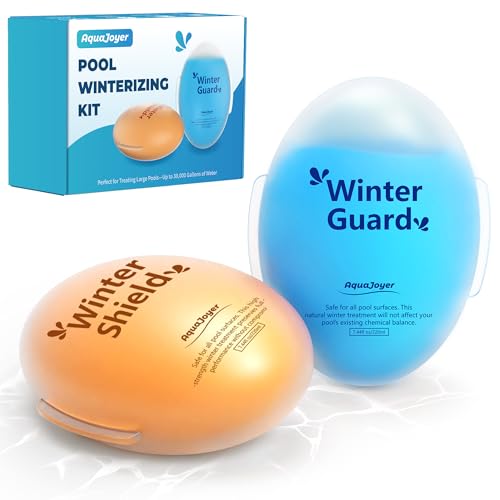
✨ Crystal Clear Water All Winter Long Enjoy a sparkling, vibrant blue pool from the moment you reopen, saying goodbye to cloudy or green and welcoming a fresh swimming season with ease.
Conclusion
Taking the time to winterize your Hayward pool heater can save you from headaches and expenses down the road. By following the right steps and avoiding common mistakes you’ll ensure your heater stays in great shape through the chilly months.
Remember that a little preparation now means a smooth start when warmer weather arrives. So grab your checklist and get started on winterizing your pool heater. You’ll be glad you did when spring rolls around and your heater is ready to go. Enjoy the peace of mind that comes with knowing your investment is protected.
Frequently Asked Questions
Why is it important to winterize a Hayward pool heater?
Properly winterizing a Hayward pool heater is essential to prevent freezing damage, maintain efficiency, and ensure safety during colder months. By taking the necessary steps, you can protect your investment and avoid costly repairs.
What are the main steps in winterizing a Hayward pool heater?
The main steps include draining all water from the heater, disconnecting power, and insulating the unit. These actions help prevent damage from freezing temperatures and keep the heater in optimal condition for the spring.
What common mistakes should I avoid during winterization?
Common mistakes include neglecting to drain water, skipping filter maintenance, failing to insulate, overlooking valve and power disconnection, rushing the process, and ignoring manufacturer guidelines. Avoiding these errors is crucial for effective winterization.
How does proper winterization benefit my pool heater?
Proper winterization helps prevent freezing damage, maintains the heater’s efficiency, and ensures safety. By appropriately preparing your heater for winter, you can avoid costly repairs and extend its lifespan.
When should I start winterizing my Hayward pool heater?
It’s best to start winterizing your Hayward pool heater before the first hard freeze. Depending on your location, this could be in late fall. Monitor local weather conditions to time your winterization effectively.