When it comes to painting a gunite pool, proper surface preparation is crucial to ensure long-lasting results. Acid etching is a highly effective method to enhance paint adhesion and remove contaminants from the pool surface.
By following the right techniques and using the appropriate safety gear, you can successfully acid etch your gunite pool before applying paint.
In this article, we will guide you through the process, from pool drainage to acid dilution ratios and surface inspection. So, let’s dive in and explore the steps involved in acid etching a gunite pool before paint.
Table of Contents
- 1 What is Acid Etching and What is Its Purpose
- 2 Benefits of Acid Etching
- 3 Different Types of Acids Commonly Used for Pool Etching
- 4 Factors to Consider When Choosing the Right Type of Acid for Your Pool
- 5 Safety Precautions to Be Taken During Acid Etching
- 6 Materials and Equipment for Acid Etching
- 7 Step-by-Step Guide for Acid Etching a Gunite Pool
- 7.1 Step 1. Drain the Pool
- 7.2 Step 2. Prepare Safety Gear
- 7.3 Step 3. Inspect the Pool Surface
- 7.4 Step 4. Prepare the Acid Solution
- 7.5 Step 5. Apply the Acid Solution
- 7.6 Step 6. Scrub the Surface
- 7.7 Step 7. Rinse Thoroughly
- 7.8 Step 8. Dispose of Acid Properly
- 7.9 Step 9. Allow the Pool to Dry
- 7.10 Step 10. Paint the Pool
- 8 Additional Considerations
- 9 Mastering the Art of Acid Etching: Tips and Tricks
- 10 Troubleshooting Common Challenges in Acid Etching
- 11 Proper Disposal of Acid and Wastewater After Etching
- 12 Alternatives to Acid Etching
- 13 Conclusion
- 14 Frequently Asked Questions
What is Acid Etching and What is Its Purpose
Acid etching is a process used to prepare the surface of a gunite pool before painting. It involves applying a diluted acid solution to the pool’s surface to create a rough and porous texture, improving paint adhesion. The purpose of acid etching is to ensure that the paint adheres properly to the pool surface, resulting in a long-lasting and durable finish.
During acid etching, a dilute solution of acid, typically muriatic acid (hydrochloric acid), is applied to the gunite pool surface. The acid reacts with the cementitious material, causing a chemical reaction that removes a thin layer of the surface and opens up the pores, creating a rough texture. This rough surface allows the paint to penetrate and bond effectively, preventing paint failure such as peeling or flaking.
The acid etching process serves several important purposes:
- Enhanced Paint Adhesion: The primary purpose of acid etching is to promote better paint adhesion. Gunite pool surfaces can be smooth and non-porous, making it challenging for paint to adhere properly. Acid etching creates a textured surface that allows the paint to grip and bond more effectively, reducing the likelihood of paint failure.
- Contaminant Removal: Acid etching also helps to remove contaminants from the pool surface. Over time, gunite pools can accumulate oils, dirt, algae, and mineral deposits, which can hinder paint adhesion and create an uneven surface. The acid solution helps to dissolve and remove these contaminants, ensuring a clean and properly prepared surface for painting.
- Surface Uniformity: Another purpose of acid etching is to create a uniform and consistent surface texture across the entire pool. Other methods like sanding or power washing may result in uneven areas or missed spots. Acid etching treats the entire surface evenly, ensuring that the paint application is consistent and visually pleasing.
- Structural Inspection: Acid etching provides an opportunity to inspect the pool surface for any existing cracks, chips, or other structural issues. By identifying these problems beforehand, any necessary repairs can be made before painting. This inspection step helps maintain the structural integrity of the pool and avoids potential complications in the future.
Benefits of Acid Etching
When it comes to preparing a gunite pool for paint, there are various methods available. However, acid etching stands out as an effective choice with several advantages over alternative surface preparation methods. Let’s explore the benefits of acid etching:
1. Superior Paint Adhesion: Acid etching creates a rough and porous surface on the gunite pool, providing excellent paint adhesion. This rough texture allows the paint to penetrate into the surface and form a strong bond. As a result, the paint is less likely to peel, chip, or bubble, ensuring a long-lasting and durable finish.
2. Contaminant Removal: Acid etching not only enhances paint adhesion but also effectively removes contaminants from the pool surface. Stubborn substances like oils, algae, mineral deposits, and dirt can be effectively eliminated through the etching process. This thorough cleaning ensures a clean and smooth surface, free from any hindrances that could compromise the paint’s performance.
3. Even Surface Preparation: Unlike other methods such as sanding or power washing, acid etching provides consistent and even surface preparation. Sanding can create uneven patches and require more effort. Power washing may not effectively remove all contaminants. Acid etching, on the other hand, uniformly treats the entire pool surface, ensuring a level playing field for paint application.
4. Time and Cost Efficiency: Acid etching is a relatively quick and cost-effective method of preparing a gunite pool for paint. Compared to labor-intensive options like sanding or abrasive blasting, acid etching requires fewer tools and resources. It is a time-efficient process, saving both valuable time and money.
5. Minimal Surface Damage: Acid etching is a non-invasive method that minimizes the risk of damaging the gunite pool surface. Unlike sanding or abrasive blasting, which can remove layers of the material, acid etching gently treats the surface without causing structural harm. This ensures the integrity of the pool while achieving the desired surface texture for optimal paint adhesion.
6. Opening Pores in the Surface: The acid etching process opens up microscopic pores in the pool surface. These pores allow the paint to penetrate and bond with the pool surface more effectively. The increased surface roughness and pore structure ensure a mechanical bond between the paint and the pool surface.
7. Promoting Paint Penetration: The acid etching process prepares the pool surface to receive the paint by creating a porous and receptive substrate. When the paint is applied after acid etching, it can penetrate the surface and form strong interlocking bonds, ensuring better adhesion and durability.
8. Increased Surface Energy: The acid etching process increases the surface energy of the pool surface. Higher surface energy allows the paint to wet the surface better and form stronger bonds, contributing to improved paint adhesion.
Different Types of Acids Commonly Used for Pool Etching
When it comes to acid etching a gunite pool, multiple types of acids can be used. Each acid has different properties and strengths, and choosing the right one is crucial for a successful etching process. Let’s compare the commonly used acids for pool etching:
Muriatic Acid (Hydrochloric Acid)
Muriatic acid is the most frequently used acid for pool etching due to its effectiveness and availability. It is a strong acid that creates a thorough etching surface. Muriatic acid is readily accessible and relatively inexpensive. However, it should be handled with caution as it is highly corrosive and emits strong fumes. It is essential to follow safety guidelines and wear appropriate protective gear when using muriatic acid.
| Pros | Cons |
|---|---|
| Strong and effective for surface preparation. | Harsh on the environment and requires proper disposal. |
| Widely available and commonly used. | Requires strict safety precautions during handling. |
| Provides reliable and consistent results. | Can cause surface staining if not applied properly. |
| Proven method with decades of use in the industry. | Potential health hazards due to fumes and splashes. |
| Economical and cost-effective. | Can be corrosive to certain metals and equipment. |
| Versatile and suitable for various pool surface types. | May require neutralization after application. |
Sulfamic Acid
Sulfamic acid is another acid commonly used for pool etching. It is a milder acid compared to muriatic acid, making it suitable for less aggressive etching or when dealing with delicate surfaces. Sulfamic acid is less corrosive and emits fewer fumes, making it a safer option to handle. It is also effective in removing contaminants from the pool surface. However, sulfamic acid may require a longer contact time for proper etching.
| Pros | Cons |
|---|---|
| Effective in removing calcium and mineral deposits. | May require longer dwell time for thorough etching. |
| Safer to use and handle compared to strong acids. | Less readily available than muriatic acid. |
| Low fumes and less likely to cause surface staining. | May not provide sufficient surface roughness for all paints. |
| Suitable for use on delicate or sensitive surfaces. | Can be more expensive than other acid options. |
| Biodegradable and poses fewer environmental risks. | May require additional passes for heavily contaminated surfaces. |
| Versatile and can be used for other cleaning applications. | Requires careful storage to avoid moisture absorption. |
Phosphoric Acid
Phosphoric acid is a less aggressive acid commonly used for light etching applications. It is milder compared to muriatic acid and sulfamic acid but still provides effective cleaning and etching properties. Phosphoric acid is often used for maintenance or touch-up etching where heavy etching is not required. It is less corrosive and emits fewer fumes, making it safer to handle. However, it may require a longer contact time for optimal results.
| Pros | Cons |
|---|---|
| Milder acid with lower environmental impact. | May require longer dwell time for optimal results. |
| Less likely to cause surface staining or residue. | Limited availability compared to muriatic acid. |
| Effective in removing light contaminants. | May not provide sufficient roughness for some paints. |
| Safer to use and handle than strong acids. | Can be slower compared to stronger acids. |
| Suitable for delicate or sensitive surfaces. | May not be as effective on heavily contaminated surfaces. |
| Can be used for other cleaning applications. | May require additional passes for thorough etching. |
| Biodegradable and poses fewer environmental risks. | Can be more expensive than other acid options. |
Citric Acid
Citric acid is a relatively mild acid that can be used for light etching and cleaning purposes. It is considered safer and more environmentally friendly compared to other acids. Citric acid is often used for removing mineral deposits and stains from the pool surface. However, it may not provide the same level of etching as the stronger acids mentioned above.
| Pros | Cons |
|---|---|
| Milder and more eco-friendly alternative to strong acids. | May require longer dwell time for effective etching. |
| Safer to use and handle compared to harsh acids. | Less effective on heavily contaminated surfaces. |
| Reduces environmental impact during the etching process. | May cost more than traditional muriatic acid. |
| Effective in removing light contaminants. | May not provide sufficient roughness for some paints. |
| Suitable for use on delicate or sensitive surfaces. | Availability may be limited in certain locations. |
| Biodegradable and poses fewer environmental risks. | Can be slower compared to stronger acids. |
| Can be used for other cleaning applications. | May not be as versatile as muriatic acid. |
Factors to Consider When Choosing the Right Type of Acid for Your Pool
When selecting the appropriate acid for etching your gunite pool, several factors should be taken into consideration. By considering these factors, you can choose the right type of acid that suits your specific needs. Here are the key factors to consider:
- Degree of Etching Required: Determine the level of etching necessary for your pool surface. If a deep and aggressive etch is desired, stronger acids like muriatic acid may be more suitable. However, if a milder etch or maintenance cleaning is needed, a milder acid like sulfamic or phosphoric acid may be the better option.
- Pool Surface Condition: Assess the condition of your pool surface. If there are heavy stains, mineral deposits, or hard-to-remove contaminants, stronger acids might be more effective in thoroughly cleaning the surface. Weaker acids may be adequate for regular maintenance and touch-up etching on a well-maintained pool.
- Safety Precautions: Consider your level of comfort and the safety precautions required when handling different types of acids. Strong acids like muriatic acid can be more hazardous and require proper safety gear, such as gloves, goggles, and a respirator. Weaker acids like sulfamic or citric acid are generally safer to handle.
- Environmental Impact: Take into account the environmental impact of the acid you choose. Stronger acids may have more significant environmental implications due to their high corrosiveness and fume emissions. Weaker acids are often considered more environmentally friendly options.
- Availability and Cost: Consider the availability and cost of the acids in your area. Muriatic acid is typically more readily available and less expensive compared to other acids. Sulfamic acid and phosphoric acid can be found in specialty stores or online. The cost may vary depending on the acid type and your location.
- Manufacturer’s Recommendations: Always refer to the manufacturer’s recommendations and guidelines for acid selection. They provide specific instructions on the suitability of each acid for different surfaces and conditions. Following the manufacturer’s recommendations ensures optimal results and safety.
Safety Precautions to Be Taken During Acid Etching
When conducting acid etching for your gunite pool, it is crucial to prioritize safety to protect yourself and minimize any potential risks. Acid etching involves working with corrosive substances, so following the proper safety precautions is essential. Here are important safety measures to consider:
- Wear Proper Protective Gear: Always wear the appropriate protective gear to shield yourself from acid exposure. This includes chemical-resistant gloves, safety goggles or a face shield, and a respirator or mask. Acid-resistant clothing, such as a long-sleeved shirt and pants, should also be worn to protect your skin.
- Ensure Adequate Ventilation: Conduct acid etching in a well-ventilated area to prevent the accumulation of fumes. Open windows and doors, use fans or ventilation systems, and work outdoors if possible. Adequate ventilation helps dissipate any potentially harmful vapors and improves air quality.
- Handle Acids Safely: Follow the manufacturer’s instructions for proper handling of acids. Be cautious when opening containers and pouring acids to prevent splashing or spilling. Use dedicated containers or sprayers for acid solutions and ensure they are labeled clearly to avoid any accidents or confusion.
- Dilute Acid Appropriately: If diluting the acid with water, always add acid to water gradually and never the other way around. This prevents any dangerous reactions that may occur from adding water to concentrated acid. Follow the recommended dilution ratios provided by the manufacturer to ensure safety and effectiveness.
- Protect Surrounding Areas: Cover and protect nearby surfaces, fixtures, and plants that could be damaged by the acid or acid solutions. Use plastic sheeting or tarps to create a barrier and prevent any accidental contact or damage during the etching process.
- Keep First Aid Supplies Ready: In case of accidental contact or exposure to acids, have a well-stocked first aid kit nearby. It should include items such as eyewash solution, clean water for rinsing, neutralizing agents recommended for the specific acid used, and appropriate bandages for treating any minor injuries.
- Proper Disposal of Acid Solutions: Dispose of used acid solutions following local regulations and guidelines. Do not pour them into storm drains, sewers, or natural water bodies. Instead, neutralize the solution as recommended by local authorities and dispose of it according to their specifications.
- Educate Yourself: Familiarize yourself with the safety data sheets (SDS) provided by the manufacturer for each acid used. These sheets contain crucial information on hazards, handling precautions, first aid measures, and emergency procedures. Understanding the risks associated with the specific acids you are using is essential for maintaining safety.
Materials and Equipment for Acid Etching
To effectively acid etch a gunite pool before paint application, you’ll need specific materials and equipment. Gathering the necessary tools beforehand will ensure a smooth and successful etching process. Here are the essential materials and equipment needed for acid etching:
Acid Solution: Choose the appropriate acid for pool etching, such as muriatic acid (hydrochloric acid), sulfamic acid, or phosphoric acid, based on your specific requirements. Purchase the required amount of acid as recommended by the manufacturer.
Water: You will need clean water for diluting the acid to the appropriate strength. Ensure a sufficient water supply for the dilution process and rinsing the pool surface afterwards.
Protective Gear: Prioritize safety by wearing the following protective gear:
- Chemical-resistant gloves: Protect your hands from acid exposure.
- Safety goggles or a face shield: Shield your eyes and face from splashes or fumes.
- Respirator or mask: Ensure respiratory protection by preventing inhalation of acid fumes or vapors.
- Acid-resistant clothing: Wear long sleeves and pants made of acid-resistant materials to safeguard your skin.
Scrub Brush: Use a stiff-bristled scrub brush or a broom with synthetic bristles. This tool will aid in scrubbing the acid solution onto the pool surface to facilitate etching and remove contaminants.
Sprayer or Pressure Washer: An acid-resistant sprayer or a pressure washer with acid-resistant components is essential for applying the acid solution onto the pool surface. This equipment ensures an even distribution of the acid solution for uniform etching.
Bucket or Mixing Container: A bucket or a mixing container is necessary for diluting the acid with water. Use a container made of acid-resistant material to avoid any corrosive reactions.
Extension Pole: Depending on the size of your pool and its accessibility, you may require an extension pole to reach all areas of the pool surface with the scrub brush or sprayer.
Plastic Sheeting or Tarps: Protect surrounding areas and fixtures from potential damage caused by the acid or acid solution by covering them with plastic sheeting or tarps. This precautionary measure prevents accidental contact with the acid.
Neutralizing Agent: Keep a suitable neutralizing agent on hand to neutralize the acid solution if needed. Refer to the manufacturer’s instructions or consult local regulations for the recommended neutralizing agent.
First Aid Kit: Maintain a well-stocked first aid kit in case of any accidental spills, splashes, or injuries. It should include items like eyewash solution, clean water for rinsing, neutralizing agents (if applicable), and appropriate bandages for minor injuries.
Step-by-Step Guide for Acid Etching a Gunite Pool
When it comes to preparing a gunite pool surface for paint adhesion, acid etching is a crucial step. Acid etching helps remove contaminants and roughens the pool surface, providing a better bonding surface for the paint. However, it’s essential to follow safety guidelines and use the correct acid dilution ratio to avoid any mishaps. In this step-by-step guide, we will walk you through the process of acid etching a gunite pool before applying paint.
Step 1. Drain the Pool
The first step in acid etching a gunite pool is to completely drain the pool. This ensures that the entire pool surface is exposed and accessible for the acid etching process. Depending on the size of the pool, draining may take some time, but it is a crucial step to achieve proper paint adhesion.
Step 2. Prepare Safety Gear
Safety should be a top priority when working with acid. Before starting the acid etching process, ensure you have the appropriate safety gear on hand. This includes chemical-resistant gloves, safety goggles, and a respirator mask. These items will protect you from potential contact with the acid, which can cause severe skin and eye irritation or respiratory issues if inhaled.
Step 3. Inspect the Pool Surface
Before proceeding with acid etching, inspect the pool surface for any visible contaminants. Common contaminants include dirt, algae, oil, and other debris. Thoroughly clean the surface using a scrub brush and water to remove these impurities. A clean surface ensures that the acid can effectively interact with the gunite and achieve optimal paint adhesion.
Step 4. Prepare the Acid Solution
Once the pool surface is clean and ready, it’s time to prepare the acid solution. Muriatic acid, also known as hydrochloric acid, is commonly used for acid etching gunite pools. To prepare the acid solution, dilute muriatic acid with water. The recommended acid dilution ratio is typically 1 part muriatic acid to 4 parts water. When mixing the solution, always add the acid to the water slowly and never the other way around. This prevents the acid from splashing or causing dangerous reactions.
Step 5. Apply the Acid Solution
Using a watering can or a plastic sprayer, apply the acid solution evenly over the pool surface. It’s essential to work in small sections to ensure proper coverage. The acid will react with the gunite and contaminants on the surface, creating a roughened texture that enhances paint adhesion. The dwell time, or the time the acid is left on the surface, is crucial. Follow the manufacturer’s instructions, which typically recommend a dwell time of 10 to 15 minutes.
Step 6. Scrub the Surface
After the specified dwell time, use a scrub brush to gently agitate the pool surface. This step helps remove any remaining contaminants and enhances the etching process. Be cautious not to scrub too aggressively, as excessive force may damage the gunite surface.
Step 7. Rinse Thoroughly
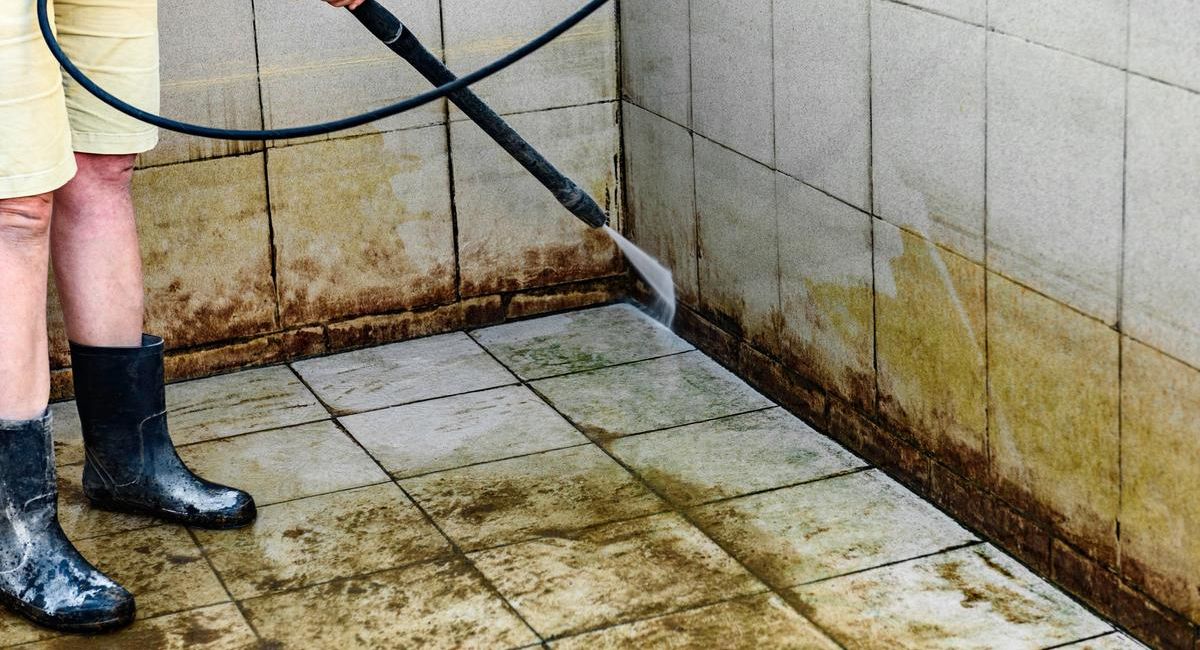
Once the acid etching is complete, rinse the pool surface thoroughly with a pressure washer or hose. The rinse should be extensive enough to remove all traces of acid from the pool. Acid residue left on the surface could interfere with the paint adhesion process and lead to premature paint failure. Ensure that the pool surface is clean and free from any acidic remnants.
Step 8. Dispose of Acid Properly
After completing the acid etching process, it is essential to dispose of the acid solution properly and responsibly. Never pour the acid solution down storm drains or any other environmentally sensitive areas. Follow local regulations for the safe disposal of hazardous materials. Proper disposal ensures environmental protection and safety.
Step 9. Allow the Pool to Dry
Allow the pool surface to dry completely before proceeding with the paint application. Moisture on the surface can affect the paint’s adhesion and longevity. Waiting for the surface to dry thoroughly will ensure that the paint adheres properly and provides a smooth and long-lasting finish.
Step 10. Paint the Pool
With the pool surface now properly prepared, it’s time to apply the pool paint. Follow the manufacturer’s instructions for the paint application process. Ensure that you use a paint specifically designed for swimming pools, as it will withstand the water and pool chemicals. Properly applied pool paint not only enhances the appearance of the pool but also contributes to its long-term durability and protection.
Additional Considerations
In addition to understanding the process of acid etching a gunite pool before applying paint, there are several other factors to consider for a successful surface preparation. These additional considerations can help you achieve the best possible results and ensure the longevity of the paint finish. Let’s explore these points in detail.
1. Weather Conditions
Before acid etching and painting the gunite pool, consider the weather conditions. Ideally, choose a day with mild temperatures and low humidity. Avoid working in direct sunlight as it can cause the acid solution to evaporate too quickly, reducing its effectiveness. Additionally, rain or high winds during the process can interfere with the etching and painting, so plan accordingly.
2. Surface Inspection
While inspecting the pool surface before acid etching is essential, also inspect it after the etching process is complete. Check for any spots that might have been missed or areas that need further attention. Address any imperfections before proceeding with the paint application to ensure a smooth and even finish.
3. Priming (Optional)
In some cases, it might be beneficial to apply a primer after acid etching and before painting. Priming creates an additional layer of adhesion between the gunite surface and the paint, promoting better paint bond and enhancing the paint’s durability. Consult with the paint manufacturer to determine if a primer is recommended for the specific paint you are using.
4. Painting Techniques
When applying paint to the pool surface, use proper painting techniques to achieve the best results. Consider using a paint roller or sprayer for even coverage. Apply the paint in thin, even coats, allowing each coat to dry before applying the next. Follow the paint manufacturer’s instructions for the recommended number of coats and drying times.
5. Maintenance
After successfully acid etching and painting the gunite pool, proper maintenance is crucial to ensure the paint’s longevity. Regularly clean the pool surface to remove dirt, debris, and potential contaminants. Avoid using abrasive cleaning tools or harsh chemicals that may damage the painted surface.
6. Consult Professionals
While acid etching and painting a gunite pool can be a rewarding DIY project, it’s essential to recognize the limits of your expertise. If you are unsure about any step in the process or encounter challenging pool conditions, consider consulting professionals. Pool maintenance and painting experts can offer valuable advice and ensure the job is done correctly, providing you with a beautiful and long-lasting pool finish.
Mastering the Art of Acid Etching: Tips and Tricks
Acid etching is a skillful technique that requires precision and attention to detail to achieve optimal results. As you aim to master the art of acid etching for pool surface preparation, consider these tips and tricks to enhance your proficiency and ensure a successful paint application:
- Choose the Right Acid and Dilution Ratio: Select the appropriate acid for the job, such as citric acid or phosphoric acid, depending on the pool surface and your preference for eco-friendly options. Follow the manufacturer’s instructions to determine the correct acid dilution ratio for optimal results.
- Timing Matters: Be mindful of the dwell time—the duration the acid remains on the surface. Over exposure to acid can damage the pool surface, while under exposure may not achieve the desired texture for paint adhesion. Follow the manufacturer’s guidelines for the specific acid and pool surface you are working with.
- Use Uniform Application: Ensure even and uniform application of the acid solution over the pool surface. Work in small sections to avoid inconsistent results and prevent the acid from drying out before proper etching.
- Controlled Scrubbing: When scrubbing the surface, use a gentle and controlled motion. Avoid excessive force that may harm the pool surface or create uneven etching. A consistent and measured approach will yield the best results.
- Rinsing and Neutralizing: Thoroughly rinse the pool surface after the etching process to remove all traces of the acid. Neutralize any remaining acid residue with a baking soda solution to ensure a safe and paint-ready surface.
- Consider Weather Conditions: Choose a suitable day for acid etching. Avoid excessively hot or windy days that can lead to quick evaporation of the acid solution. Ideal weather conditions will allow for effective etching and reduce the risk of errors.
- Work in Sections: For larger pools, divide the surface into manageable sections. Complete one section at a time to ensure proper attention to detail and avoid any mistakes due to rushing through the process.
- Test and Practice: Before undertaking a large-scale acid etching project, practice on a smaller, inconspicuous area to gain confidence and refine your technique. Testing helps you familiarize yourself with the process and understand the effects of different acid dilution ratios.
- Seek Professional Advice: If you are unsure about any aspect of acid etching or encounter challenging pool conditions, seek advice from pool maintenance professionals or experts. Their insights can prove invaluable in achieving the best possible results.
Troubleshooting Common Challenges in Acid Etching
While acid etching is a proven method for preparing gunite pools before painting, it can present some challenges that may affect the overall success of the surface preparation. Understanding and troubleshooting these common issues will help pool owners and professionals overcome potential hurdles and achieve a properly prepared surface for paint adhesion.
1. Inadequate Surface Roughness
Cause: Insufficient surface roughness can result from factors such as improper acid dilution, short dwell time, or using an unsuitable acid alternative.
Solution: Check the acid dilution ratio and ensure it matches the manufacturer’s guidelines for the pool surface and chosen acid. Extend the dwell time if necessary, but avoid overexposure. If using an acid alternative, ensure it is suitable for the pool surface and offers adequate roughening capabilities.
2. Uneven Etching
Cause: Uneven etching can occur due to inconsistent acid application, uneven scrubbing pressure, or variations in the pool surface texture.
Solution: Apply the acid solution uniformly and work in small sections to maintain consistency. Use a gentle and controlled scrubbing motion to avoid applying excessive force on specific areas. If there are pronounced variations in surface texture, consider a more advanced mechanical method like shot blasting for more even results.
3. Staining or Residue
Cause: Staining or residue can result from inadequate rinsing or insufficient neutralization of the acid solution.
Solution: Thoroughly rinse the pool surface after acid etching to remove all traces of the acid. Neutralize any remaining acid with a baking soda solution, ensuring complete neutralization before proceeding with paint application.
4. Environmental Concerns
Cause: Traditional acid etching using strong acids can raise environmental concerns due to their potential impact on aquatic ecosystems and water sources.
Solution: Consider using eco-friendly acid alternatives, such as citric acid or phosphoric acid, which offer effective surface preparation while being less harmful to the environment. Always dispose of acid waste responsibly, following local environmental regulations.
5. Safety Precautions
Cause: Handling strong acids requires strict safety precautions, and failure to do so can pose risks to personal safety.
Solution: Prioritize safety during the acid etching process. Wear appropriate safety gear, such as chemical-resistant gloves, safety goggles, and a respirator mask, to protect yourself from potential acid splashes and fumes. Work in a well-ventilated area to minimize exposure to acid fumes.
6. Preparation Time and Weather Constraints
Cause: Acid etching can be time-consuming, and adverse weather conditions, such as high temperatures or windy days, can affect the process.
Solution: Plan the acid etching process on days with mild temperatures and low humidity to prevent rapid acid evaporation. Avoid working in direct sunlight or during adverse weather conditions that may interfere with the etching process.
7. Surface Contamination
Cause: Surface contamination, such as oils, grease, or algae, can hinder the effectiveness of the acid etching process.
Solution: Thoroughly clean the pool surface before acid etching to remove all contaminants. Consider using a suitable cleaning agent or detergent to ensure a clean surface for optimal acid penetration.
Proper Disposal of Acid and Wastewater After Etching
Proper disposal of acid and wastewater is essential to prevent harm to the environment and comply with local regulations. Improper disposal can lead to water contamination and pose risks to aquatic life. Here are the steps for the responsible disposal of acid and wastewater after acid etching a gunite pool:
1. Neutralize the Acid Solution: Before disposing of the acid solution, neutralize it to make it less harmful. Add a neutralizing agent, such as baking soda (sodium bicarbonate), to the acid solution. Stir the mixture carefully, ensuring the acid is neutralized. The acid is neutralized when it no longer has a strong acidic pH. Use pH test strips to confirm neutralization if available.
2. Dilute the Neutralized Acid: Once the acid is neutralized, dilute it further with a large amount of water. This will further reduce its strength and make it safer for disposal. Ensure that the dilution is sufficient to meet local environmental standards for discharge.
3. Identify Proper Disposal Methods: Check with your local authorities or waste management facilities to understand the approved methods for disposing of the neutralized and diluted acid. Some municipalities may have specific guidelines for disposing of such waste, and it’s crucial to adhere to them.
4. Use a Chemical Waste Disposal Service (If Applicable): In some areas, you may need to contact a licensed chemical waste disposal service to handle the neutralized acid and wastewater. These services are equipped to handle hazardous materials safely and in an environmentally responsible manner.
5. Do Not Dispose in Drains or Natural Water Bodies: Under no circumstances should you pour the neutralized acid or wastewater down household drains, storm drains, or natural water bodies. Doing so can contaminate the water and harm aquatic ecosystems.
6. Allow Wastewater to Evaporate: If local regulations permit, you may let the neutralized wastewater evaporate in a safe, open area away from storm drains and water bodies. This method should only be used if it complies with local laws and does not pose environmental risks.
7. Rinse Tools and Equipment Properly: After the acid etching process, ensure that any tools or equipment used are rinsed thoroughly with water. Dispose of the rinse water according to the same guidelines as the neutralized acid wastewater.
8. Clean and Store Acid Containers Safely: Once the acid etching process is complete, clean the acid containers thoroughly and store them securely. Keep them out of reach of children and pets until you can dispose of them properly.
Alternatives to Acid Etching
While acid etching is a common method for pool surface preparation, there are several alternatives available that can achieve similar results. These alternatives provide options for pool owners who prefer to avoid working with acid or for situations where acid etching is not suitable. Here are some alternatives to acid etching for pool surface preparation:
- High-Pressure Water Blasting: High-pressure water blasting, also known as hydroblasting or water jetting, involves using a powerful stream of water to remove contaminants and roughen the pool surface. This method is effective in cleaning the surface and creating a suitable profile for paint adhesion without the use of harsh chemicals.
- Shot Blasting: Shot blasting is a mechanical surface preparation method that involves propelling small metal or mineral particles at high velocity onto the pool surface. This process removes impurities and creates a textured surface, promoting better paint adhesion.
- Sandblasting: Sandblasting is a similar method to shot blasting but uses fine sand particles to clean and roughen the pool surface. It’s an effective way to remove stubborn contaminants and prepare the surface for paint application.
- Mechanical Grinding or Polishing: Mechanical grinding or polishing involves using specialized equipment to grind away surface imperfections and create a smooth, clean, and profiled surface. This method is suitable for pool surfaces that require minor preparation and are relatively free from contaminants.
- Abrasive Scrubbing: Abrasive scrubbing with a scrub brush or abrasive pad is a manual alternative for small pool surfaces or localized areas. It can be effective in removing light contaminants and roughening the surface before painting.
- Pressure Washing with Detergents: Pressure washing the pool surface using water and mild detergents can be useful in removing dirt, grime, and some contaminants. However, it may not be as effective as other methods in preparing the surface for optimal paint adhesion.
- Solvent Cleaning: Solvent cleaning involves using a solvent to remove grease, oil, or other organic contaminants from the pool surface. It can be combined with other mechanical methods for comprehensive surface preparation.
- Surface Grinding or Scarifying: Surface grinding or scarifying uses rotating discs with cutting teeth to remove surface layers and create a textured profile. It’s effective in removing old paint or coatings and preparing the surface for a new paint application.
You Might Also Like
Can You Paint a Gunite Pool: Discover the options and considerations for giving your gunite pool a fresh look. Learn about the benefits of painting, the types of paint available, and the steps involved in this article.
How Much Does It Cost to Paint a Gunite Pool: Planning to refresh your gunite pool with a new coat of paint? Find out what factors impact the cost of painting a gunite pool, from materials to labor, in this comprehensive cost breakdown.
Can You Change the Color of a Gunite Pool: Curious about altering the aesthetic of your gunite pool? Explore the possibilities of changing its color and the methods available, from paint options to tile and plaster, in this informative article.
Conclusion
Acid etching is a crucial preparatory step before painting a gunite pool, as it ensures optimal adhesion and longevity of the coating. By following the proper safety precautions and using the right materials, the process can be accomplished effectively.
Remember to thoroughly clean the pool surface, apply the acid solution evenly, and allow sufficient curing time before proceeding with the painting. Additionally, it is vital to choose a high-quality pool paint that is compatible with the gunite substrate for the best results.
With the right approach and attention to detail, acid etching and painting can transform your gunite pool, revitalizing its appearance and safeguarding it for years to come. Always consult with a professional if you are unsure about any aspect of the process to ensure the successful completion of this essential maintenance task.
Frequently Asked Questions
1. Can you pour acid straight into the pool?
No, you should never pour acid directly into the pool. Acid, such as muriatic acid, is a highly corrosive substance and can cause damage to the pool surface and equipment if not handled properly. To use acid safely, it must be diluted in water before being added to the pool.
2. What is the best way to acid wash a pool?
First, completely drain the pool of all water. Next, prepare a solution of diluted muriatic acid and water in a plastic container, ensuring to add the acid to water, not water to acid, to prevent splashing. Apply the acid solution evenly on the pool surface using a brush or sprayer, working in small sections. Allow the acid to sit on the surface for a short time, usually a few minutes, depending on the level of staining or buildup. Gently scrub the surface with a pool brush to remove stains, algae, and other deposits. Finally, rinse the pool thoroughly with water to eliminate any residual acid.
3. Does acid wash damage the pool?
Acid washing, when done correctly, should not damage the pool. However, it is an aggressive process that removes a thin layer of the pool’s surface, which can potentially reveal underlying imperfections or weaken the surface if done excessively or improperly. It is essential to limit acid washing to occasional maintenance and avoid frequent or unnecessary applications.
4. What does muriatic acid do to a pool?
During acid washing, muriatic acid is used to remove stains, mineral deposits, and scale buildup from the pool’s surface. Muriatic acid is a highly corrosive chemical, and when applied to the pool’s surface, it reacts with and dissolves these unwanted substances. The acid breaks down the stains and deposits, making them easier to scrub away with a pool brush.
5. How much muriatic acid to add to the pool?
The amount of muriatic acid to add to the pool depends on the pool’s size, current pH and alkalinity levels, and the desired adjustments. It’s essential to follow the manufacturer’s instructions and local guidelines for chemical usage. Typically, you should start with small amounts (e.g., a quart for an average-sized pool) and test the water chemistry frequently to avoid over-acidification. It is recommended to add acid to the pool in small increments, allowing time for circulation and retesting before adding more if needed. For precise dosages, consult a pool professional or use a reliable pool water testing kit.
