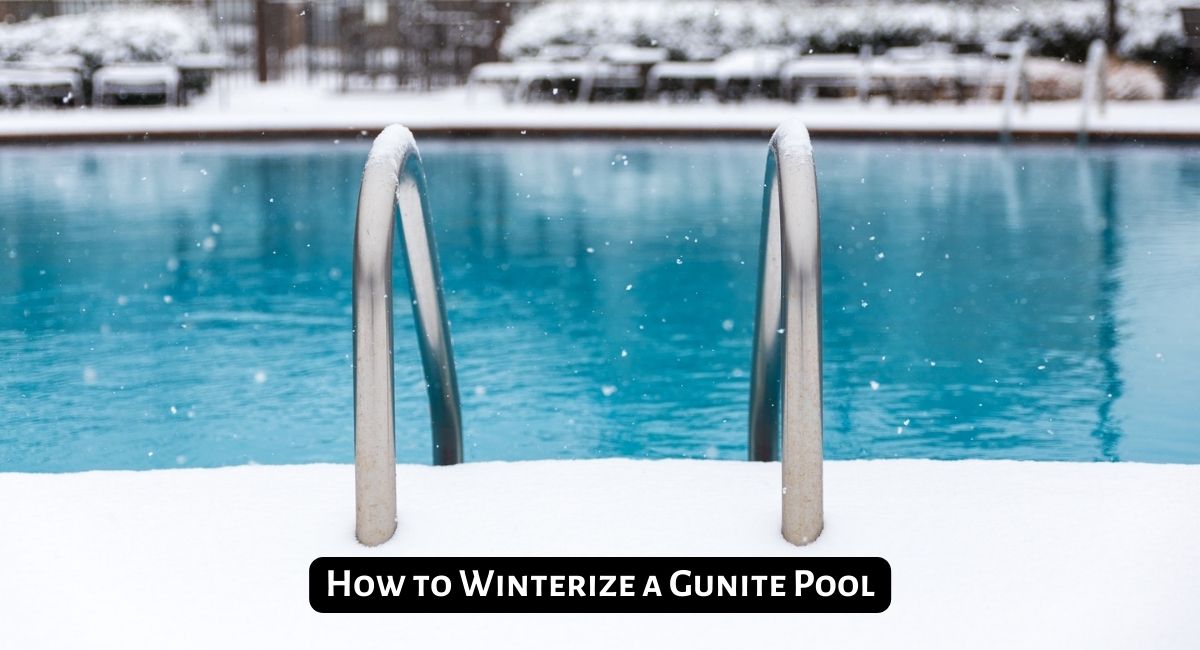
As the chilly winter months approach, it’s essential to take proper care of your gunite pool to ensure it remains in optimal condition for the next swimming season. Winterizing a gunite pool involves a series of crucial steps to protect it from freezing temperatures, ice damage, and debris accumulation.
By following a few straightforward guidelines and implementing some necessary precautions, you can safeguard your gunite pool investment and make the reopening process hassle-free when warmer days return.
In this guide, we will walk you through the step-by-step process of winterizing your gunite pool, covering everything from water treatment and equipment maintenance to cover installation and overall pool protection. So, let’s dive in and discover how to winterize your gunite pool effectively.
Table of Contents
- 1 Key Takeaways
- 2 Why Should You Winterize Your Gunite Pool
- 3 When to Start Prepping Your Pool for Winter
- 4 How to Winterize a Gunite Pool
- 5 How to Winterize Sand Filter
- 6 How to Winterize Pool Pump
- 7 Steps to Reverse Winterization
- 8 Mistakes to Avoid When Winterizing Your Pool
- 9 Pool Opening and Closing Costs
- 10 Conclusion
- 11 Frequently Asked Questions (FAQs)
Key Takeaways
- Winterizing a gunite pool is essential to protect it during the winter months and save money on potential repairs and maintenance.
- Reasons to winterize a gunite pool include preventing freeze damage, preserving the pool’s finish, avoiding debris and damage, preventing water chemistry issues, and extending the lifespan of pool equipment.
- The timing for prepping a pool for winter varies based on location and weather conditions, but generally, it should be done when the temperature consistently reaches around 18 degrees Celsius (64 degrees Fahrenheit) or below.
- The process of winterizing a gunite pool involves preparing the pool by cleaning it, removing accessories, draining water from equipment, and lowering the water level.
- Balancing pool water chemistry is crucial for preventing issues like corrosion, scaling, and algae growth during the winter.
- Additional steps for gunite pools include inspecting for cracks and damage, using skimmer bottles, and cleaning the pool filter.
- Winterizing the pool pump involves draining the water, cleaning the pump, removing and storing removable parts, protecting the pump from freezing temperatures, and storing it in a dry location.
- Reversing the winterization process involves removing the cover, opening up air plugs, removing plugs from skimmers and return lines, filling the pool with water, balancing water chemistry, and turning on pool equipment.
- Common mistakes to avoid during winterization include failing to shock the pool, neglecting to adjust pH levels, skipping proper water testing, and not adding algaecide.
Why Should You Winterize Your Gunite Pool
Winterizing your gunite pool is an important step to protect it during the winter months. Not only will this help you ensure that your pool remains in good condition throughout the season, but it will also help you save money on potential repairs and maintenance down the line. Here are the key reasons why you should winterize your gunite pool:
- Protecting against freeze damage: Winter temperatures can cause water in the pool to freeze, leading to expansion and potential damage to the pool’s structure and equipment. By winterizing your gunite pool, you can prevent freeze damage and avoid costly repairs.
- Preserving the pool’s finish: Gunite pools have a cement and plaster finish, which can be susceptible to cracking or damage if not properly protected during the winter. Winterization helps maintain the integrity of the pool’s finish and prevents cracks from forming, ensuring its longevity and aesthetics.
- Preventing debris and damage: Winter winds and storms can bring debris like leaves, branches, and dirt into the pool. By winterizing the pool, you can cover it properly and minimize the accumulation of debris, reducing the potential for clogging the pool’s filtration system and simplifying the cleanup process when you reopen the pool in the spring.
- Avoiding water chemistry issues: Winterizing the pool involves balancing the water chemistry and adding necessary chemicals to prevent the growth of algae, mold, and other germs during the winter months. Proper winterization ensures that the water remains clean and safe for future use.
- Extending the lifespan of pool equipment: By winterizing your gunite pool, you protect the pool’s equipment, such as pumps, filters, and heaters, from the potential damage caused by freezing temperatures. This helps extend the lifespan of the equipment and reduces the need for repairs or replacements.
When to Start Prepping Your Pool for Winter
The timing for prepping your pool for winter may vary depending on your geographical location and specific weather conditions. However, here are some general guidelines to consider:
- Temperature: As the temperature starts to drop and consistently reaches around 18 degrees Celsius (64 degrees Fahrenheit) or below, it’s a good indication that you should begin the process of closing your pool for winter.
- Seasonal transition: Preparing your pool for winter typically occurs during the autumn season. As summer comes to an end and the days become shorter, it’s a suitable time to start thinking about winterizing your pool.
- Proactive approach: It’s advisable not to procrastinate when it comes to winterizing your pool. Algae spores can start growing when the temperature rises above 51 degrees Fahrenheit, and they can cause a rapid algae bloom. Taking action before the water gets warmer can help prevent algae growth and other issues.
- Regular maintenance schedule: If you have a routine maintenance schedule for your pool, transitioning to winter preparation should be part of that plan. This ensures that you stay on top of the necessary tasks and minimize the risk of damage or delays when reopening the pool in the future.
Remember that these are general guidelines, and the specific timing may vary based on your location and climate. It’s always recommended to consult local pool professionals or resources that cater to your specific region for the most accurate information and tailored recommendations for preparing your pool for winter.
How to Winterize a Gunite Pool
Heading into winter, it’s important to ensure your pool is properly winterized. By taking extra precautions, you can prolong the life of your gunite pool and save money on costly repairs down the line. If you’re looking for a comprehensive guide on how to prepare your gunite pool for cold weather conditions, then look no further!
This section will cover essential maintenance tips from experienced professionals that help keep this type of swimming pool running at its best during colder months. So pour yourself a warm cup of cocoa and read on as we discuss strategies like opening up pump lines, closing valves, cleaning out debris, and more so you can safely enjoy your favorite outdoor activity year after year.
Step 1 – Prepare the Pool for Winterization
Before winter arrives, it’s crucial to prepare your pool for the colder months. This step involves several tasks such as removing debris, brushing the pool walls, and vacuuming the pool floor. By thoroughly cleaning the pool, you create a clean foundation for the winterization process, ensuring that your pool remains in good condition during the off-season.
Clean the Pool
Before winterizing your pool, it’s important to clean it thoroughly. Start by skimming the surface of the water to remove leaves, debris, and other floating particles. Then, use a pool vacuum to clean the pool floor and a pool brush to scrub the walls, stairs, and waterline. This step helps remove any dirt, algae, or bacteria that could accumulate and cause problems during the winter.
Remove Ladders and Accessories
Take out any removable ladders, handrails, diving boards, or other accessories from the pool. These items should be stored in a dry place to protect them from the winter weather. Removing them also prevents potential damage caused by freezing temperatures and helps prolong their lifespan.
Drain Water from Equipment
To prevent freezing and damage to pool equipment, it’s essential to drain the water from components such as the pump, filter, heater, and chlorinator. Follow the manufacturer’s instructions for your specific equipment to ensure proper drainage.
Some equipment may have drain plugs or valves that need to be opened, while others may require using a pump or air compressor to remove the water completely. Ensuring that there is no water left in the equipment helps prevent potential cracks or other damage caused by freezing temperatures.
Reduce Water Level
Lowering the water level in your pool is necessary to protect it from freezing and potential damage. The exact water level will depend on your pool type and the winterization method you choose. As a general guideline, it is recommended to lower the water level below the skimmer inlet.
For some pools, this may mean draining the water several inches or even a foot below the skimmer opening. Lowering the water level helps prevent water from freezing and expanding within the skimmer and other equipment, reducing the risk of damage.
Step 2 – Balance Pool Water Chemistry
Maintaining proper water chemistry is essential for the longevity of your pool. In this step, you need to test and adjust the pool water’s pH level, alkalinity, and sanitizer levels. By achieving the correct balance, you prevent issues such as corrosion, scaling, and the growth of bacteria or algae. It ensures that your pool water remains clear and safe throughout the winter.
Test and Balance Water
Testing the water is the first step to determine the current chemical levels in your gunite pool. Use a reliable test kit that can measure pH, total alkalinity, calcium hardness, sanitizer levels (such as chlorine), and metals. Each of these parameters plays a crucial role in maintaining balanced water chemistry.
- pH: The pH level indicates the acidity or alkalinity of the water. The recommended pH range for pool water is typically between 7.2 and 7.6. Adjusting the pH to the appropriate range helps optimize the effectiveness of other chemicals and prevents issues such as corrosion or scale formation.
- Total Alkalinity: Total alkalinity acts as a buffer for pH, helping to stabilize it. The ideal range for total alkalinity is usually between 80 and 120 parts per million (ppm). If the total alkalinity is too low, it can cause pH fluctuations. If it’s too high, it can lead to cloudy water or scale formation.
- Calcium Hardness: Calcium hardness refers to the level of dissolved calcium in the water. In a gunite pool, maintaining the correct calcium hardness is crucial to prevent damage to the plaster or surface. The recommended range for calcium hardness is typically between 200 and 400 ppm. If the calcium hardness is too low, it can cause etching or pitting of the pool surface, while high levels can lead to scale formation.
- Sanitizer Levels: Sanitizers like chlorine or bromine help disinfect the pool water and control bacteria and algae growth. Test the sanitizer levels and ensure they are within the appropriate range. Follow the manufacturer’s guidelines for maintaining the correct sanitizer levels.
- Metals: Test for the presence of metals such as iron or copper in the pool water. High metal levels can cause staining or discoloration. If metals are detected, you may need to use specific products to remove or sequester them.
After testing the water and obtaining the results, you can adjust the chemical levels accordingly. This may involve adding chemicals to increase or decrease pH, alkalinity, or calcium hardness. Consult the product labels or seek guidance from a pool professional to ensure proper adjustment of the chemical levels.
Shock the Pool
Shocking the pool involves adding a higher concentration of chlorine or another oxidizing agent to eliminate any contaminants, bacteria, or algae present in the water. This step helps ensure that the pool water is clean and sanitized before winter.
Choose a shock product that is suitable for gunite pools and follow the manufacturer’s instructions for the recommended dosage and application method. It’s important to shock the pool a few days before closing it to allow the chemicals to disperse and the water to clear up.
Add Algaecide
Algaecide is an additional treatment that helps prevent algae growth during the winter months. Even though the pool is not in use, algae can still develop in the water if not properly treated. Choose an algaecide that is compatible with gunite pools and follow the manufacturer’s instructions for application.
Algaecides typically come in liquid or granular form and can be added directly to the pool water. This step helps maintain clear and algae-free water throughout the winter season, making it easier to open the pool in spring.
Step 3 – Prepare the Pool Equipment for Winterization
To safeguard your pool equipment during the winter months, it’s crucial to properly prepare and protect them. This step involves draining the water from the pump, filter, heater, and any other equipment. Additionally, you’ll need to clean and lubricate certain components, such as O-rings and seals, to prevent damage and ensure their optimal performance when you reopen the pool in the spring.
Empty Water from Return Lines
To start, you’ll want to drain the water from the return lines of your pool. The return lines are the pipes or hoses that carry water back to the pool from the filtration system. By disconnecting these lines, you allow the water to flow out and prevent it from freezing during winter.
Freezing water can cause the lines to crack or burst, leading to expensive repairs. It’s important to ensure that all water is drained from the return lines before proceeding to the next step.
Plug Each Return Line and Skimmer
After emptying the water from the return lines, it’s crucial to plug each return line and skimmer. Plugs or gizmos specifically designed for winterization should be used to seal off the openings of the return lines and skimmers.
This step prevents water from entering these components during winter, as any remaining water could freeze and cause damage. Make sure to use appropriate winterization plugs that fit securely and create a watertight seal.
Airlock Main Drain
The main drain is typically located at the bottom of the pool and serves as an outlet for water. To prevent damage caused by freezing water, it’s important to airlock the main drain. This involves using an air compressor or a powerful shop vacuum to blow out any remaining water from the main drain line.
By removing all the water, you eliminate the risk of freezing and potential damage to the main drain. It’s recommended to follow the manufacturer’s instructions or consult a professional to properly airlock the main drain.
Drain Pump and Filter
Properly draining the pump and filter is crucial to protect these components from freezing temperatures. Check the manufacturer’s instructions for your specific pump and filter system to determine the proper drainage procedure. Typically, there will be drain plugs or valves that need to be opened to allow the water to flow out.
It’s essential to ensure that all water is drained from the pump and filter to avoid any potential damage from freezing. Additionally, you should remove any detachable parts, such as baskets or cartridges, and clean them before storing them for the winter.
Blow Out Water Lines
The final step is to blow out the water lines of your pool using an air compressor. This step is essential to remove any remaining water from the plumbing lines. Start with the skimmer lines, as these are usually the longest and have the most potential for water to remain. Connect the air compressor to the skimmer line and blow air through it, forcing any remaining water out of the line.
Repeat this process for the main drain and return lines as well. It’s crucial to follow the proper procedure and pressure guidelines provided by the pool manufacturer to avoid damaging the plumbing system. Once the lines are blown out, you can seal the openings with winterization plugs or gizmos.
Gunite pools are known for their durability and longevity, but is it safe to leave a gunite pool empty for an extended period? Many pool owners wonder about the effects of leaving their gunite pools without water. An empty gunite pool can experience structural issues due to hydrostatic pressure and should be properly winterized or filled with water to maintain its integrity. For more information on the potential risks and necessary precautions, read our informative article on can a gunite pool be left empty.
Step 4 – Covering the Pool for Winter
Covering your pool is a vital step in winterizing it and protecting it from the elements. In this step, you’ll need to choose a suitable pool cover and securely install it over the pool. A well-fitted cover prevents debris, leaves, and snow from entering the pool, reducing the risk of damage and making it easier to reopen the pool when the weather warms up again.
Fill Water Bags or Lift Safety Cover Anchors
If you have a safety cover with anchors, it is important to lift the safety cover anchors out of the deck. This can be done using a specialized tool designed for this purpose. By lifting the anchors, you release the tension on the cover and prepare it for winter. This step is particularly relevant for inground pools with safety covers that use anchors.
Cover the Pool
- Cleaning the pool thoroughly is essential before covering it for winter. Remove any debris, leaves, bugs, pine needles, and dirt from the water. This ensures that the pool is free from contaminants and prevents the accumulation of debris during the winter months. You can use a net skimmer and a shop vacuum to effectively clean the pool before covering it.
- If you have an above-ground pool, placing an air pillow in the center of the pool is recommended. The air pillow serves as additional support for the cover and helps prevent it from sinking into the water under the weight of snow or debris. The air pillow creates an elevated surface in the middle of the pool, providing a better slope for debris and water to fall off the cover.
- Carefully place the winter pool cover over the pool, ensuring that it completely covers the surface of the water. The cover should extend over the pool edges to provide proper protection. This helps keep debris, leaves, and snow out of the pool during the winter months. Make sure the cover is taut and smooth to minimize the risk of water or debris pooling on top of it.
- Secure the cover in place using the appropriate fastening method for your specific cover type. This can include using cover clips, straps, or cable and winch systems. Follow the manufacturer’s instructions for your particular cover to ensure proper installation. Properly fastening the cover is crucial to ensure it remains secure during winter storms and high winds, preventing it from being blown off or damaged.
Step 5 – Additional Steps for Gunite Pools
Gunite pools require some extra attention during winterization due to their construction material. In this step, you’ll need to inspect the pool’s surface for any cracks or damage and repair them as necessary. Additionally, you might consider using an air pillow to support the pool cover, which helps prevent water from accumulating on the surface and potentially causing damage. These additional steps ensure that your gunite pool remains in excellent condition throughout the winter season.
Clean the Pool Filter
Cleaning the pool filter is an essential part of winterizing any pool, including Gunite pools. Gunite pools are made of a porous material that can attract algae, so proper maintenance is crucial.
Cleaning the filter helps remove debris, leaves, and other contaminants that may have accumulated during the swimming season. This step ensures that the filter is in good condition and ready for use when you reopen the pool in the spring.
Cut Power to the Pool
Turning off the power to the pool equipment is an important safety measure during winterization. This includes shutting off the pump, heater, and any other electrical components. By disconnecting the power, you prevent any potential electrical issues and save energy during the pool’s dormant period. Make sure to follow the manufacturer’s instructions on how to safely turn off the power supply to your specific pool equipment.
Use Skimmer Bottles as a Precaution
Skimmer bottles are an additional precautionary measure you can take when winterizing a Gunite pool. These bottles are designed to absorb any expansion caused by freezing water, which helps protect the skimmer and associated plumbing lines from potential damage.
Skimmer bottles should be installed according to the manufacturer’s instructions, usually by placing them inside the skimmer basket or the skimmer throat. They provide an extra layer of protection against freezing water and can help prevent costly repairs in the spring.
How to Winterize Sand Filter
To properly winterize a sand filter for your swimming pool, it’s important to follow specific steps to ensure the system is protected during the colder months. Here’s a more detailed guide:
- Perform Backwash and Rinse: Start by performing a backwash on your sand filter. This process involves cleaning out any debris or contaminants that may have accumulated in the filter media. Once the water runs clear from the nozzle, indicating that the filter is clean, you can turn off the power.
- Switch to Winterize Setting: After the backwash and rinse, move the valve on the top mount of the sand filter to the “winterize” or “winter” setting. This position allows the water to drain from the valve and helps prevent any freezing-related damage that can occur during the winter months.
- Disconnect Inlet and Outlet Hoses: To ensure that all the water is removed from the filter system, disconnect the inlet hose from the water pump. This can be done by removing the hose clamp and sliding off the end of the spout. Similarly, disconnect the filter’s outlet hose from the pool. By disconnecting these hoses, you help facilitate the drainage of any remaining water from the system.
- Clean and Store: After disconnecting the hoses, it’s important to clean the filter further. You can do this by backwashing and rinsing it using the control lever and water pump. Once the water runs clear, turn off the power and switch the valve on the filter top to the winterize setting. This ensures that the system is properly prepared for winter. It’s also crucial to store the disconnected hoses and other accessories properly during the winter months. This helps protect them from damage and ensures they’re ready for use when you reopen the pool in the warmer seasons.
How to Winterize Pool Pump
To winterize a pool pump, you can follow these steps:
- Turn off the pump: Before starting any maintenance or winterization procedures, ensure that the pool pump is turned off and unplugged from the power source. This is a crucial safety measure to avoid any accidental injuries while working on the pump.
- Drain the water: To prevent freezing and potential damage to the pump and associated equipment, it’s important to drain all water from the system. Begin by closing the valves leading to and from the pump. Then, remove the drain plugs or caps from the pump housing and allow any water inside to drain out completely. Additionally, drain any water from the filter and any connected pipes or hoses.
- Clean the pump: Once the water is drained, take the time to clean the pump thoroughly. Use a soft cloth or brush to clean the exterior surfaces of the pump, removing any dirt, debris, or residue. If needed, refer to the manufacturer’s instructions for cleaning the internal components of the pump. This may involve disassembling certain parts for a more thorough cleaning.
- Remove and store removable parts: Many pool pumps have removable parts such as the strainer basket or pressure gauge. Remove these parts from the pump, clean them, and store them in a safe place for the winter. This will prevent damage or loss of these components and make reassembly easier when you restart the pump in the spring.
- Protect the pump: It’s important to protect the pool pump from freezing temperatures during the winter. One way to do this is by wrapping the pump with an insulating material. You can use a pool cover or a thermal blanket specifically designed for this purpose. Ensure that the entire pump, including the motor, is well-covered to provide insulation and prevent any potential damage due to freezing.
- Store the pump in a dry location: Find a suitable location to store the pump for the winter. It should be a dry area that is protected from extreme temperature fluctuations and moisture. A garage, basement, or storage shed are common choices. Ensure that the storage area is well-ventilated to prevent the buildup of humidity, which can cause corrosion or damage to the pump.
- Regular maintenance: As part of winterizing your pool pump, it’s a good practice to perform regular maintenance tasks. Check the pump’s seals and gaskets for any signs of wear or damage and replace them if necessary. Lubricate any moving parts as recommended by the manufacturer to ensure smooth operation when you start using the pump again. This maintenance will help extend the lifespan of your pool pump and keep it in good condition.
Steps to Reverse Winterization
To reverse the winterization process of a pool, you can follow the steps below:
- Remove and Store the Cover: Carefully remove the winter cover from the pool and clean it before storing it properly. Ensure the cover is dry to prevent the growth of mold or mildew. Store it in a clean, dry place to prolong its lifespan.
- Open Up Air Plugs: If you used air plugs during winterization to prevent water from accumulating in the plumbing lines, it’s time to remove them. Open the air plugs to allow water to flow freely through the system when you restart the pool equipment.
- Remove Plugs from Skimmers and Return Lines: Take out the plugs that were installed in the skimmers and return lines. This step allows water to circulate properly through the pool system. Ensure the plugs are removed completely and keep them in a safe place for future use.
- Fill the Pool with Water: If the water level in the pool has decreased during winterization, fill it up to the appropriate level using a garden hose or any other water source. Maintain the water level according to the manufacturer’s recommendations for optimal pool operation.
- Balance Pool Water Chemistry and Turn on Pool Equipment: Test the pool water and adjust the chemical levels as needed to achieve proper balance. This includes testing and adjusting pH, alkalinity, and sanitizer levels. Once the water chemistry is balanced, you can turn on the pool equipment, including the pump, filter, and heater, following the manufacturer’s instructions.
Mistakes to Avoid When Winterizing Your Pool
When winterizing your pool, it’s important to avoid certain mistakes to ensure the health and integrity of your pool. Here are some common mistakes to avoid when winterizing your pool:
- Failing to shock the pool: It’s crucial to shock the pool with the appropriate chemicals before closing it for winter. This helps prevent algae growth and keeps the water clean.
- Neglecting to adjust pH levels: Forgetting to adjust the pool’s pH levels to the recommended range of 7.2-7.8 can lead to staining, scaling, and algae growth.
- Failing to thoroughly clean the pool: Vacuuming and skimming the pool to remove floating and sunken debris is essential before winterizing. Neglecting this step can result in increased maintenance and potential water quality issues when reopening the pool.
- Not adding algaecide: Adding algaecide helps prevent algae blooms and growth during the winter months. It’s important to follow the instructions and dosage recommendations for the specific algaecide product you are using.
- Skipping proper water testing: Testing the pool water before closing it is crucial to ensure the chemical levels are balanced. Guessing the levels can lead to issues and potential problems when reopening the pool.
- Allowing phosphate levels to get too high: High phosphate levels can contribute to algae growth in the pool. Regularly monitoring and controlling phosphate levels can help prevent algae problems during the winter.
- Leaving the pool uncovered: Failing to cover the pool during winter can result in the accumulation of debris, leaves, and contaminants, making it more challenging to clean and maintain when reopening. It’s important to invest in a suitable pool cover to protect the pool from the elements.
- Not properly securing the cover: Ensure the pool cover is securely fastened to prevent it from slipping into the pool. A poorly secured cover can cause inconvenience and potential damage to the pool.
- Overlooking plumbing and equipment maintenance: Neglecting to properly blow out and drain the plumbing lines or failing to perform maintenance on pool equipment can result in freezing and cracking, leading to costly repairs or replacements.
- Not following manufacturer’s instructions: It’s crucial to carefully read and follow the manufacturer’s instructions for winterizing your specific pool and equipment. Each pool may have unique requirements and guidelines that should be followed to avoid any potential issues.
Pool Opening and Closing Costs
When it comes to pool opening and closing costs, there are several factors to consider. Pool closing, which is essential for winterizing the pool, typically ranges from $150 to $400. The actual cost depends on factors such as pool size, labor charges, and any additional accessories or add-ons. Neglecting proper pool closing can result in damage caused by freezing water.
The cost of opening or closing a pool usually falls within the range of $300 to $500. Hiring a professional pool opening service costs around $200 on average, but it can vary from $150 to $350. DIY pool opening is a more cost-effective option, with expenses typically ranging from $50 to $150.
It’s important to note that these are average estimates, and actual costs may vary depending on factors such as pool size, location, and specific requirements. Consulting with local pool maintenance professionals will provide more accurate pricing based on individual circumstances.
Conclusion
Winterizing your gunite pool is a crucial step to protect it during the winter months and ensure its longevity. By following the six easy steps outlined in this guide, you can effectively prepare your pool for the cold weather and avoid potential damage and costly repairs.
To recap, the steps involved in winterizing a gunite pool are as follows:
- Prepare the pool for winterization by thoroughly cleaning it and removing any accessories or removable items.
- Balance the pool water chemistry by testing and adjusting the pH, alkalinity, calcium hardness, and sanitizer levels.
- Prepare the pool equipment for winterization by draining the water from components such as the pump, filter, heater, and chlorinator.
- Cover the pool for winter using a high-quality pool cover that fully protects the pool surface and minimizes debris accumulation.
- Take additional steps specific to gunite pools, such as cleaning the pool filter, cutting off power to the pool equipment, and using skimmer bottles as a precautionary measure.
- Finally, remember to reverse the winterization process in the spring by removing the cover, opening up air plugs, refilling the pool with water, balancing the water chemistry, and turning on the pool equipment.
To ensure successful winterization, it’s important to avoid common mistakes such as neglecting to shock the pool, failing to adjust pH levels, and overlooking proper cleaning and maintenance. Following manufacturer’s instructions and checking local regulations and restrictions are also essential.
By taking these steps and paying attention to important details, you can protect your gunite pool from freeze damage, preserve its finish, prevent debris accumulation, maintain proper water chemistry, and extend the lifespan of pool equipment. Enjoy a worry-free winter and look forward to reopening your pool in the spring for another season of swimming enjoyment.
Frequently Asked Questions (FAQs)
1. What should I put in my pool to winterize it?
To winterize your pool, you should put in a winterizing kit that typically includes algaecide, winterizing chemicals, and sometimes a stain preventer. Additionally, you will need to adjust the chemical levels, drain the water to the proper level, blow out the plumbing lines, winterize the pool equipment, and cover the pool with a high-quality pool cover.
2. What happens if I don’t winterize my pool?
If you don’t winterize your pool, the water in the pool can freeze and expand, causing damage to the pool’s surface, plumbing lines, and equipment. This can result in costly repairs and even the need for a full pool replacement in severe cases. Additionally, without proper winterization, debris can accumulate in the pool, leading to issues with water quality and hygiene.
3. Can I winterize my pool without draining water?
Yes, you can winterize your pool without draining the water. Winterizing your pool typically involves balancing the water chemistry, cleaning the pool, and adding winterizing chemicals to prevent algae growth and equipment damage during the winter months. There are different methods and products available for winterizing pools, such as using winterizing kits or employing a professional pool service. The process can vary based on the type of pool and your specific circumstances. It’s advisable to follow proper winterizing guidelines to ensure the pool remains in good condition until the next swimming season.
4. How much shock do I need to winterize my pool?
The amount of shock needed to winterize a pool can vary depending on the pool size, water volume, and specific requirements. Shocking the pool before winter helps eliminate bacteria and contaminants that may have accumulated. It’s recommended to follow the manufacturer’s instructions for the shock product you’re using, as the dosage can differ between brands. Typically, the dosage is calculated based on the gallons of water in your pool. Remember to test the water and adjust the pH and chlorine levels before adding the shock treatment. Consult with a pool professional or refer to specific pool maintenance guides for precise instructions based on your pool’s characteristics.
5. Do swimming pools freeze in the winter?
Swimming pools can freeze in the winter, especially in colder climates where temperatures drop below freezing. Freezing temperatures can cause significant damage to the pool’s plumbing, equipment, and even the pool structure if proper precautions are not taken. When water freezes, it expands, which can lead to cracked pipes, damaged filtration systems, and other costly issues. To prevent this, it’s crucial to winterize your pool by removing water from the plumbing lines, adding winterizing chemicals, and protecting the pool with a cover. The specific steps for winterizing vary depending on the type of pool you have, so it’s recommended to follow proper guidelines or consult with a professional to ensure your pool is adequately protected.
